Contact Us

If you still have questions or prefer to get help directly from an agent, please submit a request.
We’ll get back to you as soon as possible.

Please fill out the contact form below and we will reply as soon as possible.

  • Go to Haptik Website
  • Contact Us
  • Home
  • Bot Building
  • Steps

How to Add a Step?

Written by Medha Anand

Updated on December 15th, 2022

Contact Us

If you still have questions or prefer to get help directly from an agent, please submit a request.
We’ll get back to you as soon as possible.

Please fill out the contact form below and we will reply as soon as possible.

  • Getting Started
    Build Deploy Analyse Manage Account Bot Deactivation
  • Bot Building
    Essentials Smart Skills Steps User Messages Bot Responses Entities Connections Customisations User feedback collection Testing Whatsapp Bots NLU Bot Maintenance
  • Smart Agent Chat
    Set up Admin Settings MyChats Section (Agent Inbox) Live Traffic Section Teams Section Archives Section Analytics Plans on Smart Agent Chat
  • Conversation Design
    Design Basics Design Guides Designing for Platforms Designing WhatsApp Bots
  • Developer Guides
    Code Step Integration Static Step Integration Shopify Integration SETU Integration Exotel Integration CIBIL integration Freshdesk KMS Integration PayU Integration Zendesk Guide Integration Twilio Integration Razorpay Integration LeadSquared Integration USU(Unymira) Integration Helo(VivaConnect) Integration Salesforce KMS Integration Stripe Integration PayPal Integration CleverTap Integration Fynd Integration HubSpot Integration Magento Integration WooCommerce Integration Microsoft Dynamics 365 Integration
  • Deployment
    Web SDK WhatsApp Facebook Instagram Sunshine Conversation LINE Google Business Messages Telegram MS Teams Bot as an API iOS SDK Android SDK
  • External Agent Tool Setup
    Zendesk Chat Salesforce Service Cloud Freshchat Zoho NICE CXOne Gorgias
  • Analytics & Reporting
    Intelligent Analytics
  • Notifications
    SMS Notifications Success Measurement
  • Commerce Plus
    Catalog Integration Bot Building Guide Channel Deployments Unified ML Pipeline Documentation
  • Troubleshooting Guides
    Error Messages FAQs
  • Release Notes
+ More

Table of Contents

Table of Contents Creating a Step Info Multi Steps Selection Info Components of Steps Uploading Steps

Table of Contents

Creating a StepMulti Steps SelectionComponents of StepsUploading Steps

Creating a Step

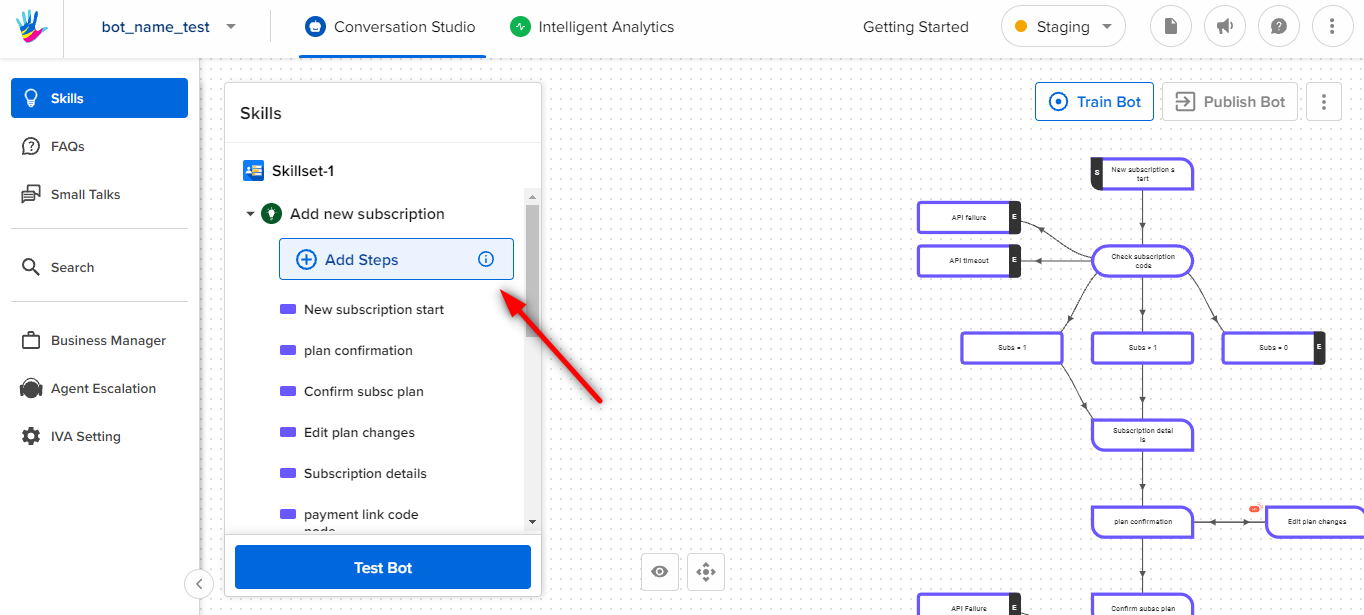
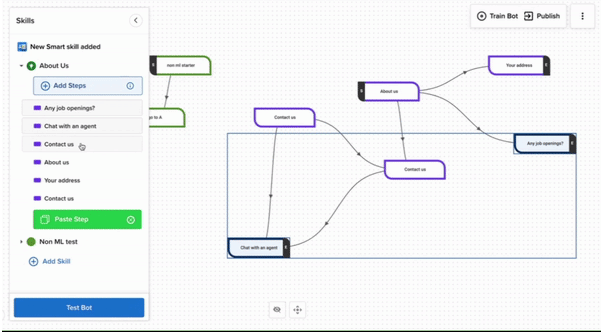
Once you have created a skillset, and have added the necessary skill, you can start adding steps in it. Select the Add Steps button as shown in the image.

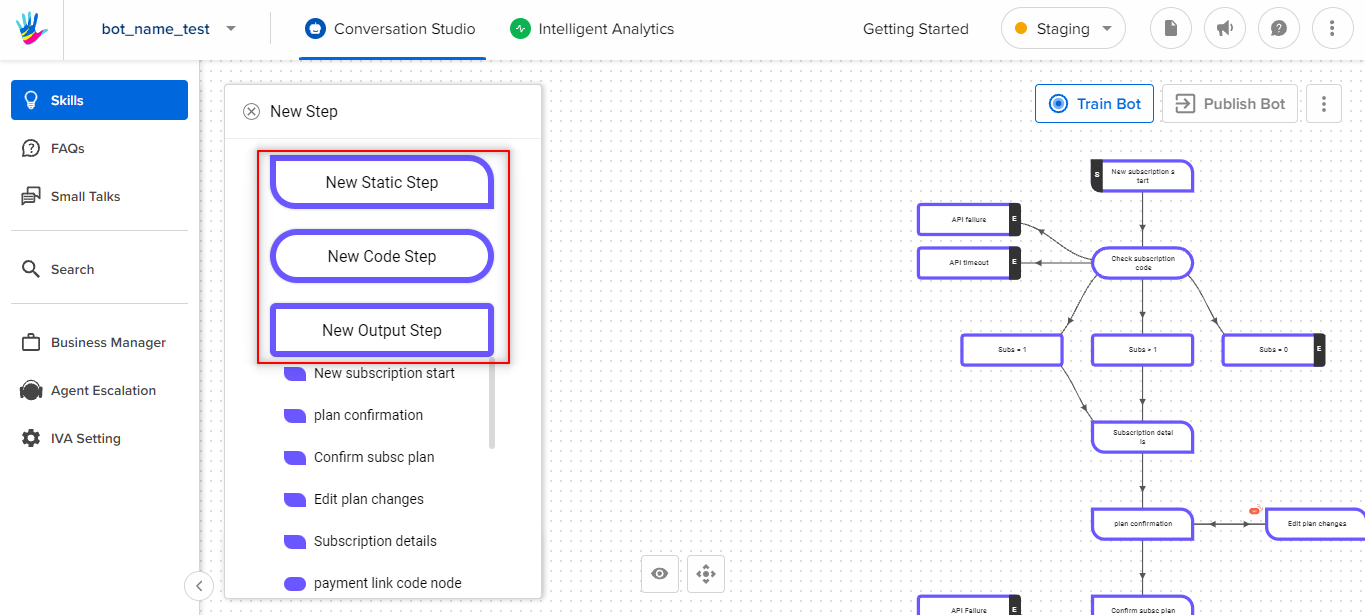
This will open a sidebar, as shown below, on the left-hand side of the graph. You can drag and drop the step you want from this sidebar

Once you drag and drop any of the step types from the sidebar, a new sidebar is opened with the RHS of the step type you selected. You will need to fill in some information about the step before saving it.

You'll need to add the following inputs:

  • Step Name: The label that will appear on the step on the graph.

  • System Name: The system name is used to uniquely identify the step in the backend. Only underscores and capital case alphanumeric characters are allowed in this field.

  • Step Type: Use step type to indicate if a step is a Start Step, End of Query or a Context Clear Step.

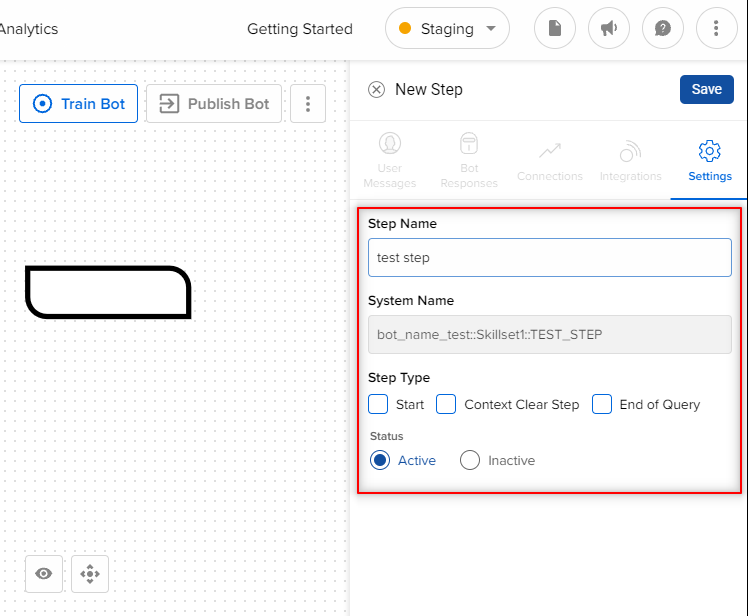
The Start Step indicates that this is the step that will initiate a new Query.

End of Query indicates that this is where the user's query gets resolved. It is usually the end of the conversational flow and also triggers Feedback flow. 

The "Context Clear" flag clears the entities and other contextual data of the conversation. This context includes the current position in the conversational flow.

You can read more about it, here.

Delete

Info

When the user is in the middle of a query and the system cannot find a match to the connecting steps, our system will go over all the Start Steps to see if they can find a match to what the user said.

Status: Status indicates whether the step will be active or inactive. When you are first making a bot, we'll assume all the steps you create are active. Instances, when you will deactivate steps, will arise later on.

Click 'Save' when done.

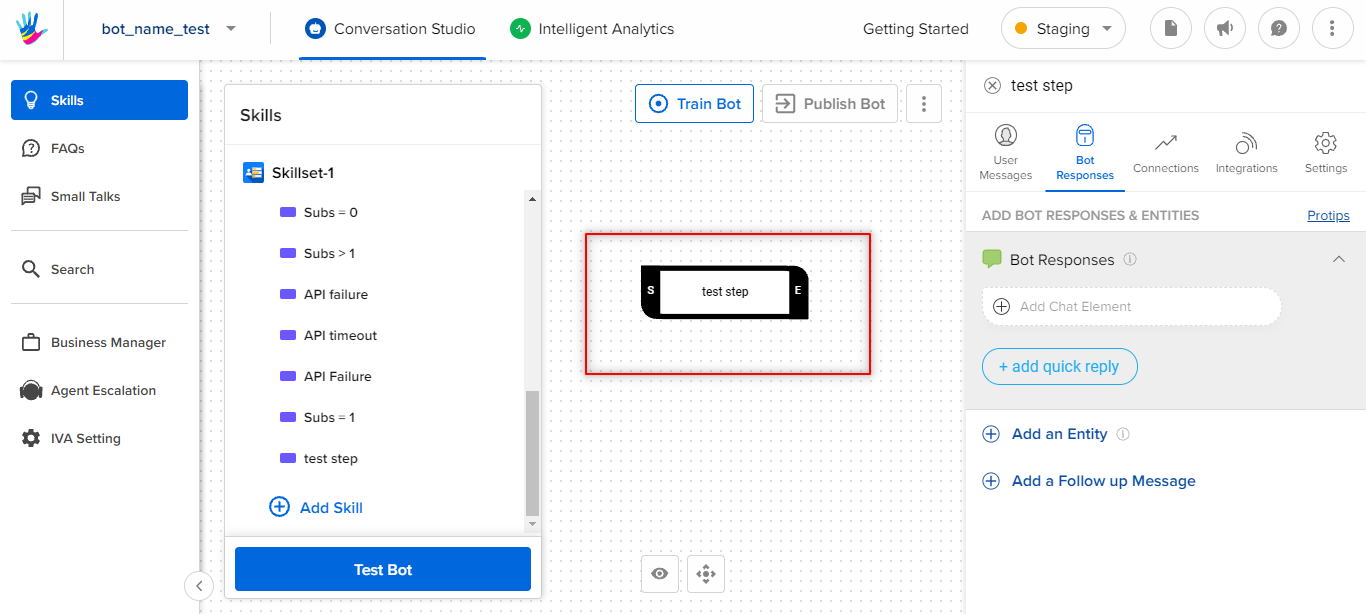
Post creation of a step, the step will be displayed as depicted below:

Multi Steps Selection

You can select multiple steps and move them on the graph. Steps can be selected using the ⌘ CMD + Click, and ⌘ CMD + Click + Drag to move on the graph, as below.

You can also select multiple steps using the same operation steps above on the Skills navigation bar available on the left hand side of the screen, as below.

Delete

Info

Use the control button (ctrl) when using a Windows system instead of ⌘ CMD. 

Press ‘esc’ to deselect the selected steps.

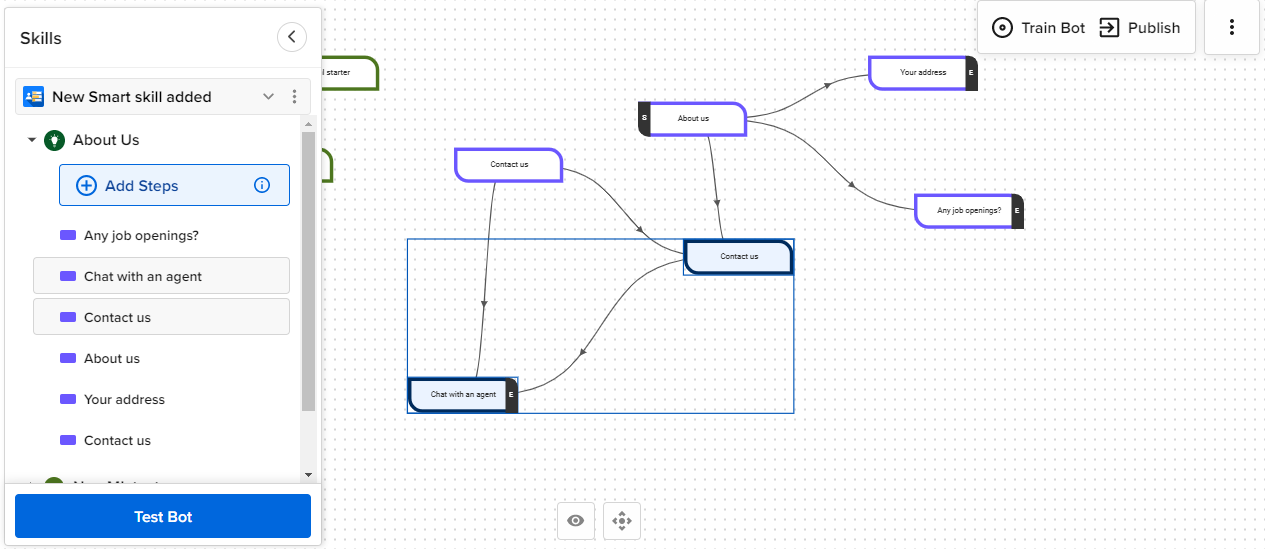
Apart from this, we have three icons at the bottom-middle of the screen as below.

  1. Click eye icon to show inactive steps on the screen.
  2. Click center icon to recenter the graph on the screen.
  3. Click keyboard icon to see keyboard shortcuts employed for creating a connection or multiple selection of steps.

Components of Steps

Depending on the type of step, you will be able to see all or a few of these components.

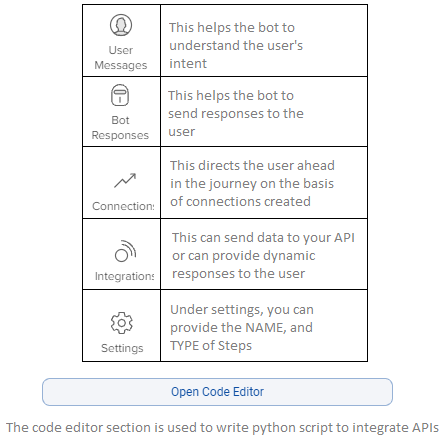
The following components constitute in creating a step-

  • Add User Messages
  • Add Bot Response
  • Create Connections
  • Create/Add Entities
  • Integrate APIs

Uploading Steps

You can also create steps by uploading a CSV. You can read more about it here.

Delete

Instead of adding a new Step, you can also copy an existing Step. Learn more about it, here.

Was this article helpful?

Yes
No
Give feedback about this article

Related Articles

  • What is a Step on Haptik?
  • What is a Static Step?
  • What is Output Step?

Platform

  • Conversation Studio
  • Smart Skills
  • Advanced NLU
  • Intelligent Analytics
  • Omnichannel
  • Smart Agent Chat
  • Enterprise Security
  • Integrations

Solutions

  • Conversational Commerce
  • Lead Generation
  • Customer Care
  • WhatsApp
  • Conversational IVR
  • Google Business Messages

Industries

  • Retail/ E-Commerce
  • Financial Services
  • Travel & Hospitality
  • Telecom

Knowledge

  • ROI Calculator
  • Reports & Research
  • Case Studies
  • Webinars
  • ISAT
  • Tech Blog
  • Business Blog
  • Resources
  • Haptik v/s Yellow
  • Haptik v/s Liveperson
  • Haptik v/s IBM Watson
  • Haptik v/s Verloop
  • Conversations on AI

Company

  • Why Haptik
  • About Us
  • Careers
  • News & Media
  • Awards & Recognition
  • Contact Us
  • Partnerships
  • Investor Relations

Subscribe

Sign up to recieve the latest updates

Find us on

  • Twitter-footer
  • Linkedin-footer
  • YT-footer
  • Insta-footer
  • G2-footer
  • Facebook-footer

Knowledge Base Software powered by Helpjuice

Copyright © jio Haptik Technology Limited 2021 | Data Security & Privacy Policy | GDPR

North America | Asia Pacific | Africa | enterprise@haptik.ai

Definition by Author

0
0