Step 6 - How to create a Menu?
- Getting Started
- Bot Building
- Smart Agent Chat
- Conversation Design
-
Developer Guides
Code Step Integration Static Step Integration Shopify Integration SETU Integration Exotel Integration CIBIL integration Freshdesk KMS Integration PayU Integration Zendesk Guide Integration Twilio Integration Razorpay Integration LeadSquared Integration USU(Unymira) Integration Helo(VivaConnect) Integration Salesforce KMS Integration Stripe Integration PayPal Integration CleverTap Integration Fynd Integration HubSpot Integration Magento Integration WooCommerce Integration Microsoft Dynamics 365 Integration
- Deployment
- External Agent Tool Setup
- Analytics & Reporting
- Notifications
- Commerce Plus
- Troubleshooting Guides
- Release Notes
The first thing any user would spot on the bot is the menu. A menu will present the user with all the possible options the bot has to offer. It can play a very important role in guiding the user.
Let us understand Menu with an example.
Here, in the above image, you can see the menu with four options. The user can choose any of the options and the bot will give the response to the user and that itself will set a pace for the conversation.
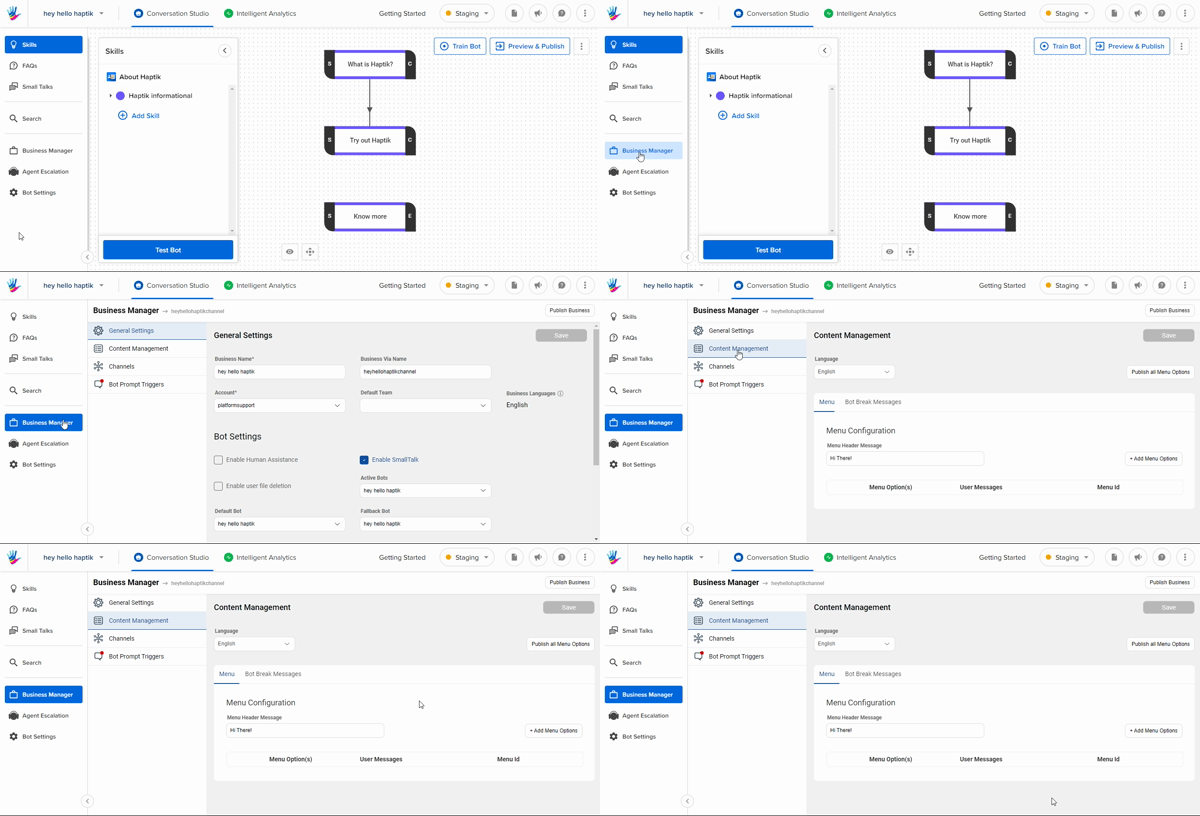
Let us understand how to create a menu for our sample bot. You need to navigate to Business Manager > Content Management > Menu as shown below.
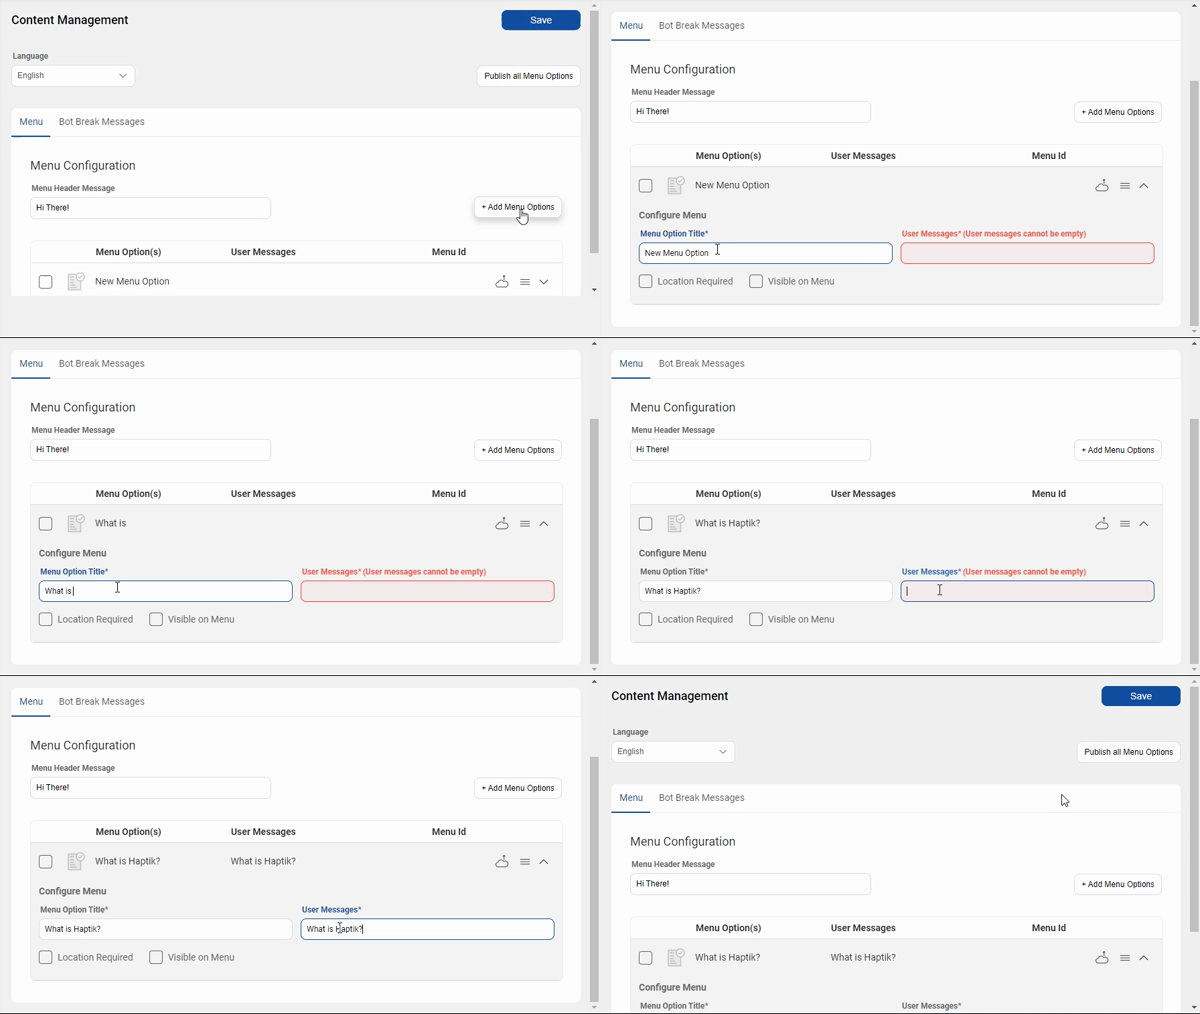
Here, you can select +Add Menu Options, for creating a menu. You would need to add Menu Option title and User Message. Menu Option title will be displayed as the menu on your bot, and the User Message will ensure which step of the journey to trigger when the user selects that particular menu item. Don't forget to mark the "Visible on Menu" checkbox.
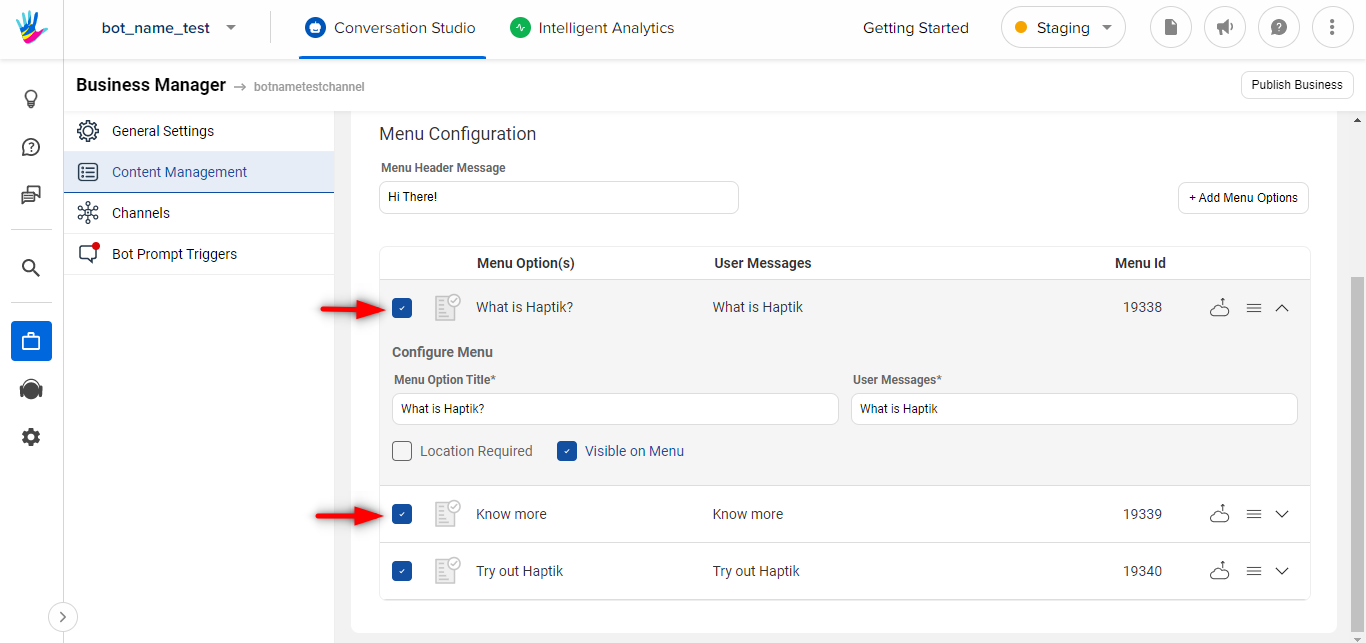
Apart from the Visible on Menu checkbox, make sure you are marking the checkbox beside the Menu name too.
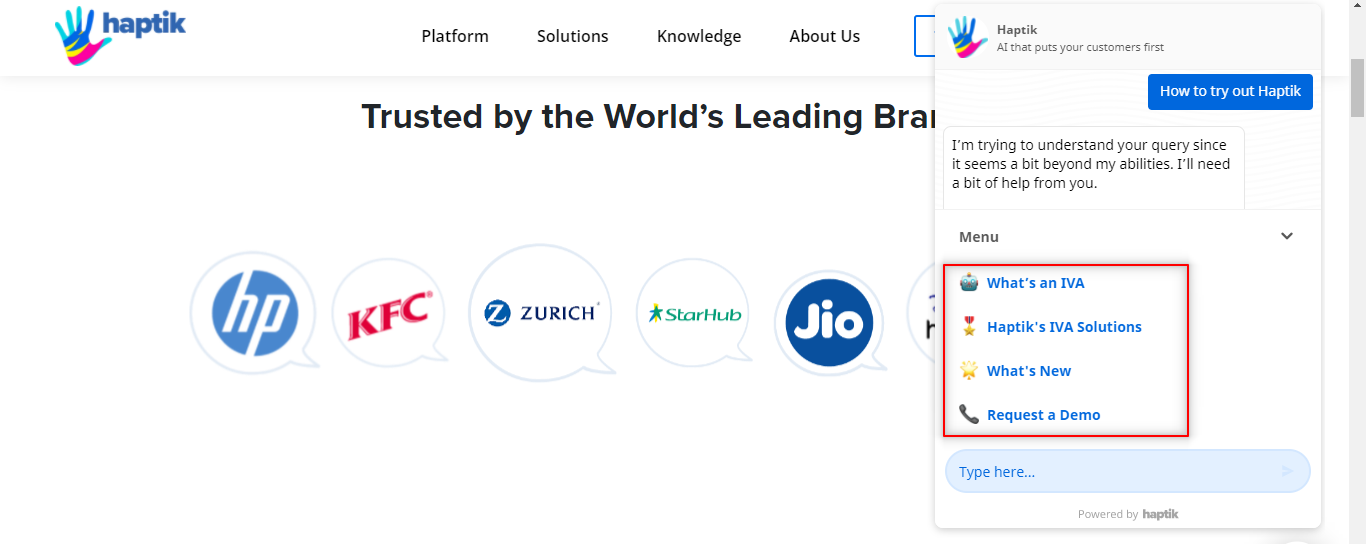
Once you have added the menu successfully, it will be displayed on your bot, in the following way.
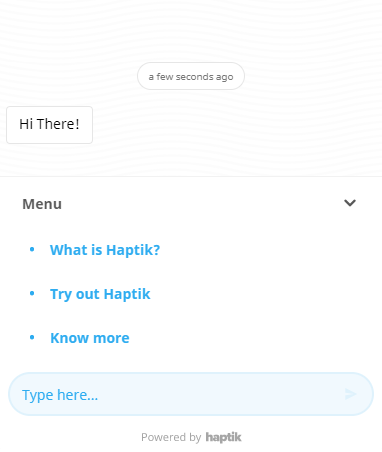
By adding the menu, we have tried to guide the user to use our bot. But in real-life scenarios, users still ask queries that are out of context or too complex to understand for a bot. In those scenarios, the bot would give a standard response "I'm sorry, I didn't understand that!". This is called a Bot Break message.
Let us understand this in more detail in Step 7, which is how to add Bot Break Messages.
