Step 7 - How to add the Bot Break Message?
- Getting Started
- Bot Building
- Smart Agent Chat
- Conversation Design
-
Developer Guides
Code Step Integration Static Step Integration Shopify Integration SETU Integration Exotel Integration CIBIL integration Freshdesk KMS Integration PayU Integration Zendesk Guide Integration Twilio Integration Razorpay Integration LeadSquared Integration USU(Unymira) Integration Helo(VivaConnect) Integration Salesforce KMS Integration Stripe Integration PayPal Integration CleverTap Integration Fynd Integration HubSpot Integration Magento Integration WooCommerce Integration Microsoft Dynamics 365 Integration
- Deployment
- External Agent Tool Setup
- Analytics & Reporting
- Notifications
- Commerce Plus
- Troubleshooting Guides
- Release Notes
As explained in the last article, when bots do not understand the user query they send a Bot Break Message.
As a bot builder, you would train your bot for all the possible user queries, so that the bot functions well. But, you can never really say what a user would ask. If the user ends up asking something which the bot is not trained for, the bot won't understand it and it will send a Bot break message to the user.

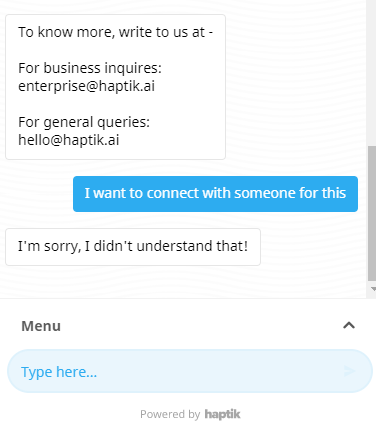
In the above image, since the bot was not trained for this query, the bot gave a generic Bot Break response - I'm sorry, I didn't understand that!
By default, your bot would have this generic message configured to be sent in such situations. You can edit it or you can add a new bot break message.
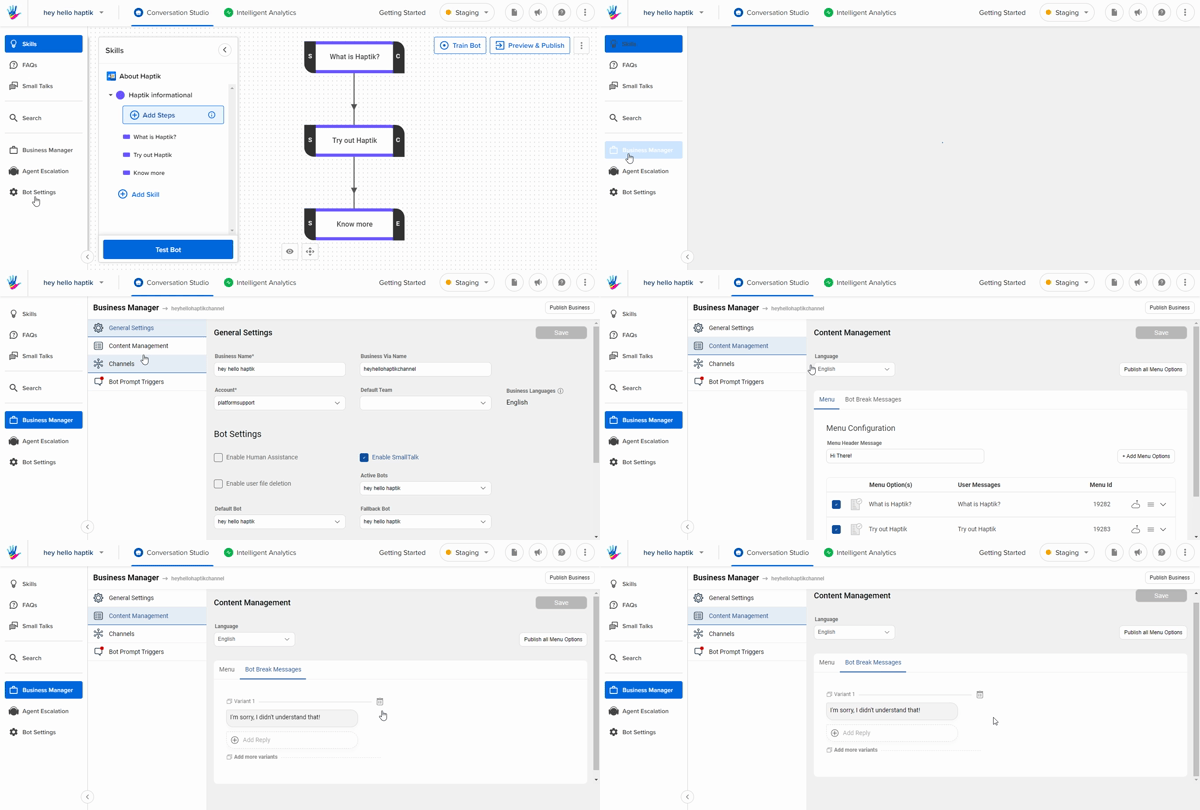
To navigate to Bot break messages, go to Business Manager > Content Management > Bot Break Messages, as shown below.

Also for our sample bot, you can make edits in the Bot Break Message. Once you are done with adding the Bot Break Message, you can go to Step 8, which is enabling feedback collection on your bot.
