Using IP Whitelisting for Data Safety
- Getting Started
- Bot Building
- Smart Agent Chat
- Conversation Design
-
Developer Guides
Code Step Integration Static Step Integration Shopify Integration SETU Integration Exotel Integration CIBIL integration Freshdesk KMS Integration PayU Integration Zendesk Guide Integration Twilio Integration Razorpay Integration LeadSquared Integration USU(Unymira) Integration Helo(VivaConnect) Integration Salesforce KMS Integration Stripe Integration PayPal Integration CleverTap Integration Fynd Integration HubSpot Integration Magento Integration WooCommerce Integration Microsoft Dynamics 365 Integration
- Deployment
- External Agent Tool Setup
- Analytics & Reporting
- Notifications
- Commerce Plus
- Troubleshooting Guides
- Release Notes
Table of Contents
Overview
Haptik lets you add users with specific permissions to prevent misuse and protect sensitive information. We’ve taken one step further by introducing IP whitelisting feature for data security.
Once enabled, users won’t be able to use your Haptik account if they are on a different IP address that is not part of the whitelist. The major plus point is that users, even with the highest access, will be unable to access your Haptik account if their IP address is not included in the whitelist.
Business owners prefer IP whitelisting so that they can limit access only to their office locations.
Steps to Use IP Whitelisting
- Log in to your Haptik account.
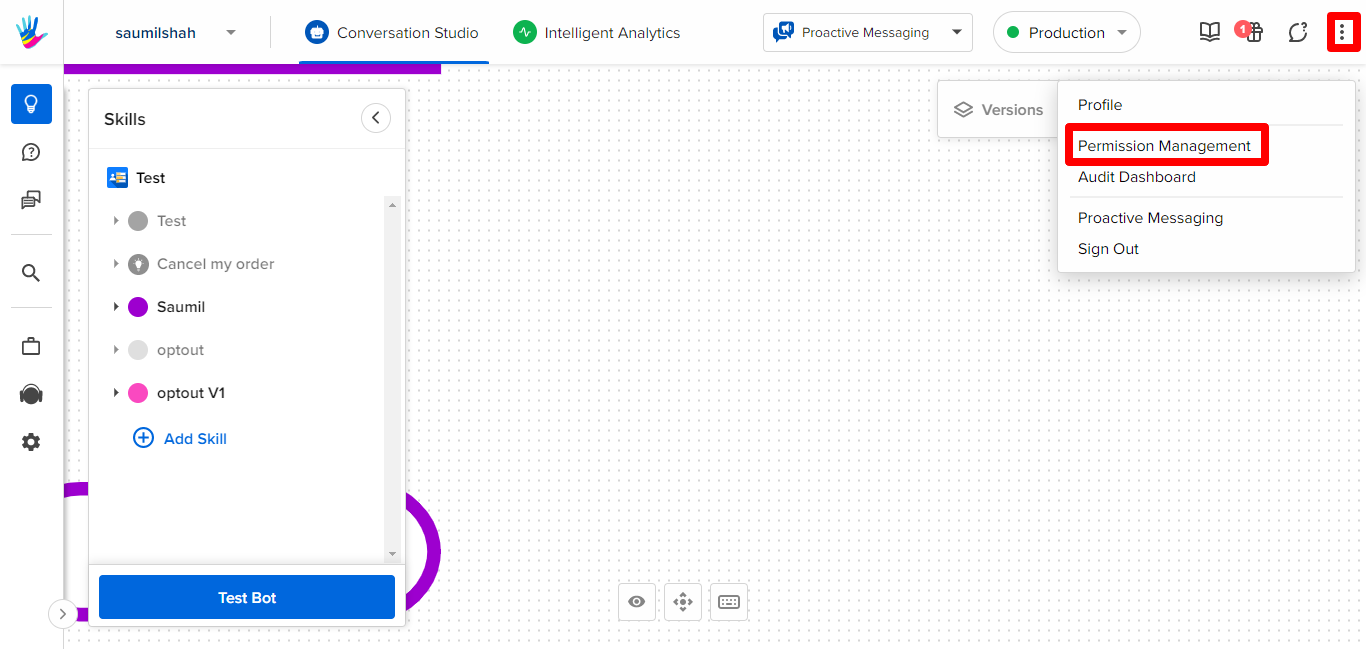
- Go to the top right corner and click the vertical ellipsis (⫶) to select Permission Management.

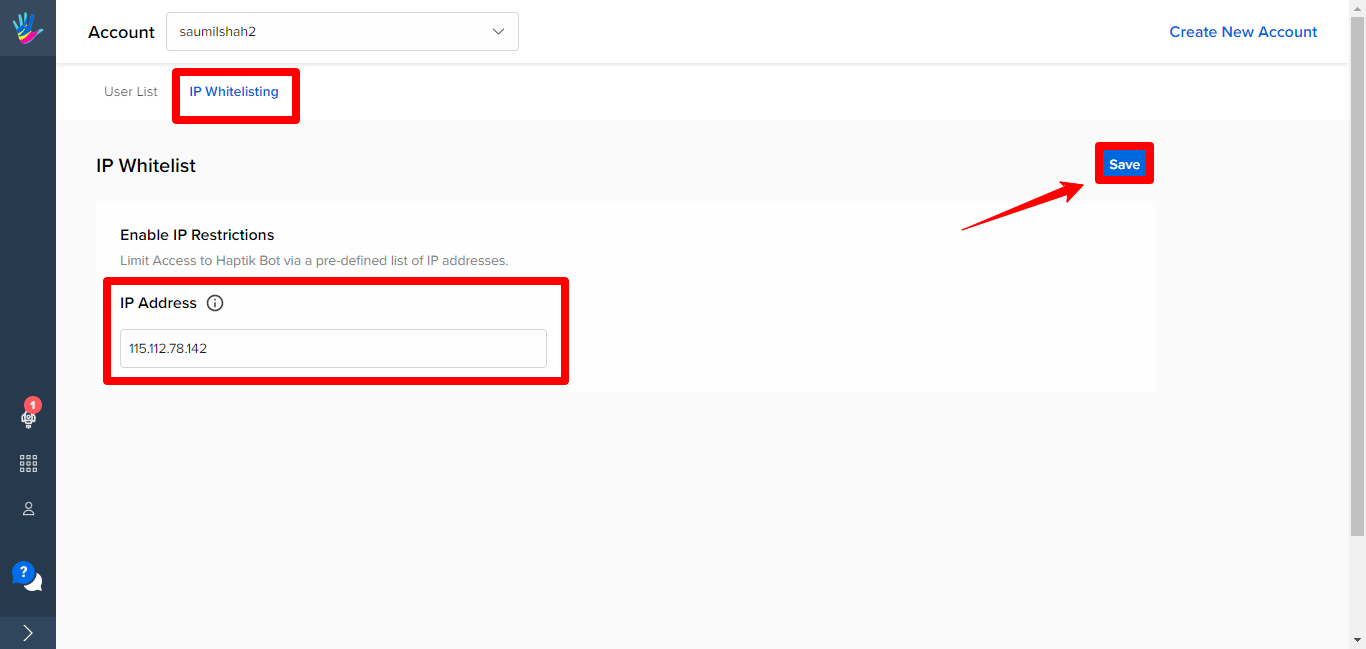
- Click IP Whitelisting to see the vacant field in which you need to add IP addresses on which invited users can use your Haptik account.

- Click Save to save the changes made. Your IP whitelisting is successful.
In case you have any questions about IP whitelisting, you can get in touch with your Haptik SPOC.
