How to Enable Omnichannel Bot Prompts
- Getting Started
- Bot Building
- Smart Agent Chat
- Conversation Design
-
Developer Guides
Code Step Integration Static Step Integration Shopify Integration SETU Integration Exotel Integration CIBIL integration Freshdesk KMS Integration PayU Integration Zendesk Guide Integration Twilio Integration Razorpay Integration LeadSquared Integration USU(Unymira) Integration Helo(VivaConnect) Integration Salesforce KMS Integration Stripe Integration PayPal Integration CleverTap Integration Fynd Integration HubSpot Integration Magento Integration WooCommerce Integration Microsoft Dynamics 365 Integration
- Deployment
- External Agent Tool Setup
- Analytics & Reporting
- Notifications
- Commerce Plus
- Troubleshooting Guides
- Release Notes
Before discussing how to enable Omnichannel Bot Prompts, let’s review what Bot Prompts are. Bot Prompts are pop-ups that leverage content and click action to grab the user's attention.
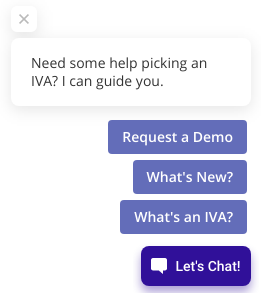
Below we have shared what a Text + CTA Bot Prompt looks like. Even before the user has clicked on a bot, they will see pop-ups that will guide them into starting a conversational journey on the bot
Omnichannel Bot Prompts come with an added capability of enabling channel-specific Bot Prompts. So, if you have a bot on your website and on your WhatsApp number, you can add a WhatsApp Bot Prompt on your website to allow users to switch between the channels of their choice.
Currently, all three major channels — Whatsapp, Facebook, and Instagram— are supported under these Omnichannel Bot Prompts.
In order to enable this, open your bot and navigate to Business Manager > Bot Prompt Triggers, and click on Create a New Trigger, as shown.

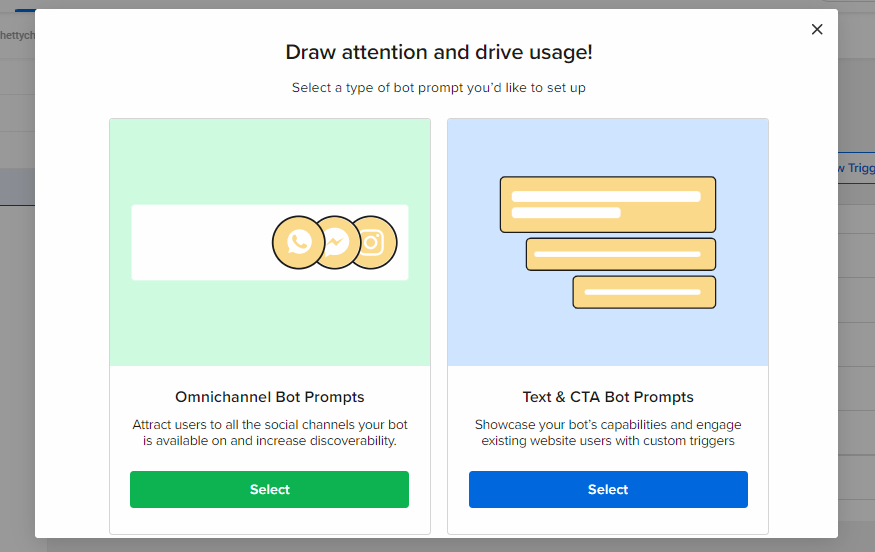
You will then be asked the type of trigger you want to create. Here, you need to select Omnichannel Bot Prompts, as shown.
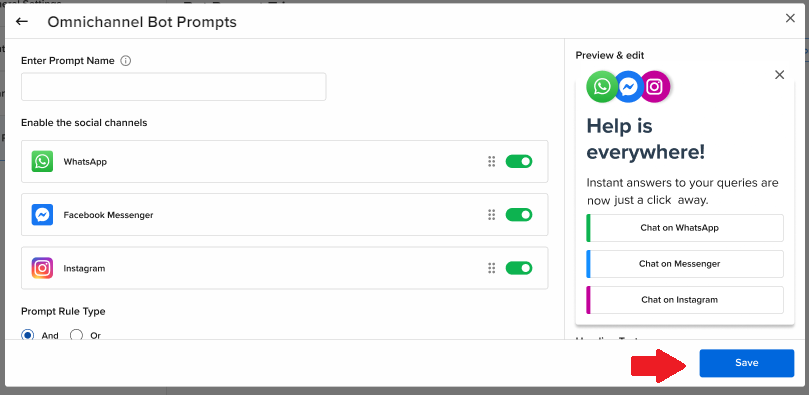
Next, you will have to select the Channel for which you want to have a Bot Prompt on your Bot, by enabling the toggle alongside it.
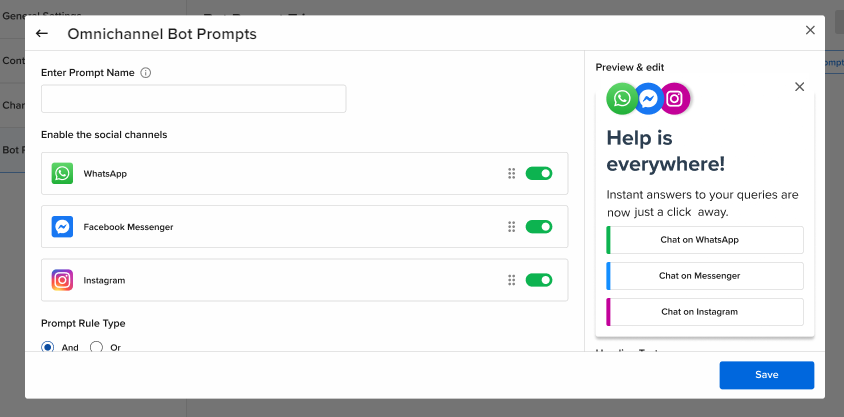
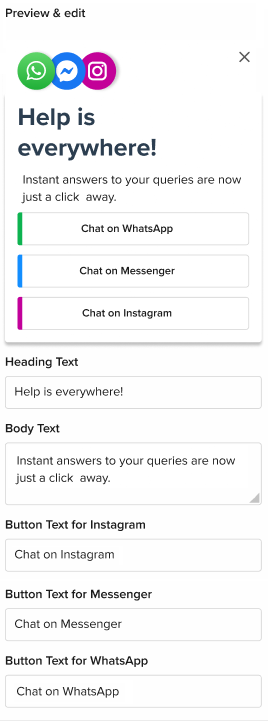
Apart from selecting the Channel, you can also define the message content you want to have on the Bot Prompt. You can add this to the Preview & edit section on the right-hand side of the screen, as shown below.
Once you have added all the required information, click on the Save button, as shown.
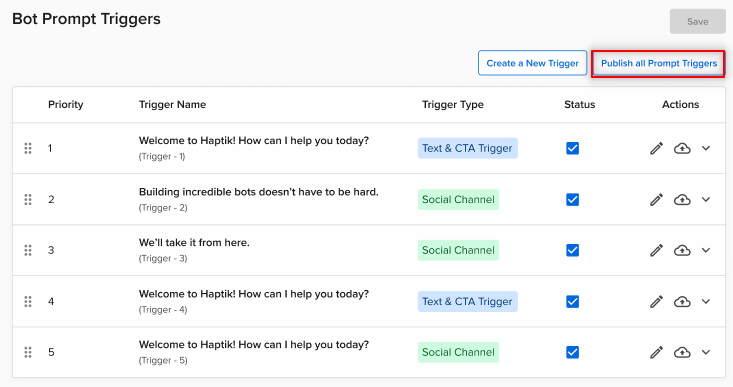
You can go ahead and test your bot and try out the new prompts you have added. Once you are done testing you can take them live on your Production bot by clicking on Publish all Bot Prompts, as shown.
Why am I seeing a few channels greyed out?
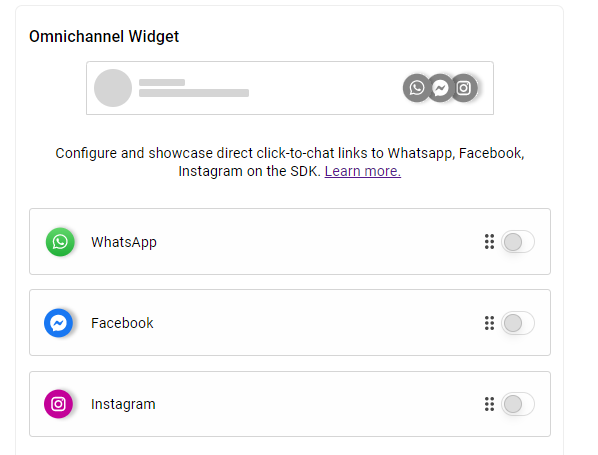
To create an omnichannel bot prompt, you first need to enable the Omnichannel Widget on your bot.
To enable it, you can navigate to Business Manager > Channels > SDK Configurations, and scroll down to this Omnichannel Widget, as shown. You can enable the Channel/s for which you have configured the Omnichannel Bot Prompt on your bot. You can read more about it here.
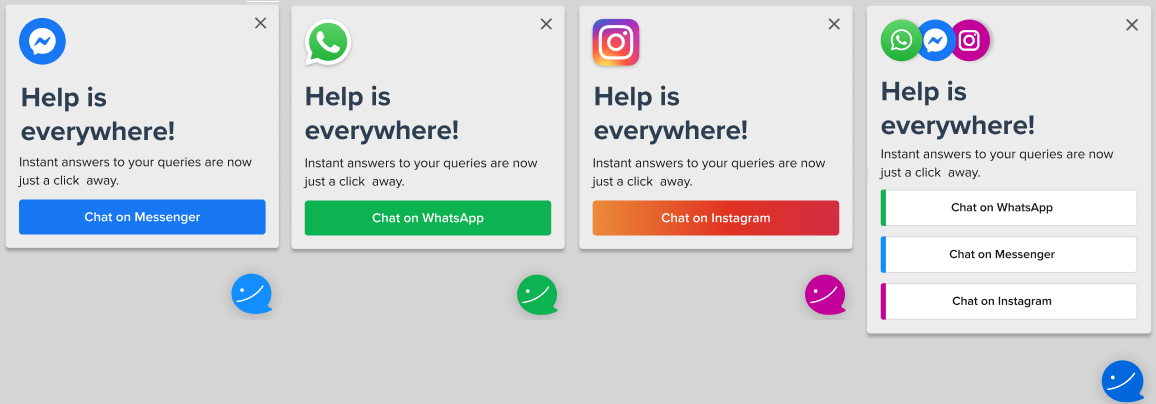
The following is a representation of how the Omnichannel Bot Prompts will be displayed on the screen based on your selection of one or more channels.
You can check the below video to see the Omnichannel Bot Prompts feature in action.
