How to Create Dynamic Bot Prompts
- Getting Started
- Bot Building
- Smart Agent Chat
- Conversation Design
-
Developer Guides
Code Step Integration Static Step Integration Shopify Integration SETU Integration Exotel Integration CIBIL integration Freshdesk KMS Integration PayU Integration Zendesk Guide Integration Twilio Integration Razorpay Integration LeadSquared Integration USU(Unymira) Integration Helo(VivaConnect) Integration Salesforce KMS Integration Stripe Integration PayPal Integration CleverTap Integration Fynd Integration HubSpot Integration Magento Integration WooCommerce Integration Microsoft Dynamics 365 Integration
- Deployment
- External Agent Tool Setup
- Analytics & Reporting
- Notifications
- Commerce Plus
- Troubleshooting Guides
- Release Notes
Table of Contents
Dynamic Bot Prompt Triggers

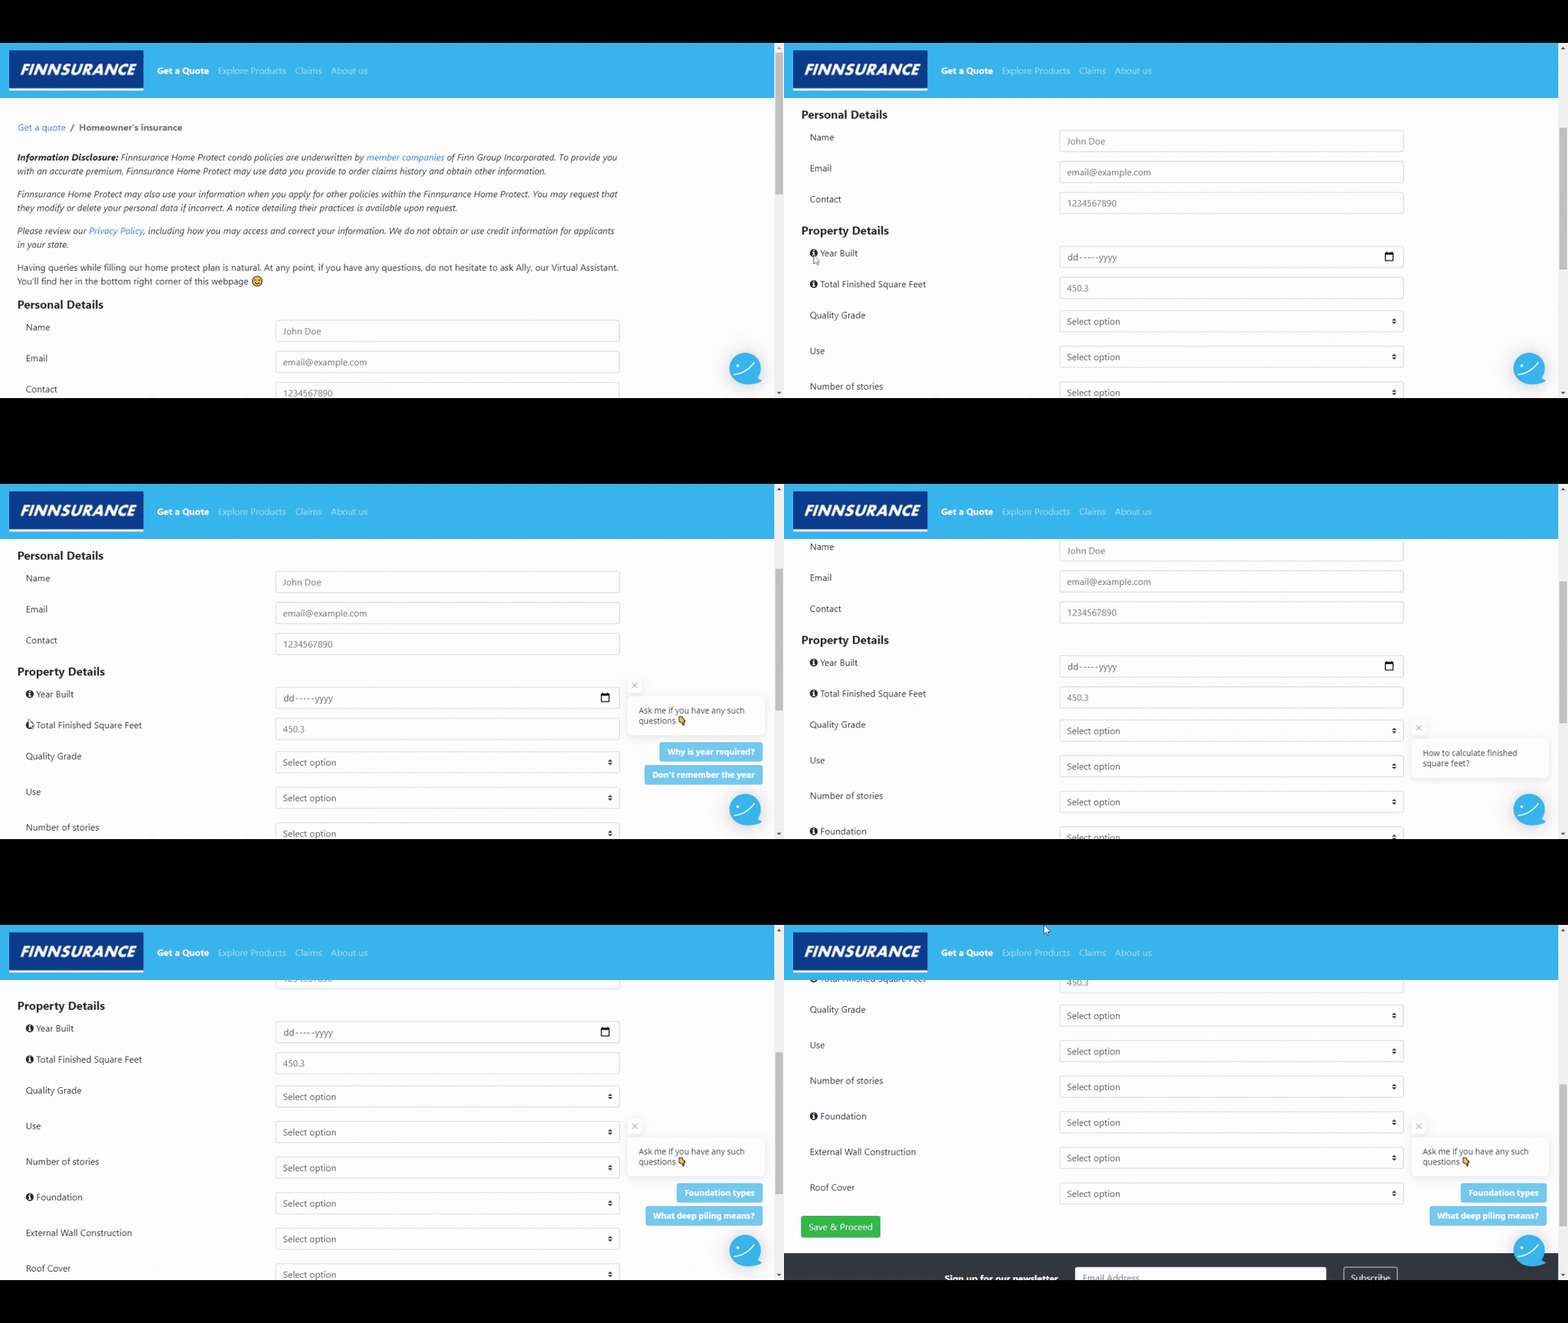
Dynamic Bot Prompt Triggers change based on the user's activity on the webpage.
How to Create Dynamic Bot Prompt Triggers?
1: Add it to your HTML code
To set up the Bot Prompt when the user hovers on a specific field or area of the webpage, you will have to set which Bot Prompt needs to get triggered.
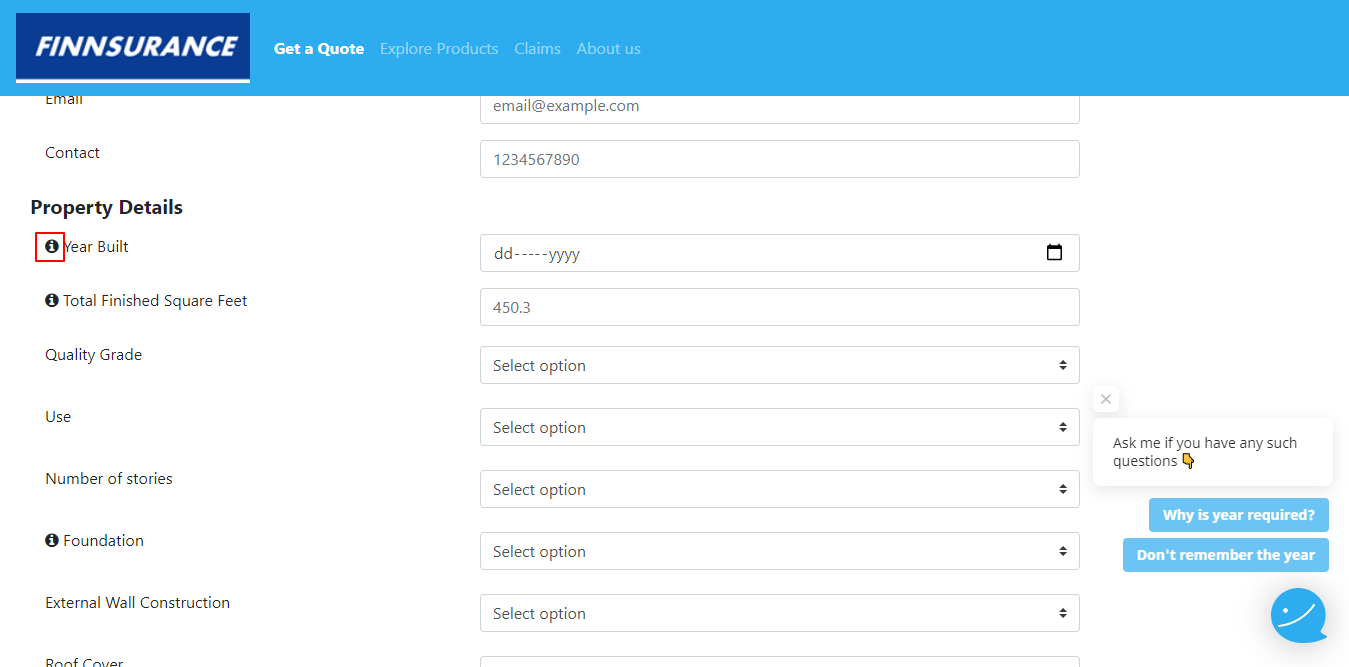
When the user hovers on the "i" symbol besides Year Built, a Bot Prompt is triggered.

The following is the sample code of how the bot prompt is set on the hover of the "i" symbol and what messages will be sent.
 <div class="form-group row">
 <div class="col-sm-5">
 <label for="staticEmail"
 class="col-sm-2 col-form-label set_inline bot_message"
 data-bot_says="Will the year affect my quote?"
 data-bot_prompt=" Why is year required?/-/-/Don't remember the year">
 <i class="fa fa-info-circle bot_message"
 data-bot_says="Will the year affect my quote?"
 data-bot_prompt=" Why is year required?/-/-/Don't remember the year"></i>
 Year Built
 </label>
 </div>
 <div class="col-sm-7">
 <input type="date" class="form-control" placeholder="1234567890">
 </div>
 </div>
2: Create a JavaScript function
Bot Prompt Triggers can be initiated at different instances i.e. when the user clicks on some button or text area, or when the user hovers over some text or button on the page.
The following is the sample code for triggering the bot prompt on hovering over the i symbol.
var tOut;
 $('.bot_message').hover(function() {
 let message = $(this).data('bot_prompt')
 message = message.split("/-/-/");
 console.log("hover timer started ----");
 tOut = setTimeout(function() {
 console.log("5 sec up")
 if (message.length > 1) {
 let prompt_msg = []
 message.map((item, i) = > {
 prompt_msg.push({
 "title": item,
 "userMessage": item
 })
 })
 HaptikSDK.prompt("Ask me if you have any such questions 👇", "", prompt_msg)
 } else {
 HaptikSDK.prompt(message[0], message[0])
 }
 }, 2000);
 }, function() {
 clearTimeout(tOut);
 console.log("timer reset")
 });
Customizing HaptikSDK.prompt
Below is the prompt syntax followed by three properties used to customize the bot prompt.
HaptikSDK.prompt(title, titleUserMessage, [
          { title: '', userMessage: '' },
          { title: '', userMessage: '' }
]);- title<string>: This is the main title of bot prompt. This field is optional. If you leave this field blank or send null, then the Bot Prompt Title will not be shown.
- titleUserMessage<string>: This is the actual user message that will be sent to the bot when user clicks on the Bot Prompt Title.
- The third property is an array of Quick Replies of the bot prompt which in further has two sub- properties:
- title<string>: This contains the title of the quick reply
- userMessage<string>: This depicts the actual user message that will be sent to the bot when the user clicks on the quick reply.
Hiding the Bot Prompt Title
You can hide the Bot Prompt Title by simply sending null or " " as the title of the Bot Prompt.
