Contact Us

If you still have questions or prefer to get help directly from an agent, please submit a request.
We’ll get back to you as soon as possible.

Please fill out the contact form below and we will reply as soon as possible.

  • Go to Haptik Website
  • Contact Us
  • Home
  • Developer Guides
  • WooCommerce Integration

How to Set Up WooCommerce Integration

Written by Rahul Garg

Updated on January 20th, 2023

Contact Us

If you still have questions or prefer to get help directly from an agent, please submit a request.
We’ll get back to you as soon as possible.

Please fill out the contact form below and we will reply as soon as possible.

  • Getting Started
    Build Deploy Analyse Manage Account Bot Deactivation
  • Bot Building
    Essentials Smart Skills Steps User Messages Bot Responses Entities Connections Customisations User feedback collection Testing Whatsapp Bots NLU Bot Maintenance
  • Smart Agent Chat
    Set up Admin Settings MyChats Section (Agent Inbox) Live Traffic Section Teams Section Archives Section Analytics Plans on Smart Agent Chat
  • Conversation Design
    Design Basics Design Guides Designing for Platforms Designing WhatsApp Bots
  • Developer Guides
    Code Step Integration Static Step Integration Shopify Integration SETU Integration Exotel Integration CIBIL integration Freshdesk KMS Integration PayU Integration Zendesk Guide Integration Twilio Integration Razorpay Integration LeadSquared Integration USU(Unymira) Integration Helo(VivaConnect) Integration Salesforce KMS Integration Stripe Integration PayPal Integration CleverTap Integration Fynd Integration HubSpot Integration Magento Integration WooCommerce Integration Microsoft Dynamics 365 Integration
  • Deployment
    Web SDK WhatsApp Facebook Instagram Sunshine Conversation LINE Google Business Messages Telegram MS Teams Bot as an API iOS SDK Android SDK
  • External Agent Tool Setup
    Zendesk Chat Salesforce Service Cloud Freshchat Zoho NICE CXOne Gorgias
  • Analytics & Reporting
    Intelligent Analytics
  • Notifications
    SMS Notifications Success Measurement
  • Commerce Plus
    Catalog Integration Bot Building Guide Channel Deployments Unified ML Pipeline Documentation
  • Troubleshooting Guides
    Error Messages FAQs
  • Release Notes
+ More

Table of Contents

Overview Prerequisites for WooCommerce Integration with Haptik Steps to Make WooCommerce Integration Active  Info Generating API Key on WooCommerce

Overview

Being swift with your responses is not an option; it's the responsibility of businesses toward their customers. With Haptik, you can promptly answer your customers' queries. 

All you need to do is to connect your WooCommerce store with Haptik to let your bot have all the information about your products for answering questions appropriately.

Prerequisites for WooCommerce Integration with Haptik

  • A registered WooCommerce Platform account
  • A Haptik bot. Click here if you haven’t created one yet

Steps to Make WooCommerce Integration Active 

  • Log in to your Haptik account and choose the bot you want to connect with your WooCommerce store.
  • Navigate to Conversation Studio > Business Manager > Channels > Platform Deployments and select WooCommerce from the Platform drop-down.


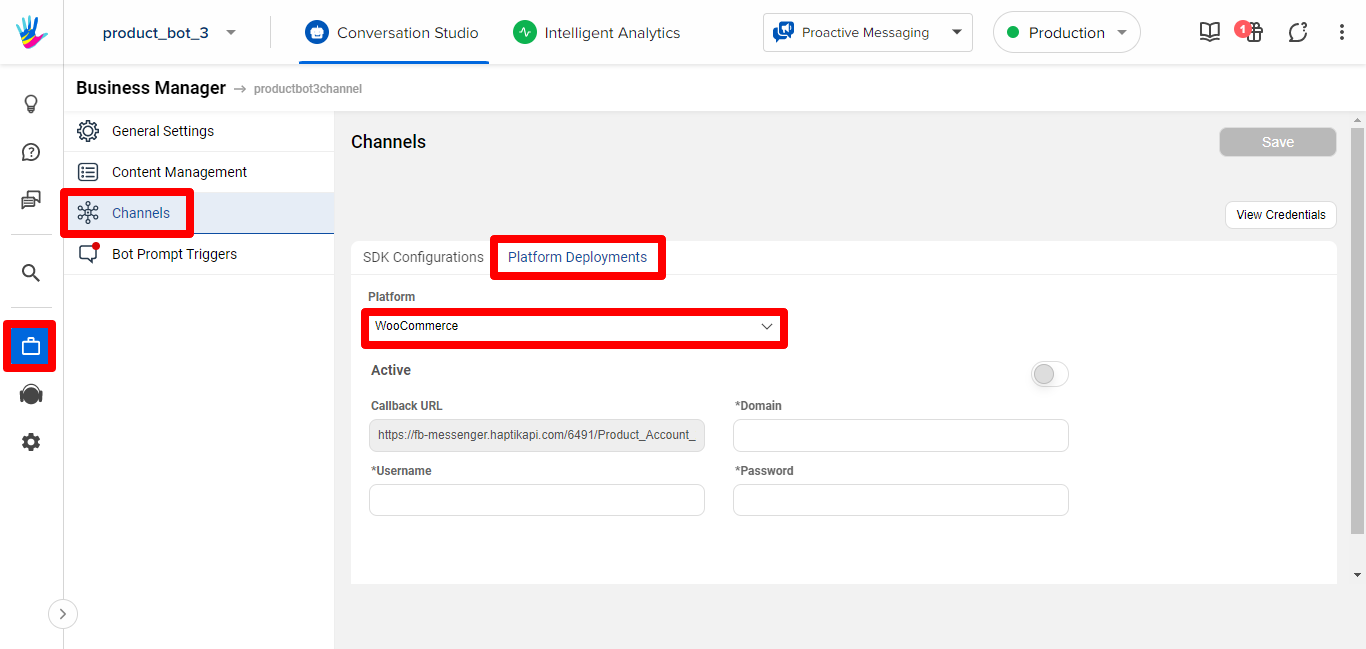
  • You’ll see a few blank fields like Domain, Username, and Password. Fill in these fields to establish the connection. 
Delete

Info

In the Username and Password fields, you need to enter your Consumer Key and Consumer Secret which you need to generate first. The process for the same is explained below. In the Domain field, paste your WooCommerce store URL.

  • Once done, turn on the Active toggle button and click on Save.

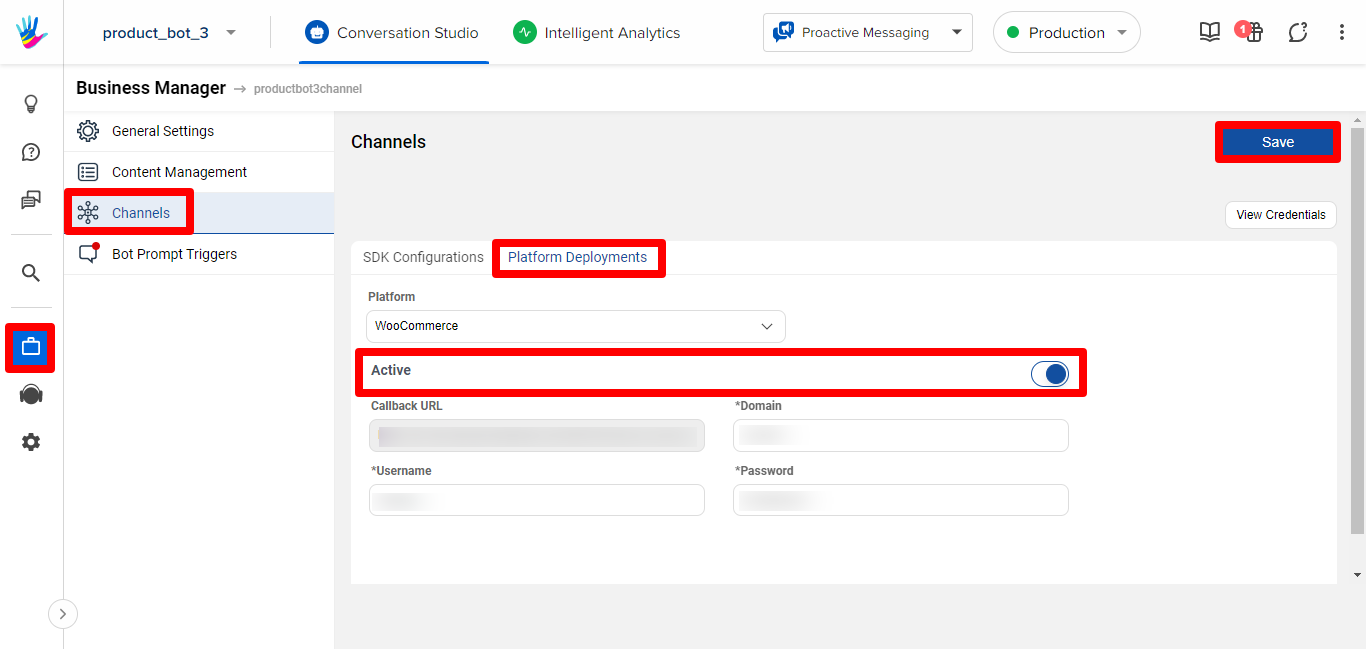
Congrats! Your bot is integrated with your WooCommerce store. Now, you can confirm your Haptik SPOC to take the next steps in building the commerce journey.

Generating API Key on WooCommerce

Follow these steps to get generate an API Key for successful integration.

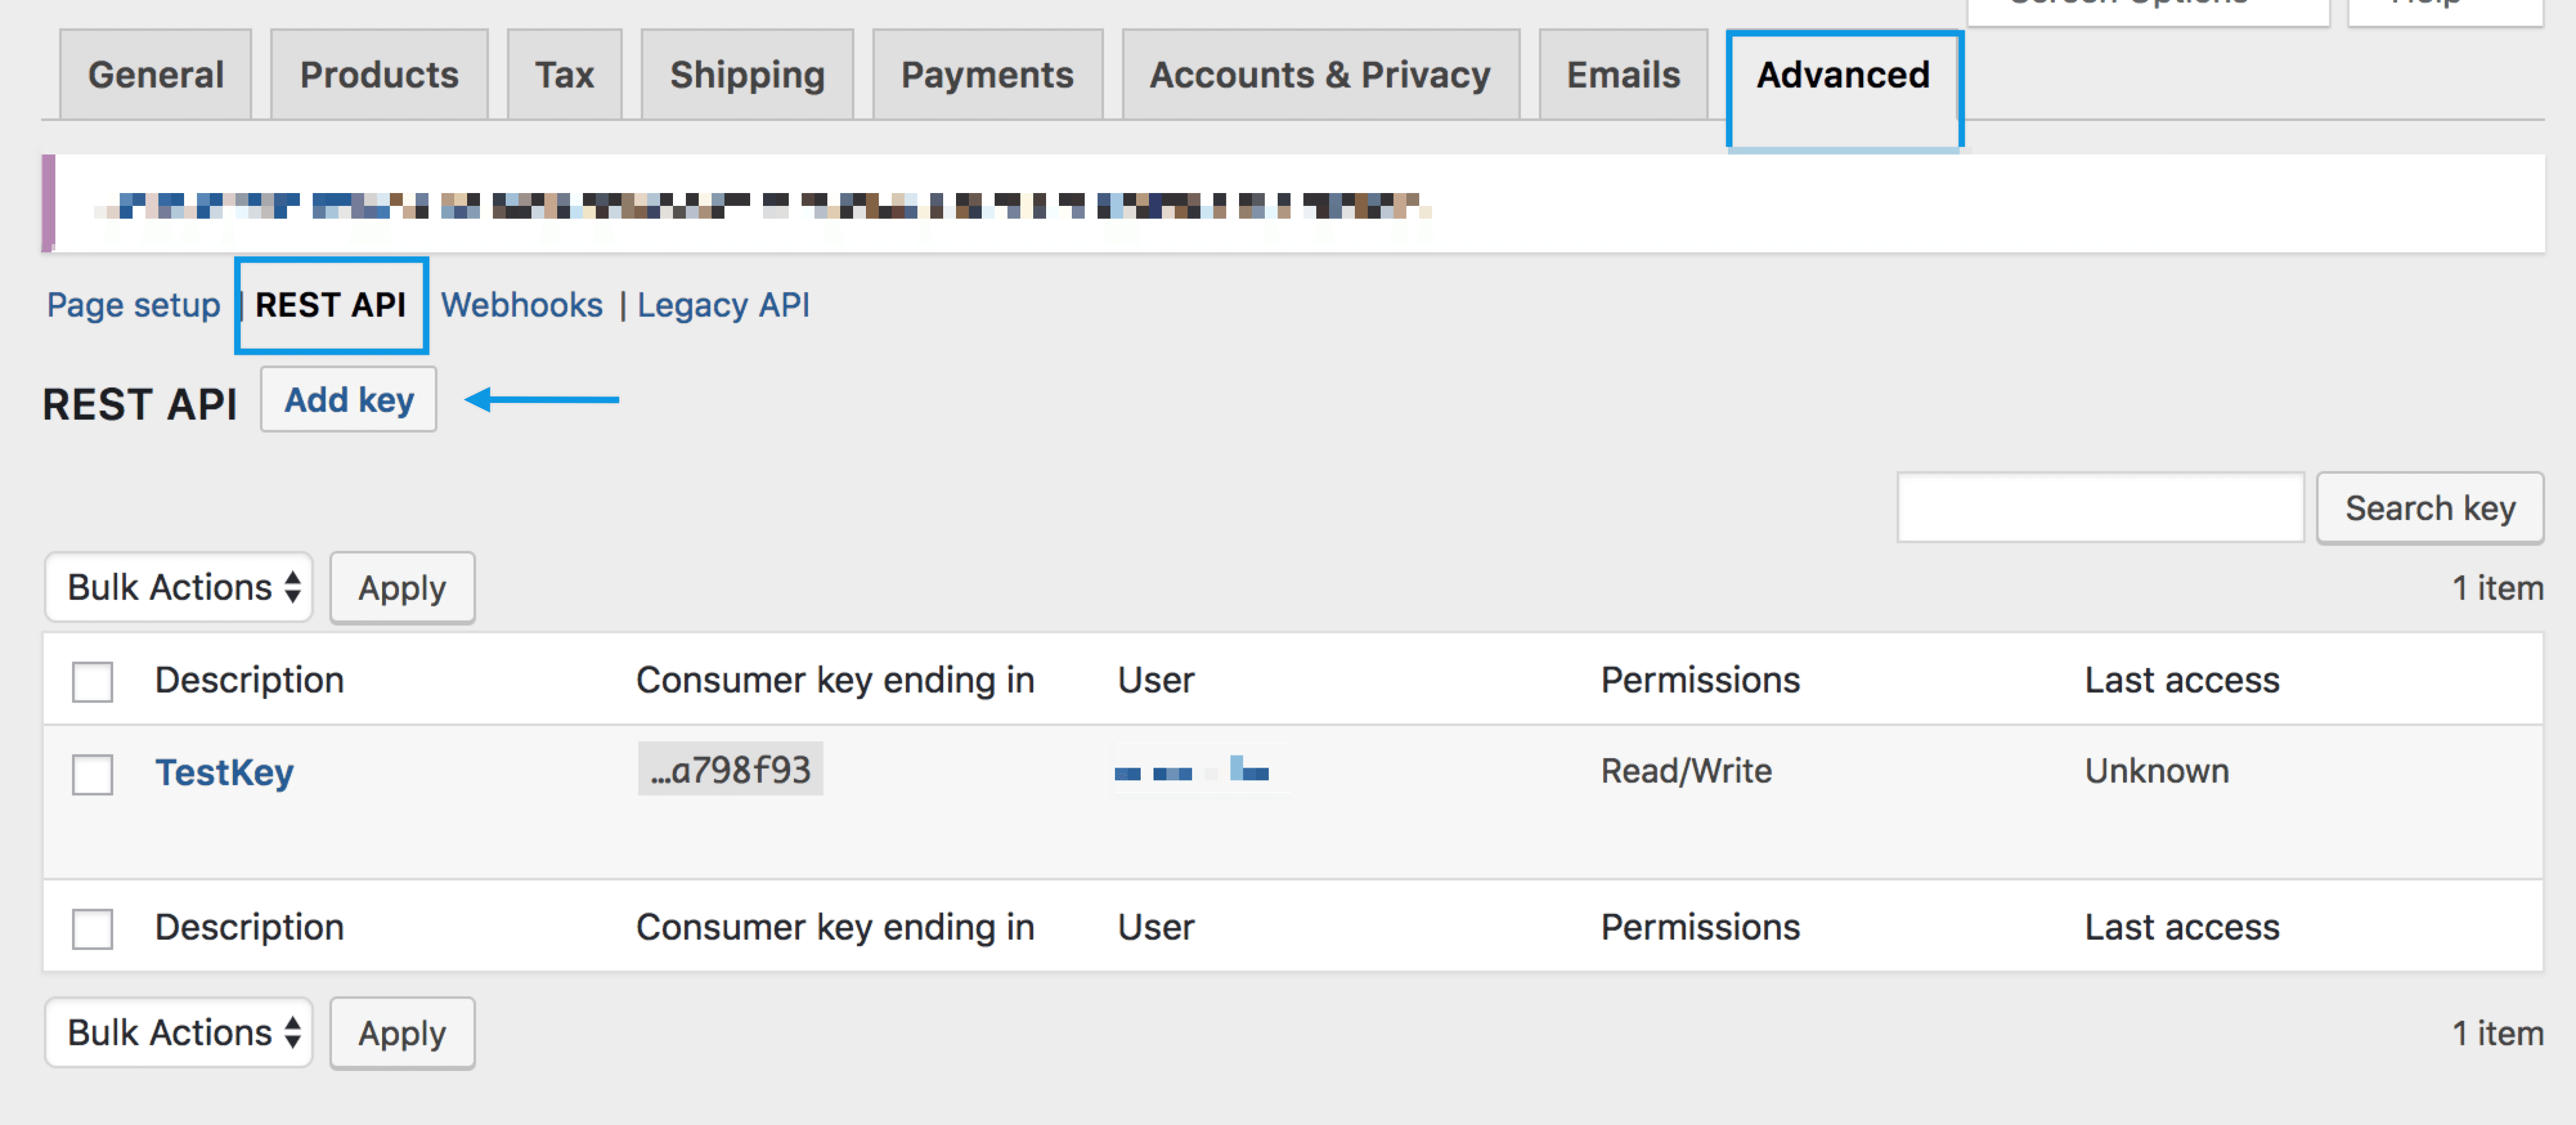
  • Go to WooCommerce admin panel > Settings > Advanced > REST API.
  • Select Add Key to be able to see the Key Details screen.


  • Add a Description as you like.
  • Select the User for which you would like to generate a key.
  • Set the Read access for your API key.

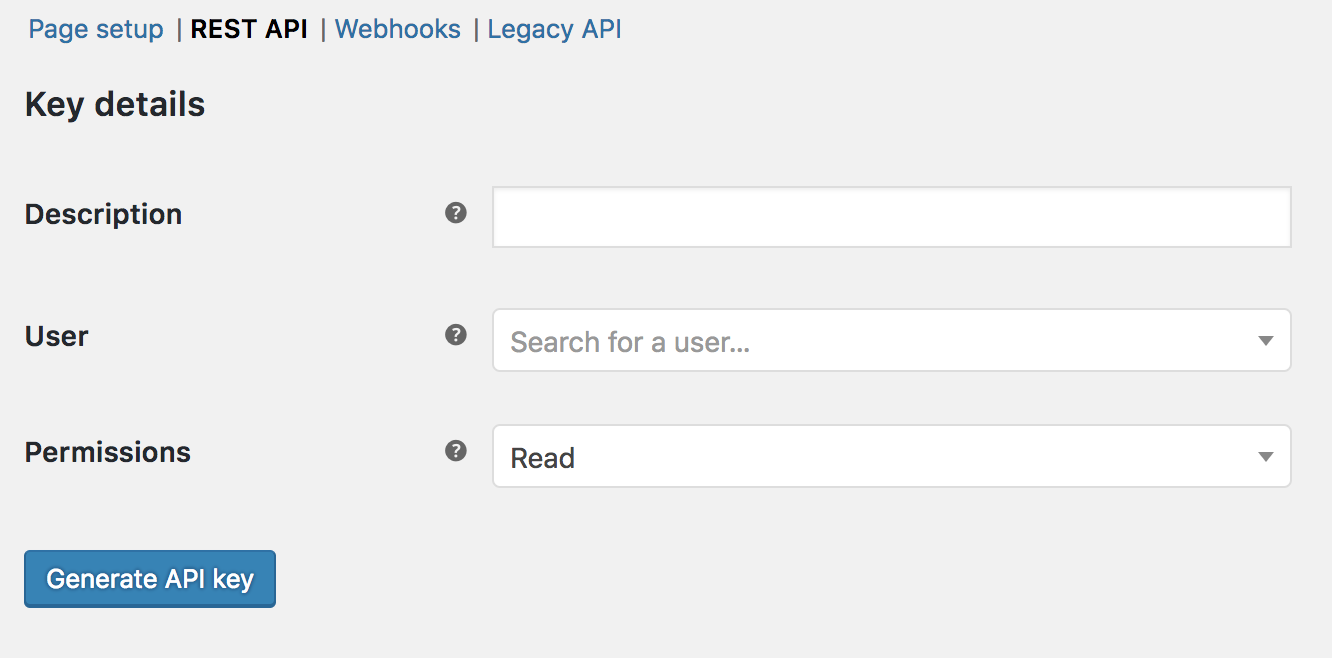
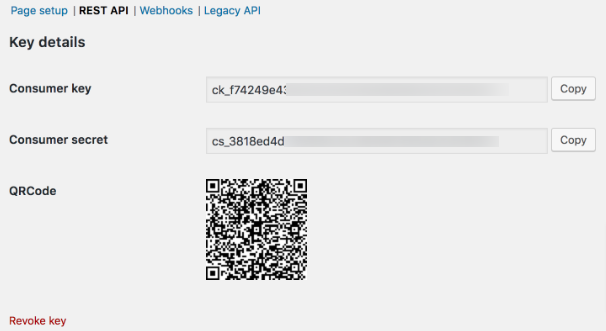
  • Click Generate API Key to get details as shown below.
  • Copy the Consumer Key and Consumer Secret to paste them into the respective fields of your Haptik account.

In case you need more help in this process, refer this link or reach out to your Haptik SPOC.

Was this article helpful?

Yes
No
Give feedback about this article

Related Articles

  • How to Set Up Fynd Integration

Platform

  • Conversation Studio
  • Smart Skills
  • Advanced NLU
  • Intelligent Analytics
  • Omnichannel
  • Smart Agent Chat
  • Enterprise Security
  • Integrations

Solutions

  • Conversational Commerce
  • Lead Generation
  • Customer Care
  • WhatsApp
  • Conversational IVR
  • Google Business Messages

Industries

  • Retail/ E-Commerce
  • Financial Services
  • Travel & Hospitality
  • Telecom

Knowledge

  • ROI Calculator
  • Reports & Research
  • Case Studies
  • Webinars
  • ISAT
  • Tech Blog
  • Business Blog
  • Resources
  • Haptik v/s Yellow
  • Haptik v/s Liveperson
  • Haptik v/s IBM Watson
  • Haptik v/s Verloop
  • Conversations on AI

Company

  • Why Haptik
  • About Us
  • Careers
  • News & Media
  • Awards & Recognition
  • Contact Us
  • Partnerships
  • Investor Relations

Subscribe

Sign up to recieve the latest updates

Find us on

  • Twitter-footer
  • Linkedin-footer
  • YT-footer
  • Insta-footer
  • G2-footer
  • Facebook-footer

Knowledge Base Software powered by Helpjuice

Copyright © jio Haptik Technology Limited 2021 | Data Security & Privacy Policy | GDPR

North America | Asia Pacific | Africa | enterprise@haptik.ai

Definition by Author

0
0