How to Use Message Composer Area on Smart Agent Chat?
- Getting Started
- Bot Building
- Smart Agent Chat
- Conversation Design
-
Developer Guides
Code Step Integration Static Step Integration Shopify Integration SETU Integration Exotel Integration CIBIL integration Freshdesk KMS Integration PayU Integration Zendesk Guide Integration Twilio Integration Razorpay Integration LeadSquared Integration USU(Unymira) Integration Helo(VivaConnect) Integration Salesforce KMS Integration Stripe Integration PayPal Integration CleverTap Integration Fynd Integration HubSpot Integration Magento Integration WooCommerce Integration Microsoft Dynamics 365 Integration
- Deployment
- External Agent Tool Setup
- Analytics & Reporting
- Notifications
- Commerce Plus
- Troubleshooting Guides
- Release Notes
Table of Contents
Table of Contents
Send messages to the userUse Canned ResponsesUse Smart ActionsUse Toolbar ActionsClose ChatWaiting for userReassign chat
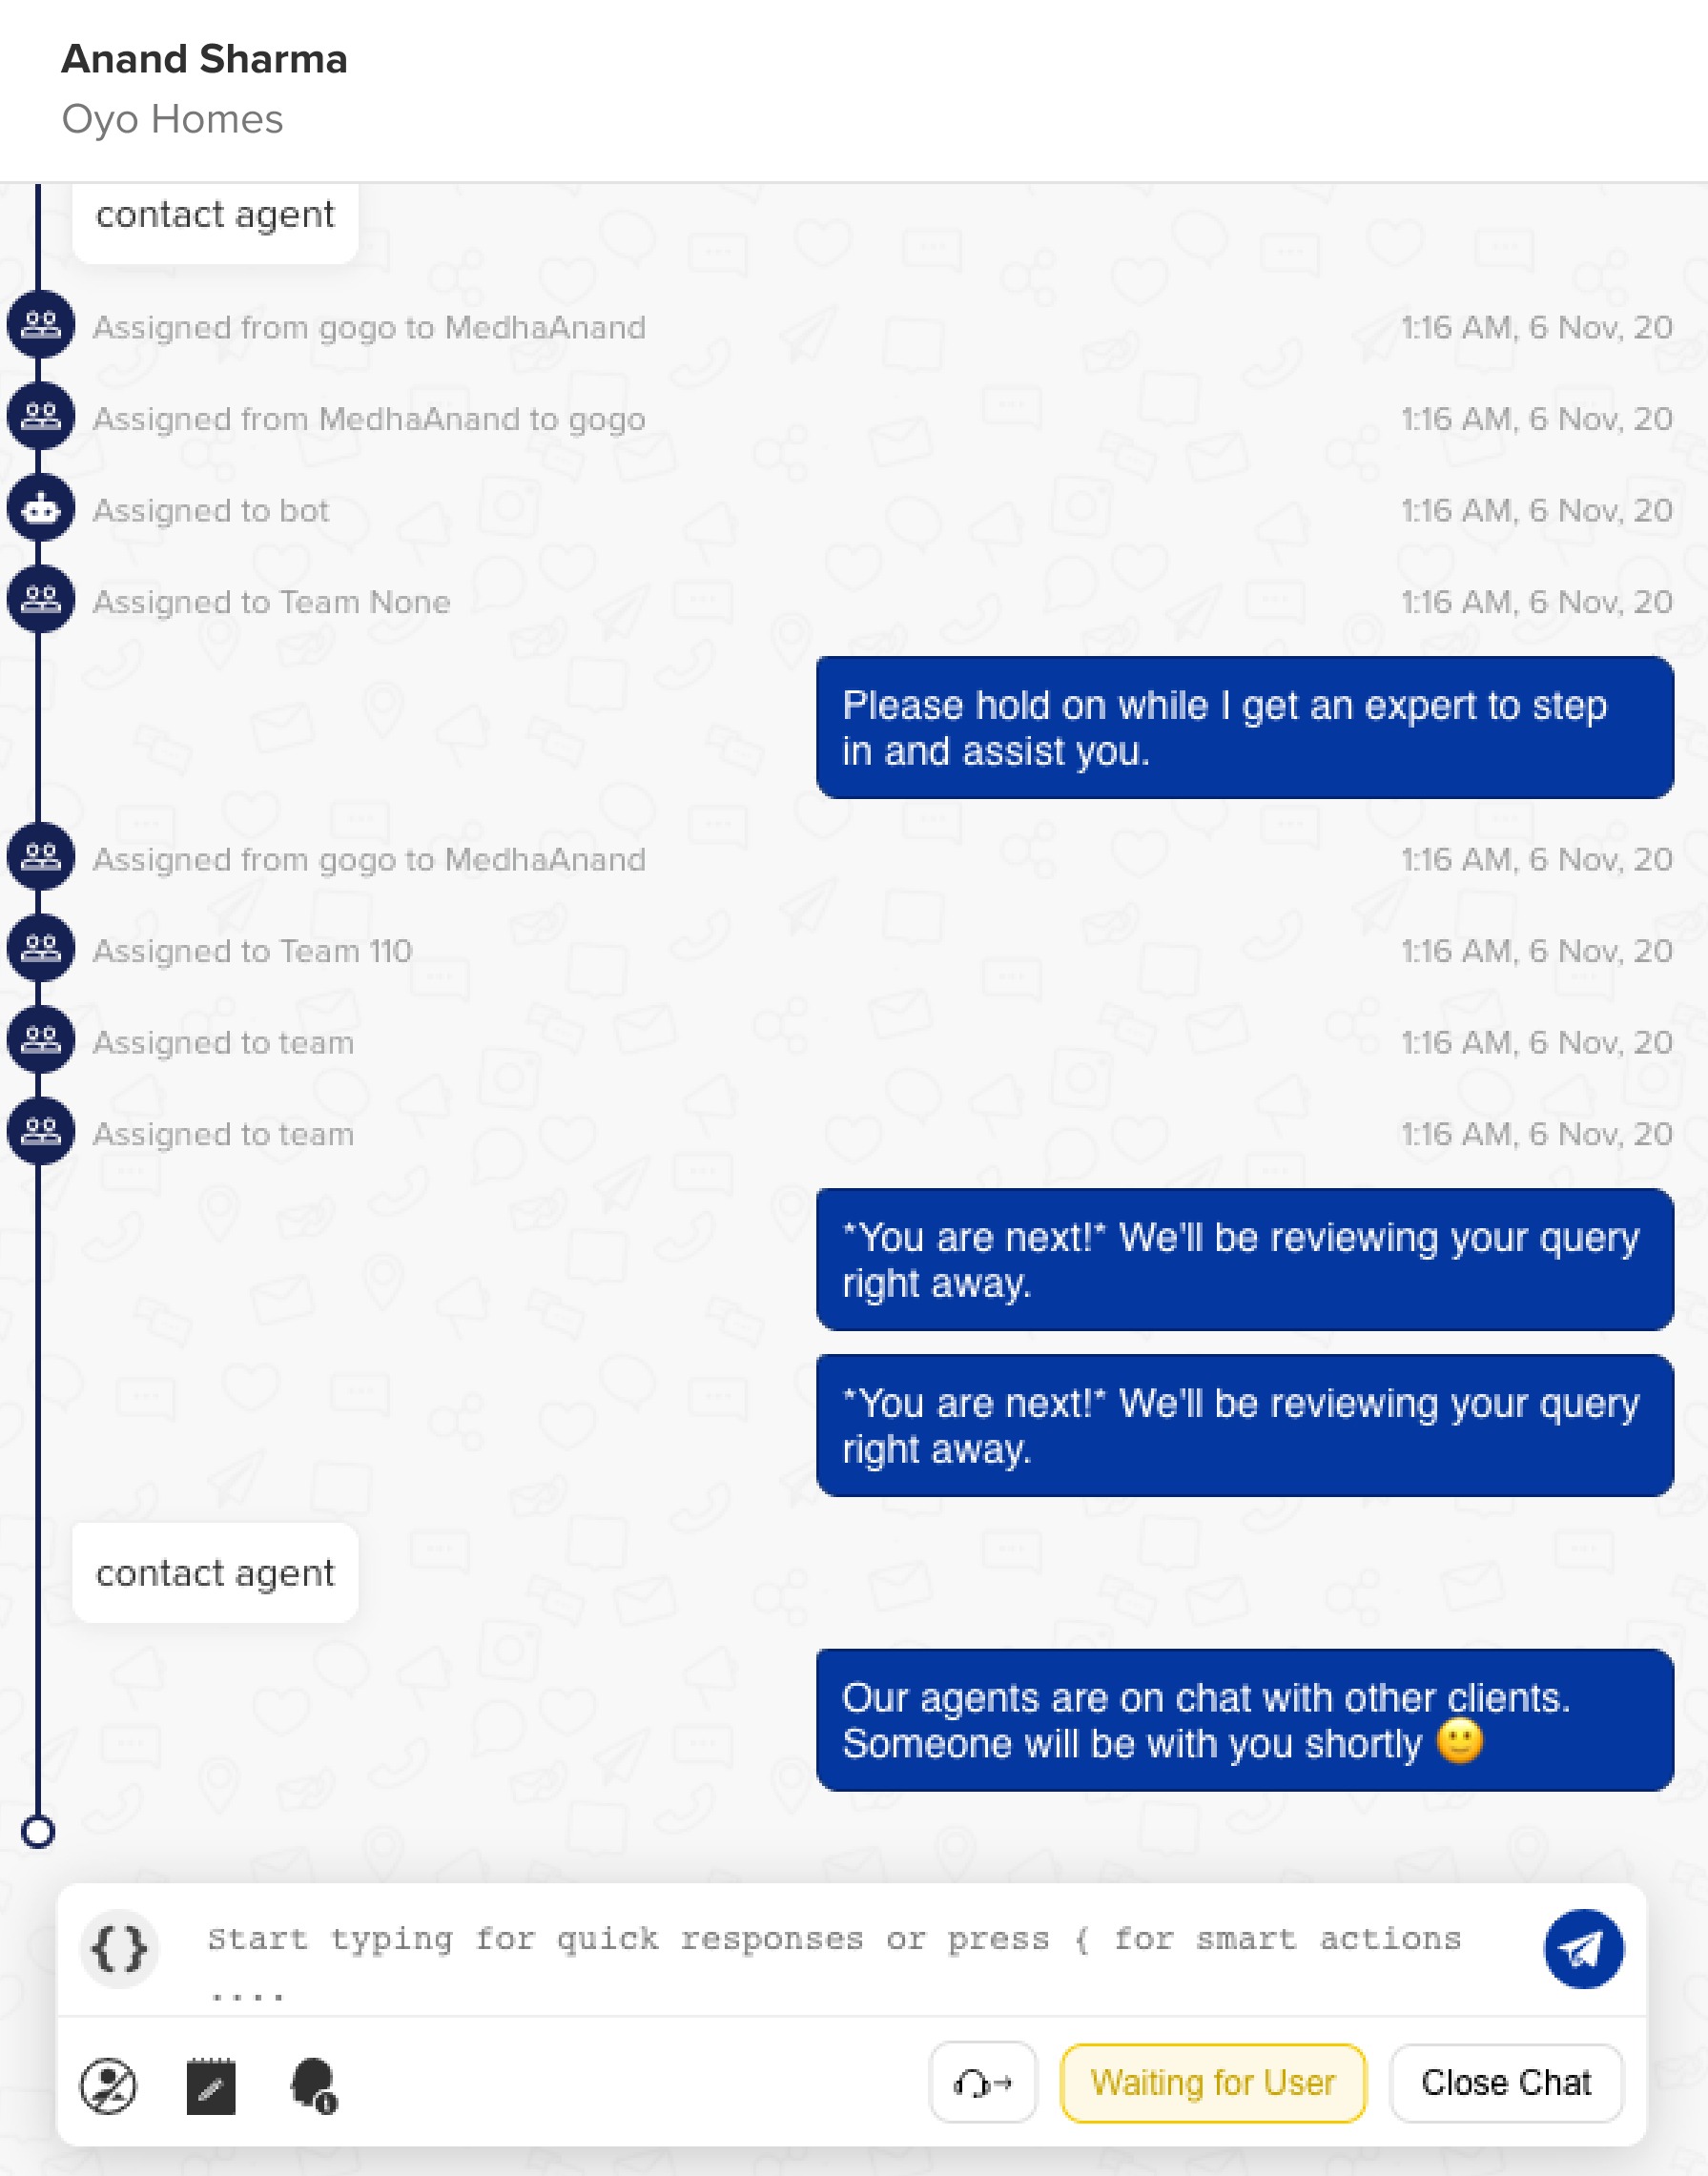
The center of the screen comprises the message composer. An agent can:
- Exchange messages with the user
- Send canned responses to users
- Use Smart Actions
- Report a user as inappropriate
- Takedown notes during a conversation
- Share a chat link with others
- Mark chat as Complete and Waiting for user
- Generate Chat Summary happened so far
- Reassign chat to a person or a team
Send Messages to the User
Agent can type the responses in the message composer and send them to the user.

Use Canned Responses
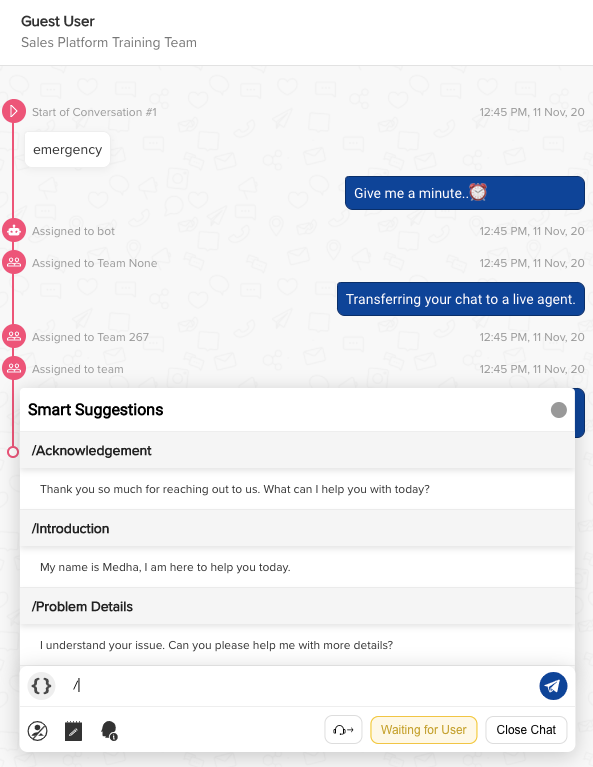
Canned Responses are predefined responses uploaded prior, which can easily be used by agents to reduce response time. They are ready-made responses that agents can customize according to the situation and need before sending it to the user.
Use Smart Actions
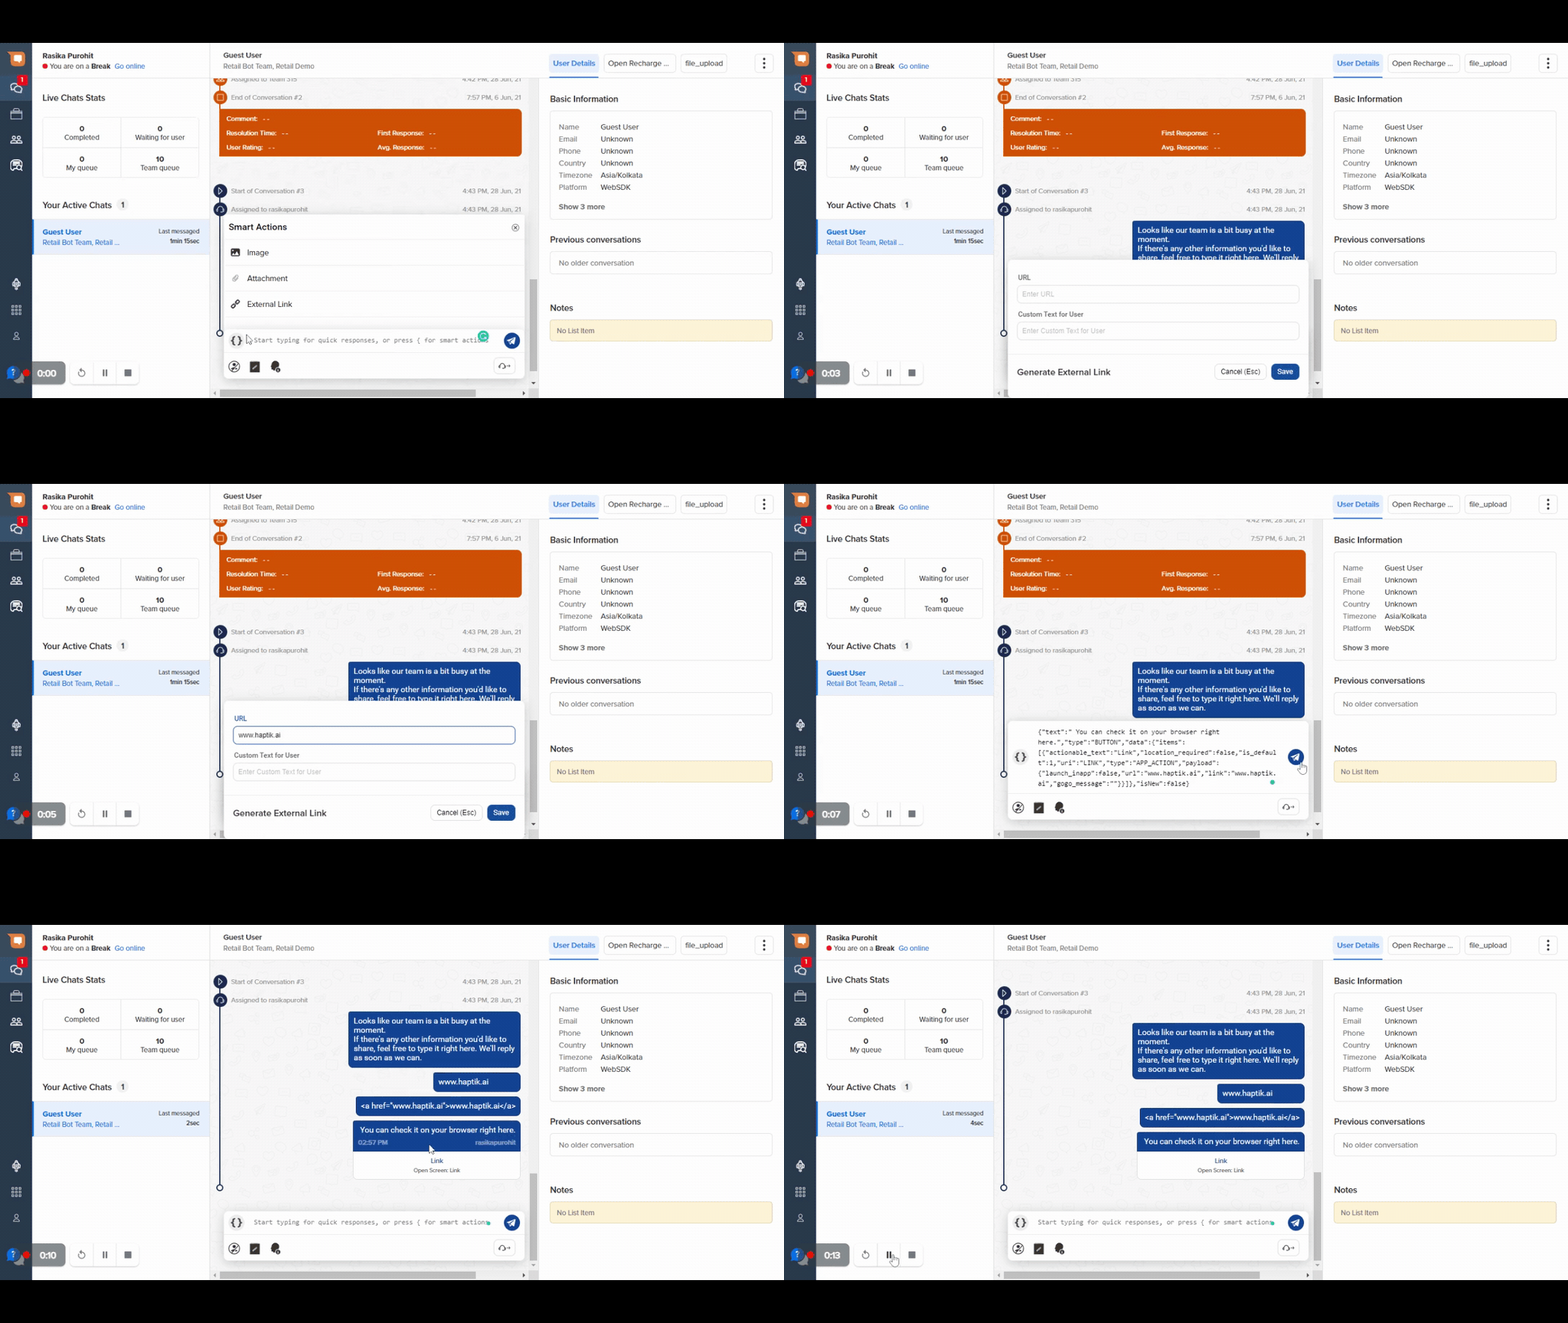
Smart Actions help the agents to send media attachments to the users. To open smart action, click on the icon at the left-hand side of the action toolbar

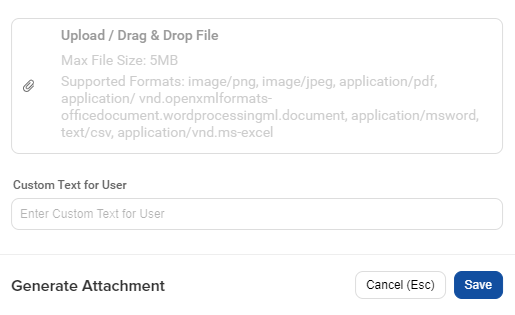
Once you click on it, the below window will pop-up

Image Smart Action
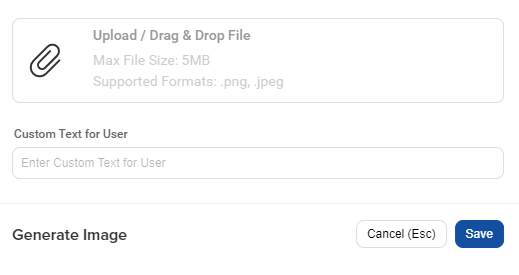
Image smart action is used to share an image with the user. The agent can drag and drop the image file on the pop-up that opens on clicking this smart action. The default image file size limit is 5MB.
You can also add custom text for the user here. Now, click Save and then send it to the user.
Attachment Smart Action
Attachment smart action is used to share .pdf files with the user. The agent can drag and drop the file on the pop-up that opens on clicking this smart action. The default attachment file size limit is 5MB.
You can also add custom text for the user here. Now, click Save and then send it to the user.
External Link Smart Action
Use external link smart action to send links to the user. In the URL field you have to paste the link and in the Custom Text for User field, mention the link provided.
Pasting a link without using the smart action automatically converts it to one without the custom text.
Use Toolbar Actions
Report a user as inappropriate
Agents can mark a user as inappropriate by clicking on this icon as shown below -
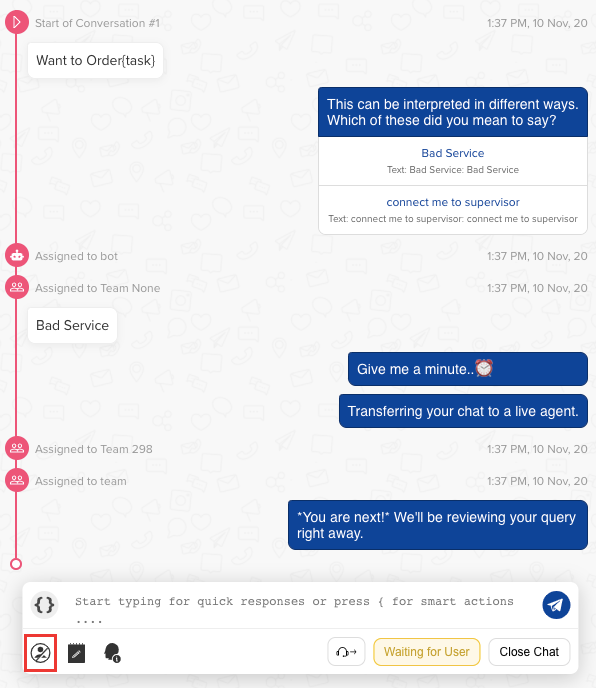
We register/log a user is marked as inappropriate once every 2 hours per user. If the inappropriate count for a user is greater than 2, we send a blocked message to the user as shown below -
Hi <User Name>, this is a system generated message to inform you that your access to
this chat service has been permanently disabled. You will not be able to use this
chat service any more as you have been flagged multiple times for inappropriate messages
sent to our Human assistants.
Notes
This tool  is used to save links to the product suggested or any other information given from any website. These notes are shared with other assistants for a particular user. It is helpful for another assistant to get the details quickly by just checking notes. Even numbers are saved in Notes for reference. Make sure that you save notes wherever and whenever required.
Please note Assistant and Agent is the same as the person replying back to the user queries on our chat window.
User Info Link
This tool  will help you to get the link to the ongoing chat. As soon as you click on the tool, it will take you to the next tab where the User Info link will be visible. This is used for sharing chat links with users.
Close Chat
Agents can close a chat by clicking on this button.
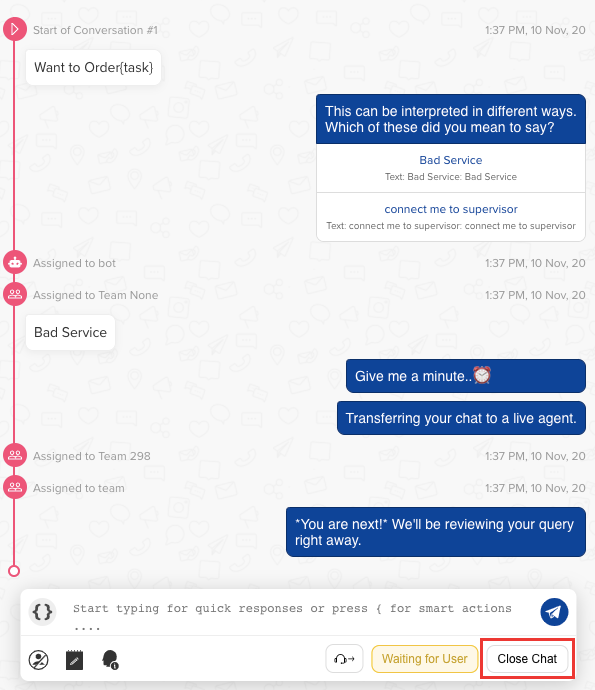
As an agent clicks on this button, a modal opens up showing few options like closing categories aka disposition tags and follow up.
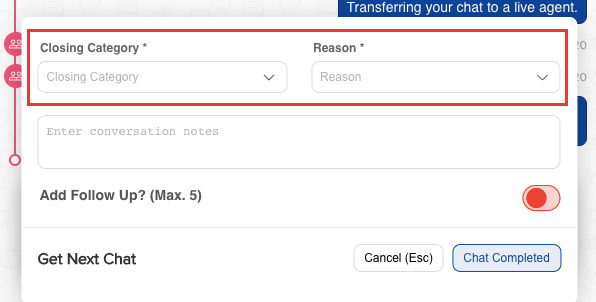
You can read more about closing categories here.
Use Waiting for User
As we know, an agent can take only a certain number of chats at once. We call that number concurrency of chats. This is specific to an agent.
Many times we have seen a user stops replying in between a conversation, what shall an agent do in this case? This chat where the user has stopped replying keeps the agent's concurrency bucket blocked. To clear up the concurrency bucket without closing a chat, agents can use the Waiting for user button.
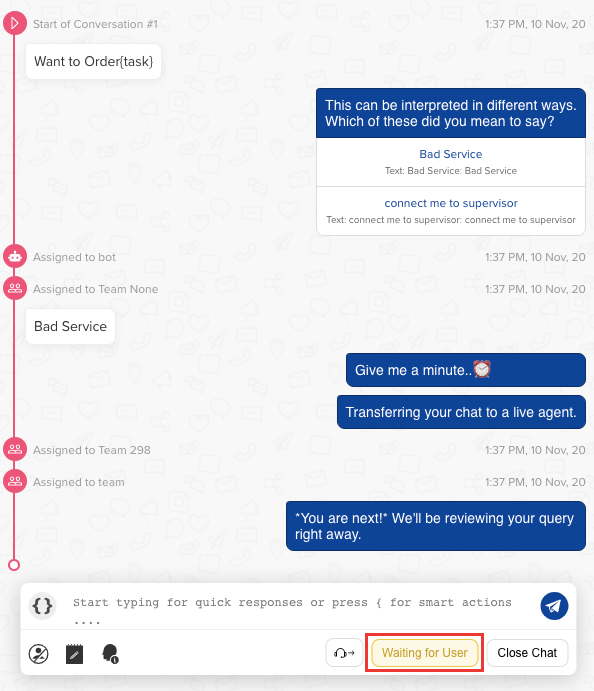
When the user will come back and respond on the chat screen, the chat will get reassigned to the agent and the agent can continue the conversation with the user.
This is what makes this button extremely powerful, it cleans up the concurrency bucket of the agent at their demand without inserting any friction for the user.
Generate Chat Summary
Our new GPT-powered Chat Summary button placed on the top right corner of the agent-user chat pane gives you a holistic summary of chat happened so far between the customer and the bot or agent.
This includes Tags, Customer Sentiment, and a brief Summary of the issue. This feature will help in faster takeovers between agents, faster output and increased customer satisfaction. This feature is still in Beta state and will be available for everyone soon.
Reassign Chat
In situations where agents need additional help from their team members, they can use this button to reassign the chat to anyone specific among his team or whoever is free in his team. This is where we may need help of the Chat Summary feature.
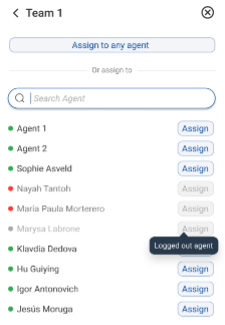
Once you click on the Reassign Chat button, a modal opens up on the right-hand side of the screen where you can choose whom to reassign it to.
- "Assign to any agent" will auto-assign the chat to an online agent of the team
- The "Assign" button will be active only if the agent is online, which is indicated by a green dot on the left side of the agent's name
- In case the agent is offline (red dot) or logged out (grey dot), the "Assign" button will not be active, and chat can't be assigned to that particular agent.
When an agent is offline, he would not get the option of Waiting for user but only Reassigning Chat and Closing Category as compared to the online state, where agents get to see all controls mentioned above.

