How to deploy Haptik's bot on Microsoft Teams?

Written by Medha Anand
Updated on December 6th, 2021
- Getting Started
- Bot Building
- Smart Agent Chat
- Conversation Design
-
Developer Guides
Code Step Integration Static Step Integration Shopify Integration SETU Integration Exotel Integration CIBIL integration Freshdesk KMS Integration PayU Integration Zendesk Guide Integration Twilio Integration Razorpay Integration LeadSquared Integration USU(Unymira) Integration Helo(VivaConnect) Integration Salesforce KMS Integration Stripe Integration PayPal Integration CleverTap Integration Fynd Integration HubSpot Integration Magento Integration WooCommerce Integration Microsoft Dynamics 365 Integration
- Deployment
- External Agent Tool Setup
- Analytics & Reporting
- Notifications
- Commerce Plus
- Troubleshooting Guides
- Release Notes
Table of Contents
Setting up a Microsoft Teams bot1: Navigate to App Studio2: Create a bot on Teams3: Create a bot on the Conversation Studio tool of the Haptik platform4: Provide Platform Deployment Keys5: Provide the Callback URL in Teams Bot6: Create an App in Microsoft Teams7: Set up the bot8: Install the AppShare the BotMicrosoft Teams apps bring key information, common tools, and trusted processes to where people increasingly gather, learn, and work. Apps are how you extend Teams to fit your needs. You can create a bot for Teams or integrate an existing app.
Conversations often result in the need to do something (generate an order, review my code, check ticket status, and so on). A bot can kick off these kinds of workflows right inside Teams. A bot acts as an intermediary between a Teams user and a web service. Users can chat with a bot to quickly get information, initiate workflows, or do anything else your web service can do.
Haptik can help you elevate the user experience by adding NLP capabilities using conversational flows on your Teams bot. Using the Conversation Studio tool of Haptik, you can build user journeys to resolve user queries faster. You can create conversational user journeys, connect the user to an agent if any human intervention is required, and so on.
Setting up a Microsoft Teams bot
Creating a bot on Microsoft Team is a simple process. This guide will help you create a new bot in Microsoft Teams and deploy the Haptik bot on Microsoft Teams.
Pre-requisites -
- Microsoft account for Teams
- Access to Haptik
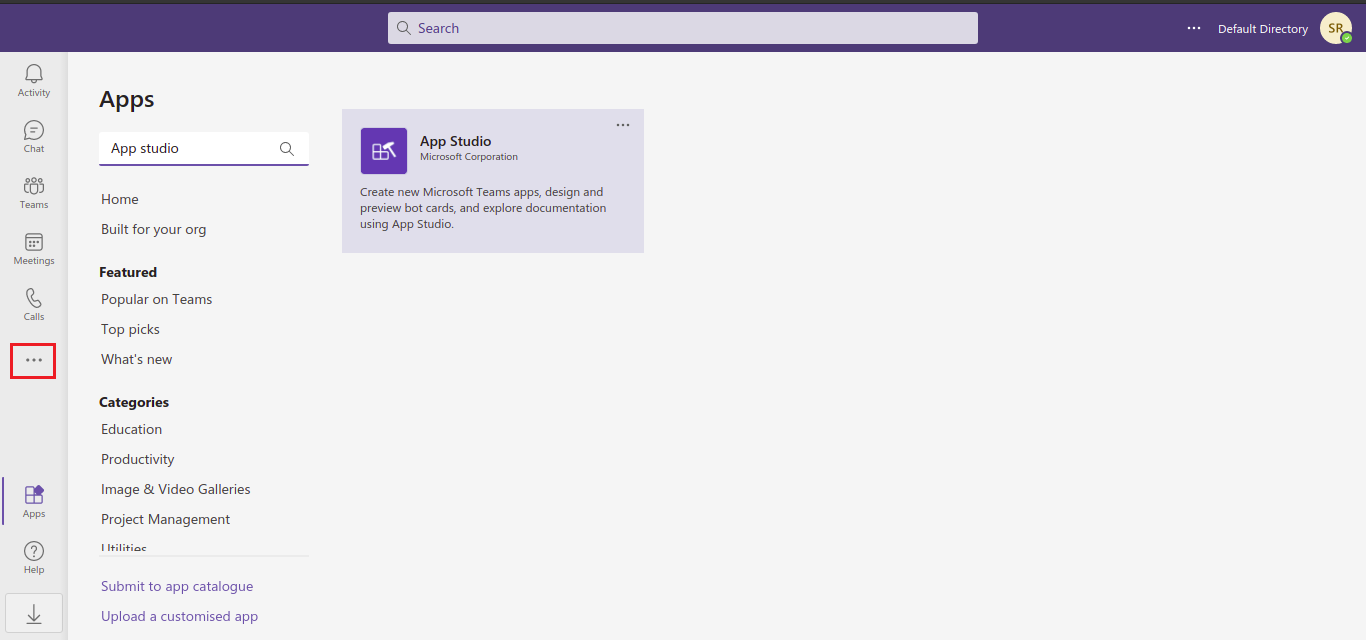
1: Navigate to App Studio
- Login to Teams using the organization account.
- On the left sidebar click on ...
- Click on App Studio
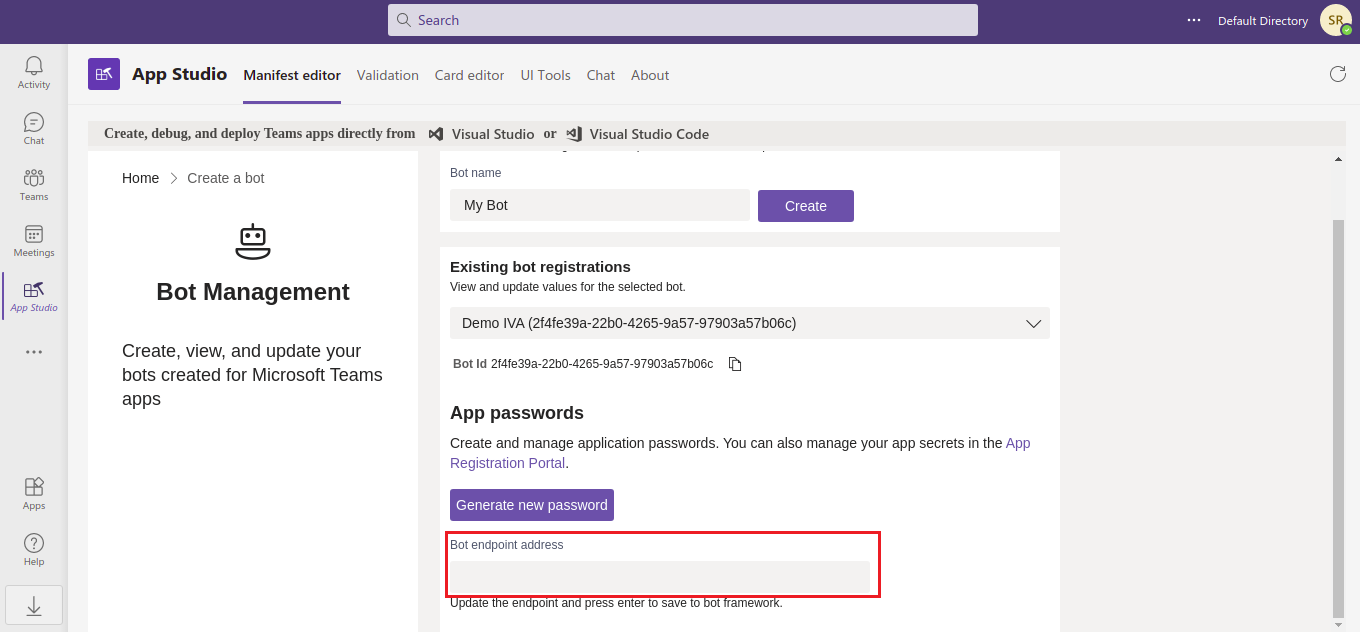
2: Create a bot on Teams
- In the App Studio, select Bot Management
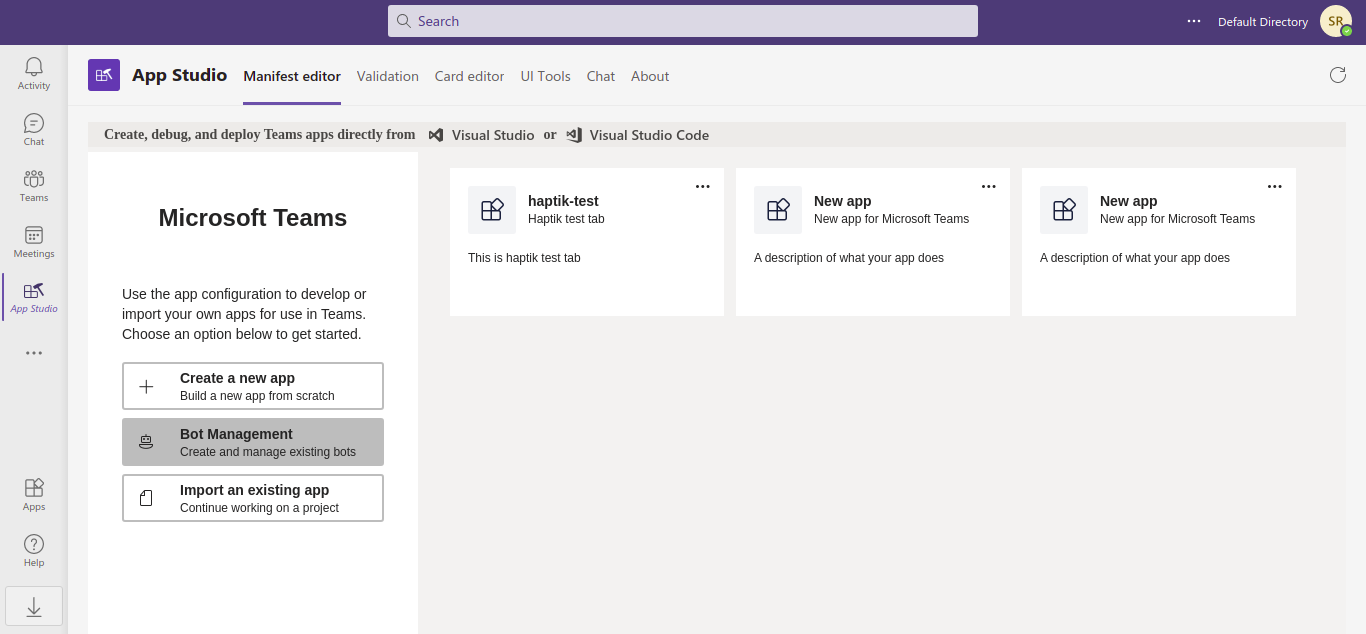
- Create a new bot by providing a bot name and click on Create.
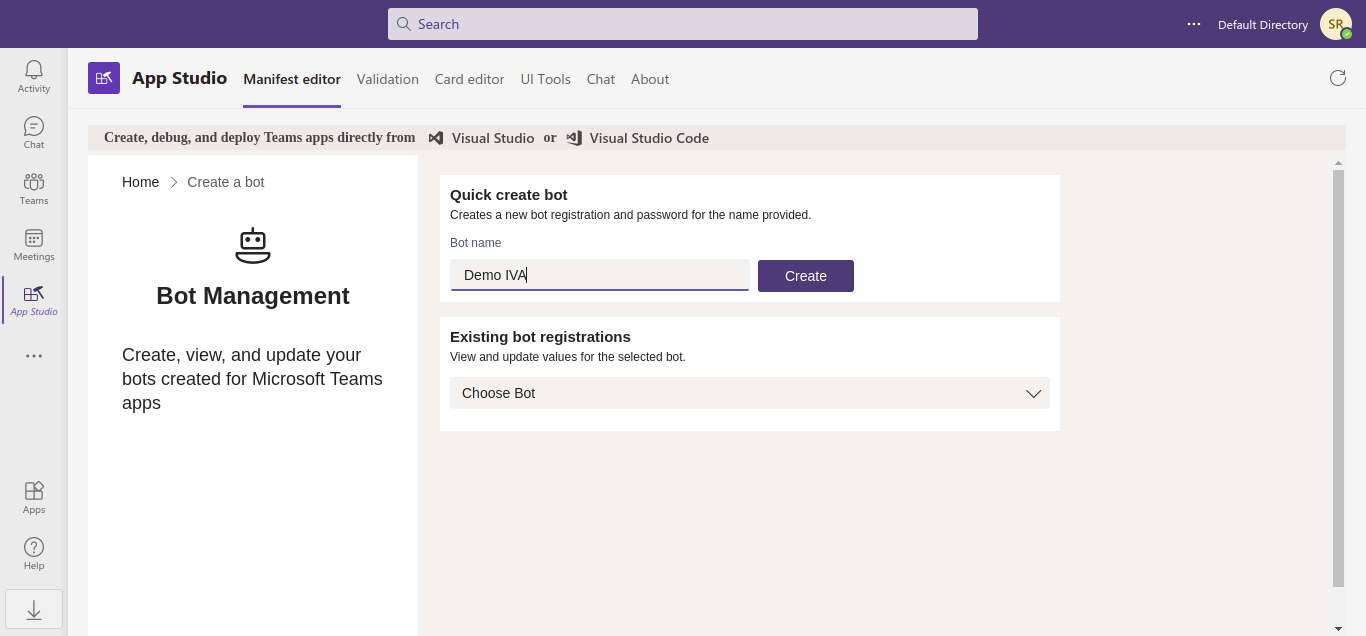
If you already have a bot created, you can choose to select the bot from Existing bot registrations.
When the bot is created, a Bot ID and App Password are generated. You will have to provide these keys in the Platform Deployments section of the Haptik Platform.
- Bot ID - will already be visible.
- Click on Generate new password to create a new password.
App Password is generated and visible only once. Please save the App Password in a safe file before closing the pop-up.
3: Create a bot on the Conversation Studio tool of the Haptik platform
On the Conversation Studio tool, you can create AI-powered user journeys. Click here to know more about creating a bot on the Haptik platform.
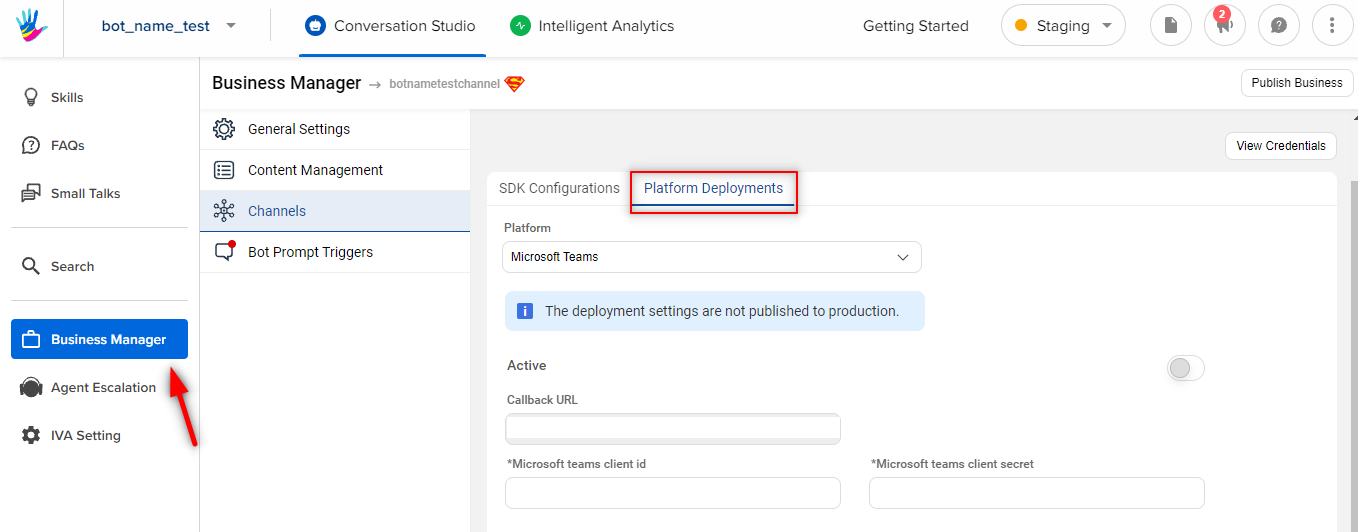
4: Provide Platform Deployment Keys
- Navigate to the Platform Deployments section on the Business Manager, from the Conversation Studio tool.
- Here,
- Select the Platform as Microsoft Teams.
- Mark the status as Active.
- Provide the Bot ID (generated in 2) in the Microsoft teams client id field.
- Provide the App Password (generated in 2) in the Microsoft Teams client secret field.
5: Provide the Callback URL in Teams Bot
Copy the Callback URL from the Platform Deployments section (4) and paste the URL in the Bot endpoint address section of the Teams Bot, as shown below -
6: Create an App in Microsoft Teams
Navigate to App Studio (refer to 1). Click on Create a new app.

To create a new app, provide these values -
- Short name
- Fullname
- App ID gets generated automatically
- Package name This can be any name such as
com.haptik.test - Version number
- Description of the bot
- Developer information such as your organization name, website.
- Partner information is optional
- In the App URLs section
- Provide your organization's privacy statement which users will have to agree to follow
- The terms of use which users will have to follow
- You can then select the icon for the bot from the options
7: Set up the bot
Once you have completed the stages mentioned above, in the left sidebar, navigate to Bots under the capabilities section.
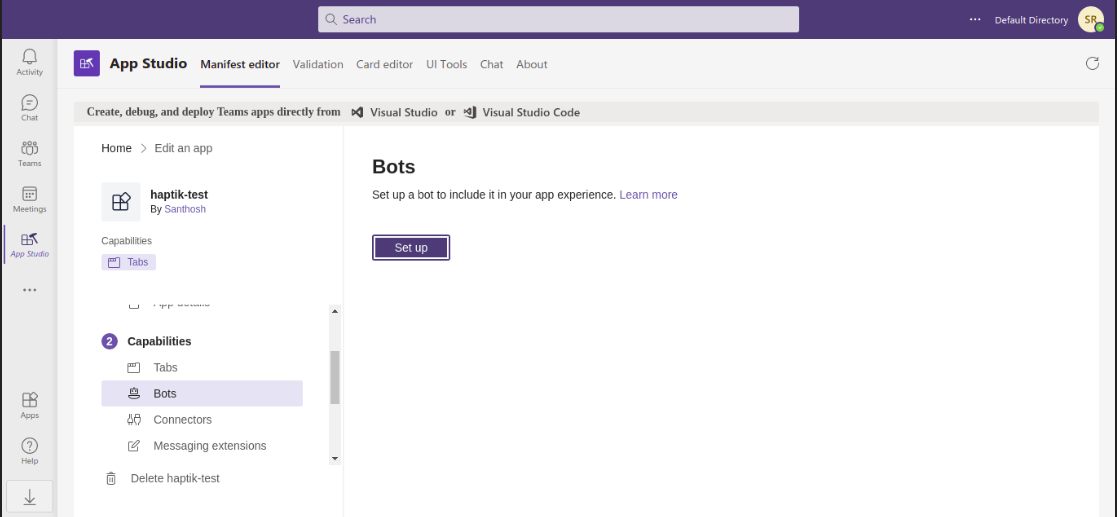
Click on Set up.
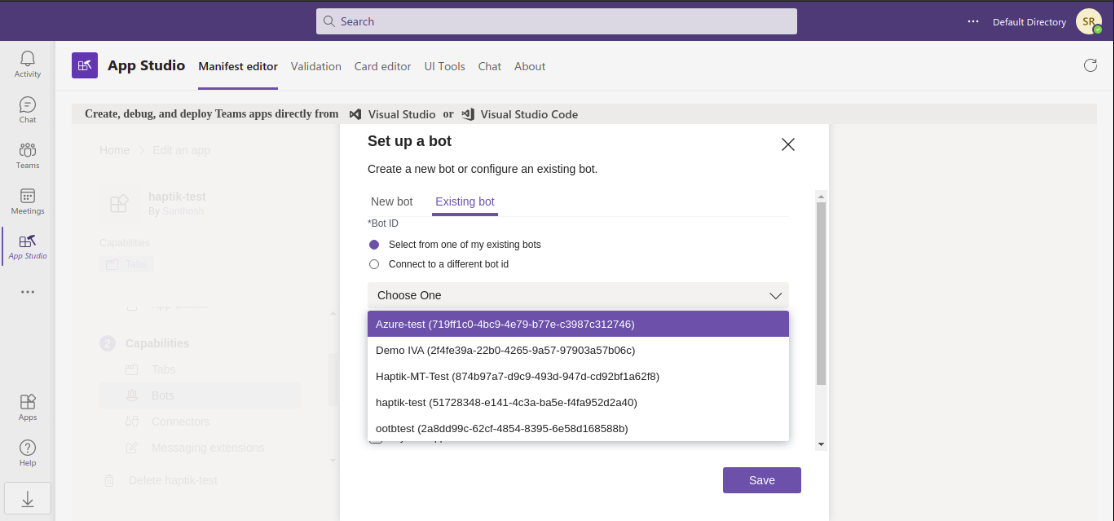
You can set up the already created bot (2) from the dropdown.
Here mention the scope of the bot, i.e. how will the bot be used.
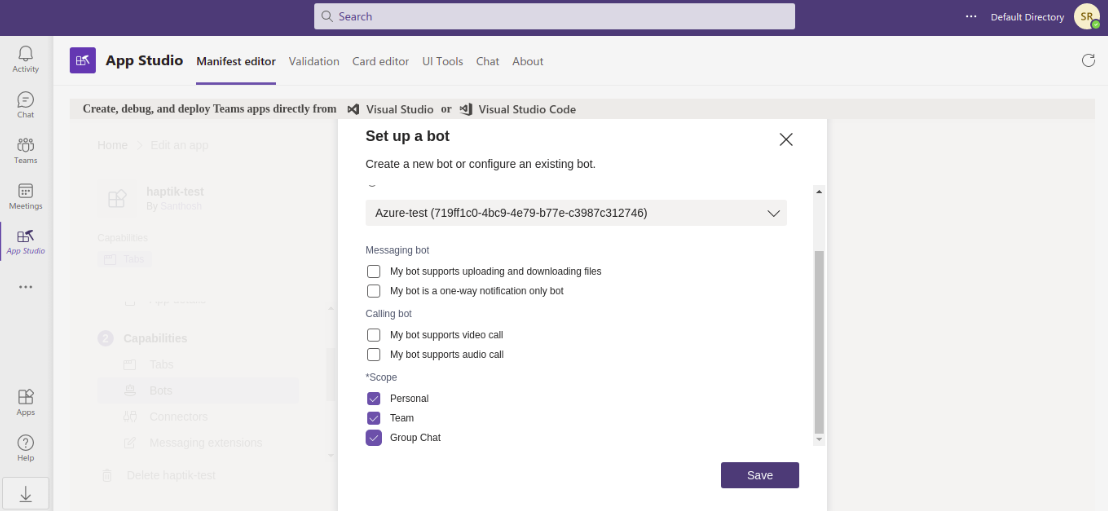
Click on Save.
8: Install the App
Once the bot is set up, navigate to Test and distribute under the Finish section on the left sidebar.
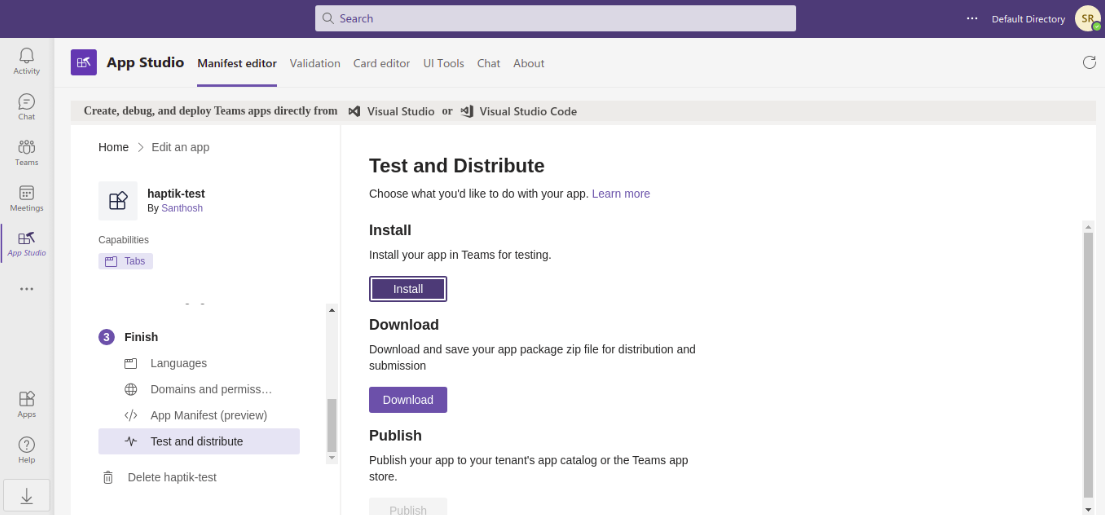
Click on Install.
A modal opens up, click on Add option.
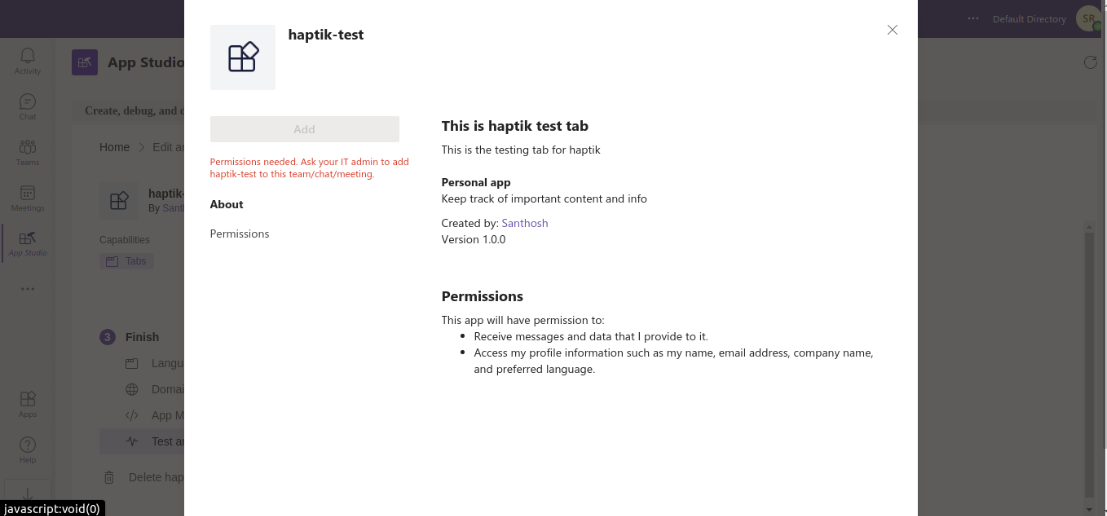
This will add the bot icon on the left sidebar.
Share the Bot
To share the bot link, so that users can start communicating with the bot, navigate to dev.botframework.com.
Here you will be able to see the bots that have been created.
Left-click on the bot name and select the Copy link address option. You can share this link with users so that users can start to communicate with the bot.
