How to Power eKYC with OCR (beta) on Haptik IVAs
- Getting Started
- Bot Building
- Smart Agent Chat
- Conversation Design
-
Developer Guides
Code Step Integration Static Step Integration Shopify Integration SETU Integration Exotel Integration CIBIL integration Freshdesk KMS Integration PayU Integration Zendesk Guide Integration Twilio Integration Razorpay Integration LeadSquared Integration USU(Unymira) Integration Helo(VivaConnect) Integration Salesforce KMS Integration Stripe Integration PayPal Integration CleverTap Integration Fynd Integration HubSpot Integration Magento Integration WooCommerce Integration Microsoft Dynamics 365 Integration
- Deployment
- External Agent Tool Setup
- Analytics & Reporting
- Notifications
- Commerce Plus
- Troubleshooting Guides
- Release Notes
Table of Contents
Overview
OCR reduces human errors and lets underwriters and other professionals focus on more valuable work. OCR also lets clients process their own documents, which can help bankers and insurers speed their processes like eKYC.
OCR at Haptik
At Haptik, OCR is a beta feature that powers eKYC journeys, letting enterprises make the onboarding process seamless by extracting and verifying user details from images/pdfs of user’s Govt. ID cards. This includes scanning and extracting details from standard IDs like PAN card, Driving License, Passport, Aadhaar card, Voter ID, and if required verification of the same from Government database. In beta, only India Govt. ID cards are supported, for a different region, please contact your Haptik SPOC.
Haptik offers two services for OCR:
- Data extraction: Obtaining the data from an ID card that has been shared
- Data verification: Cross checking whether the shared ID card is valid from a government database wherever applicable
While extraction is readily available OOTB, it is recommended that you cross check with a Haptik SPOC to ensure that a particular ID card is supported. Regional cards are supported as long as one of the mentioned languages is English.
Supported File Types: .png, .jpg, .pdf
Steps to Add OCR
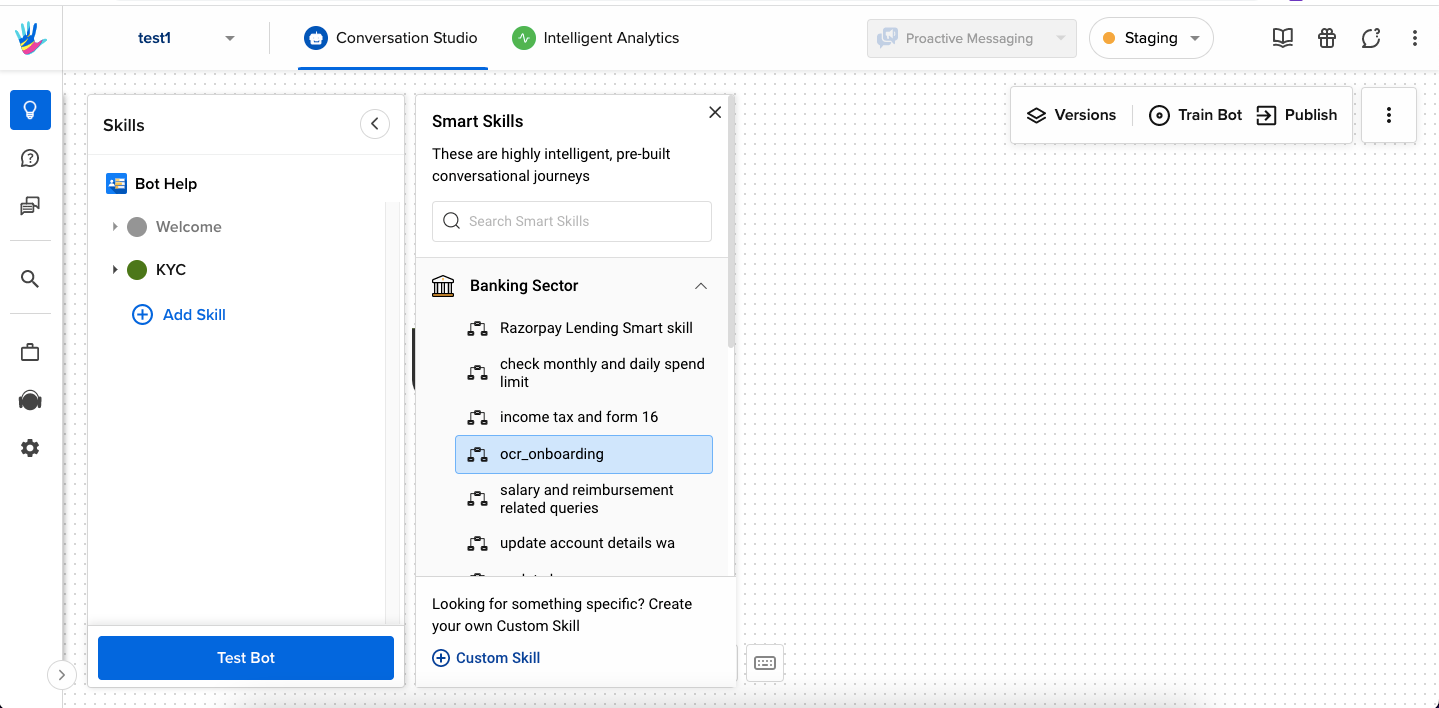
- Open your bot on Conversation Studio and click on Add Skill.
- A slider comprising of various Smart Skills will appear. Select Banking Sector and then click on ocr_onboarding to add this smart skill to your bot.

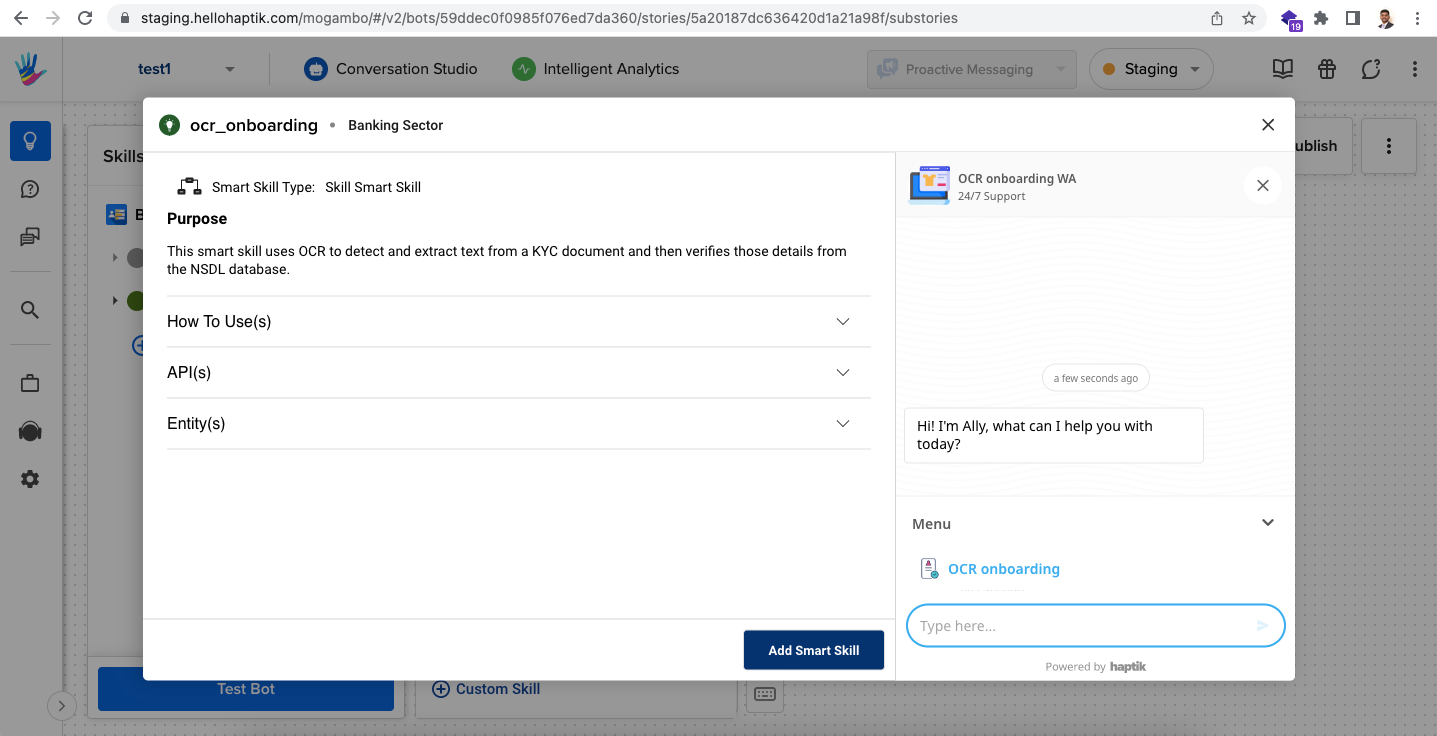
- A pop-up window appears showcasing the skill. Click Add Smart Skill.

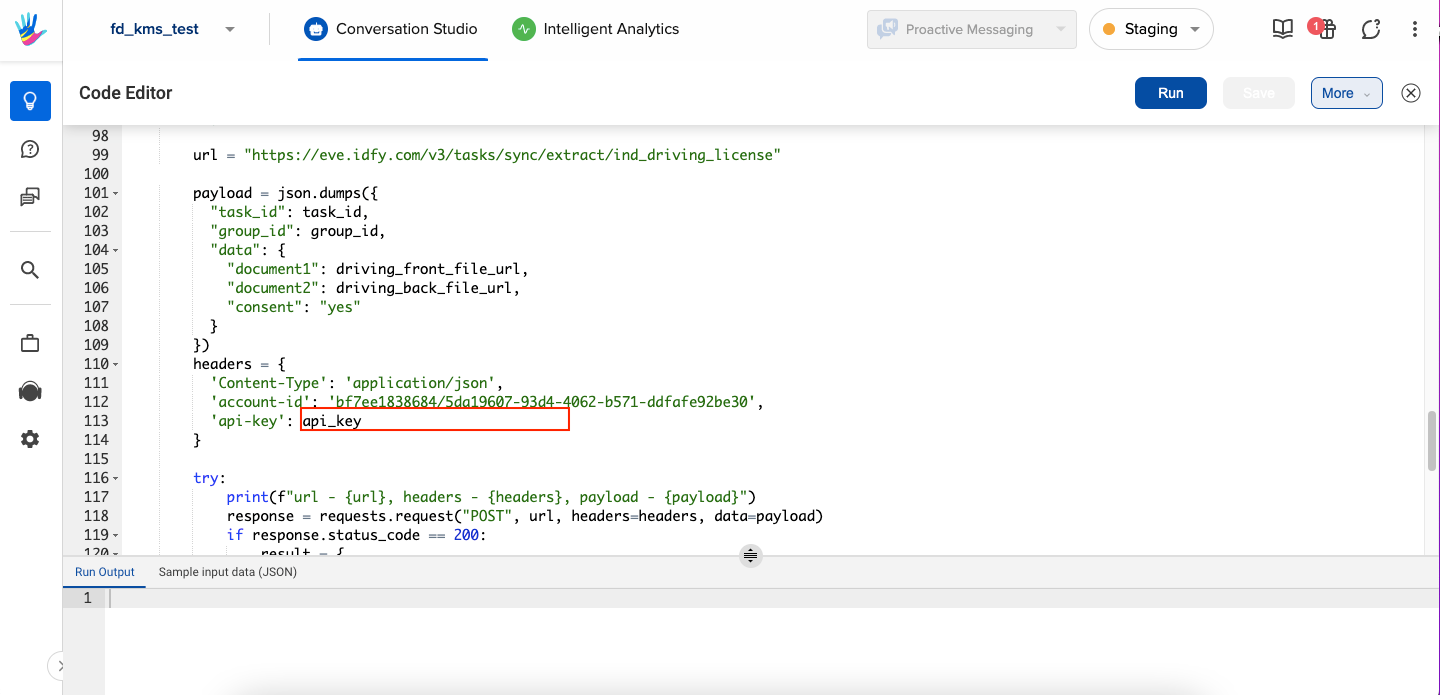
- To ensure the OCR APIs function correctly, update the api-key in the code nodes you intend to use in your journey. Once done, click Run to save the updates.

- Train Bot to eliminate any loopholes in your bot functioning.
Tada! You have successfully added OCR functionality to your bot.
