Step 3 - How to publish my bot or take my bot live?
- Getting Started
- Bot Building
- Smart Agent Chat
- Conversation Design
-
Developer Guides
Code Step Integration Static Step Integration Shopify Integration SETU Integration Exotel Integration CIBIL integration Freshdesk KMS Integration PayU Integration Zendesk Guide Integration Twilio Integration Razorpay Integration LeadSquared Integration USU(Unymira) Integration Helo(VivaConnect) Integration Salesforce KMS Integration Stripe Integration PayPal Integration CleverTap Integration Fynd Integration HubSpot Integration Magento Integration WooCommerce Integration Microsoft Dynamics 365 Integration
- Deployment
- External Agent Tool Setup
- Analytics & Reporting
- Notifications
- Commerce Plus
- Troubleshooting Guides
- Release Notes
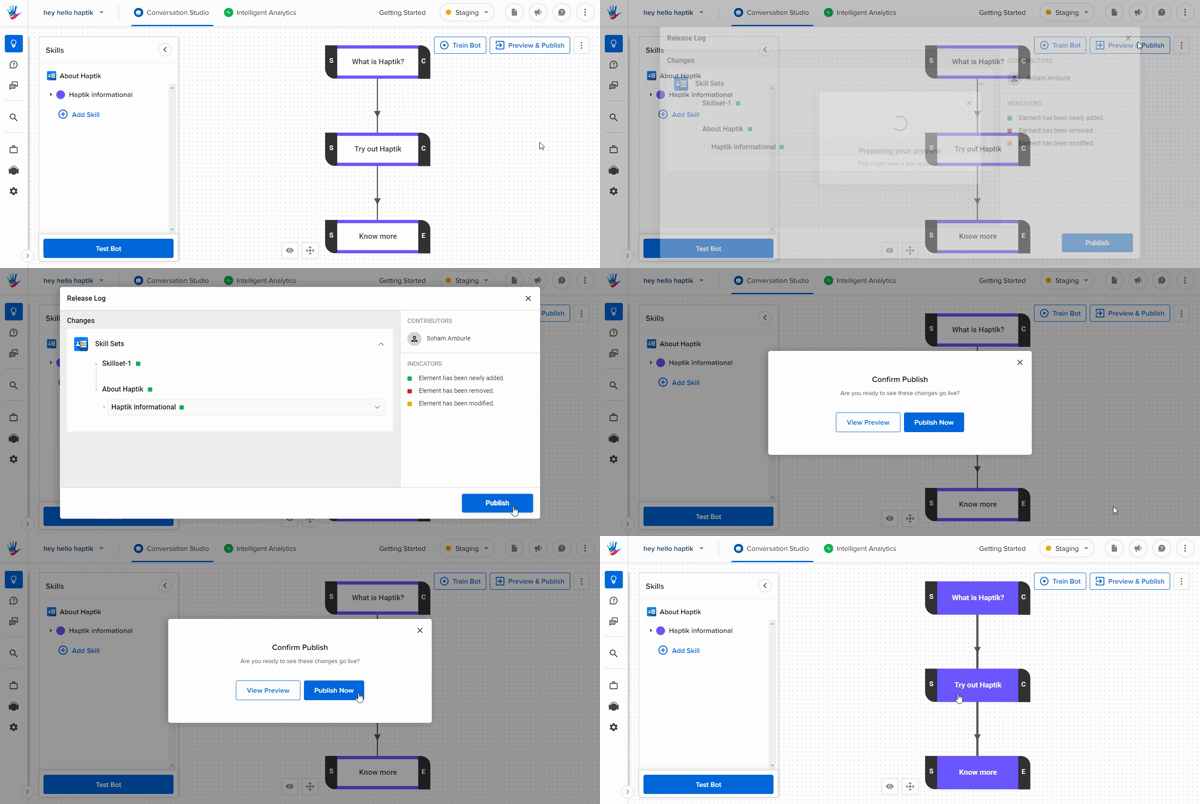
Once you are done with adding all the functionalities to your bot and your bot is ready to go live for your end-users, that is when you use the Publish option.
With Publish, your bot will be published from the Staging Environment to the Production Environment. You can click on the Preview and Publish bot button as shown below.

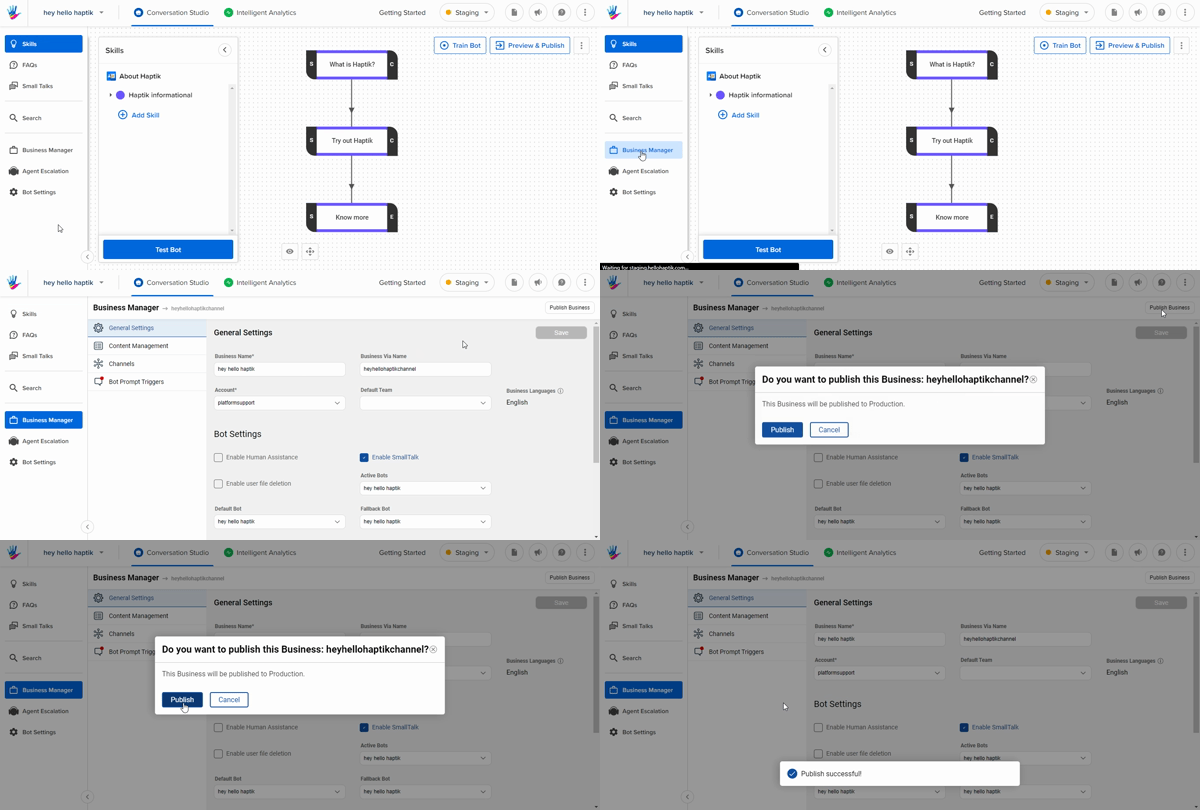
Not just the bot, but you would need to Publish the Business too.

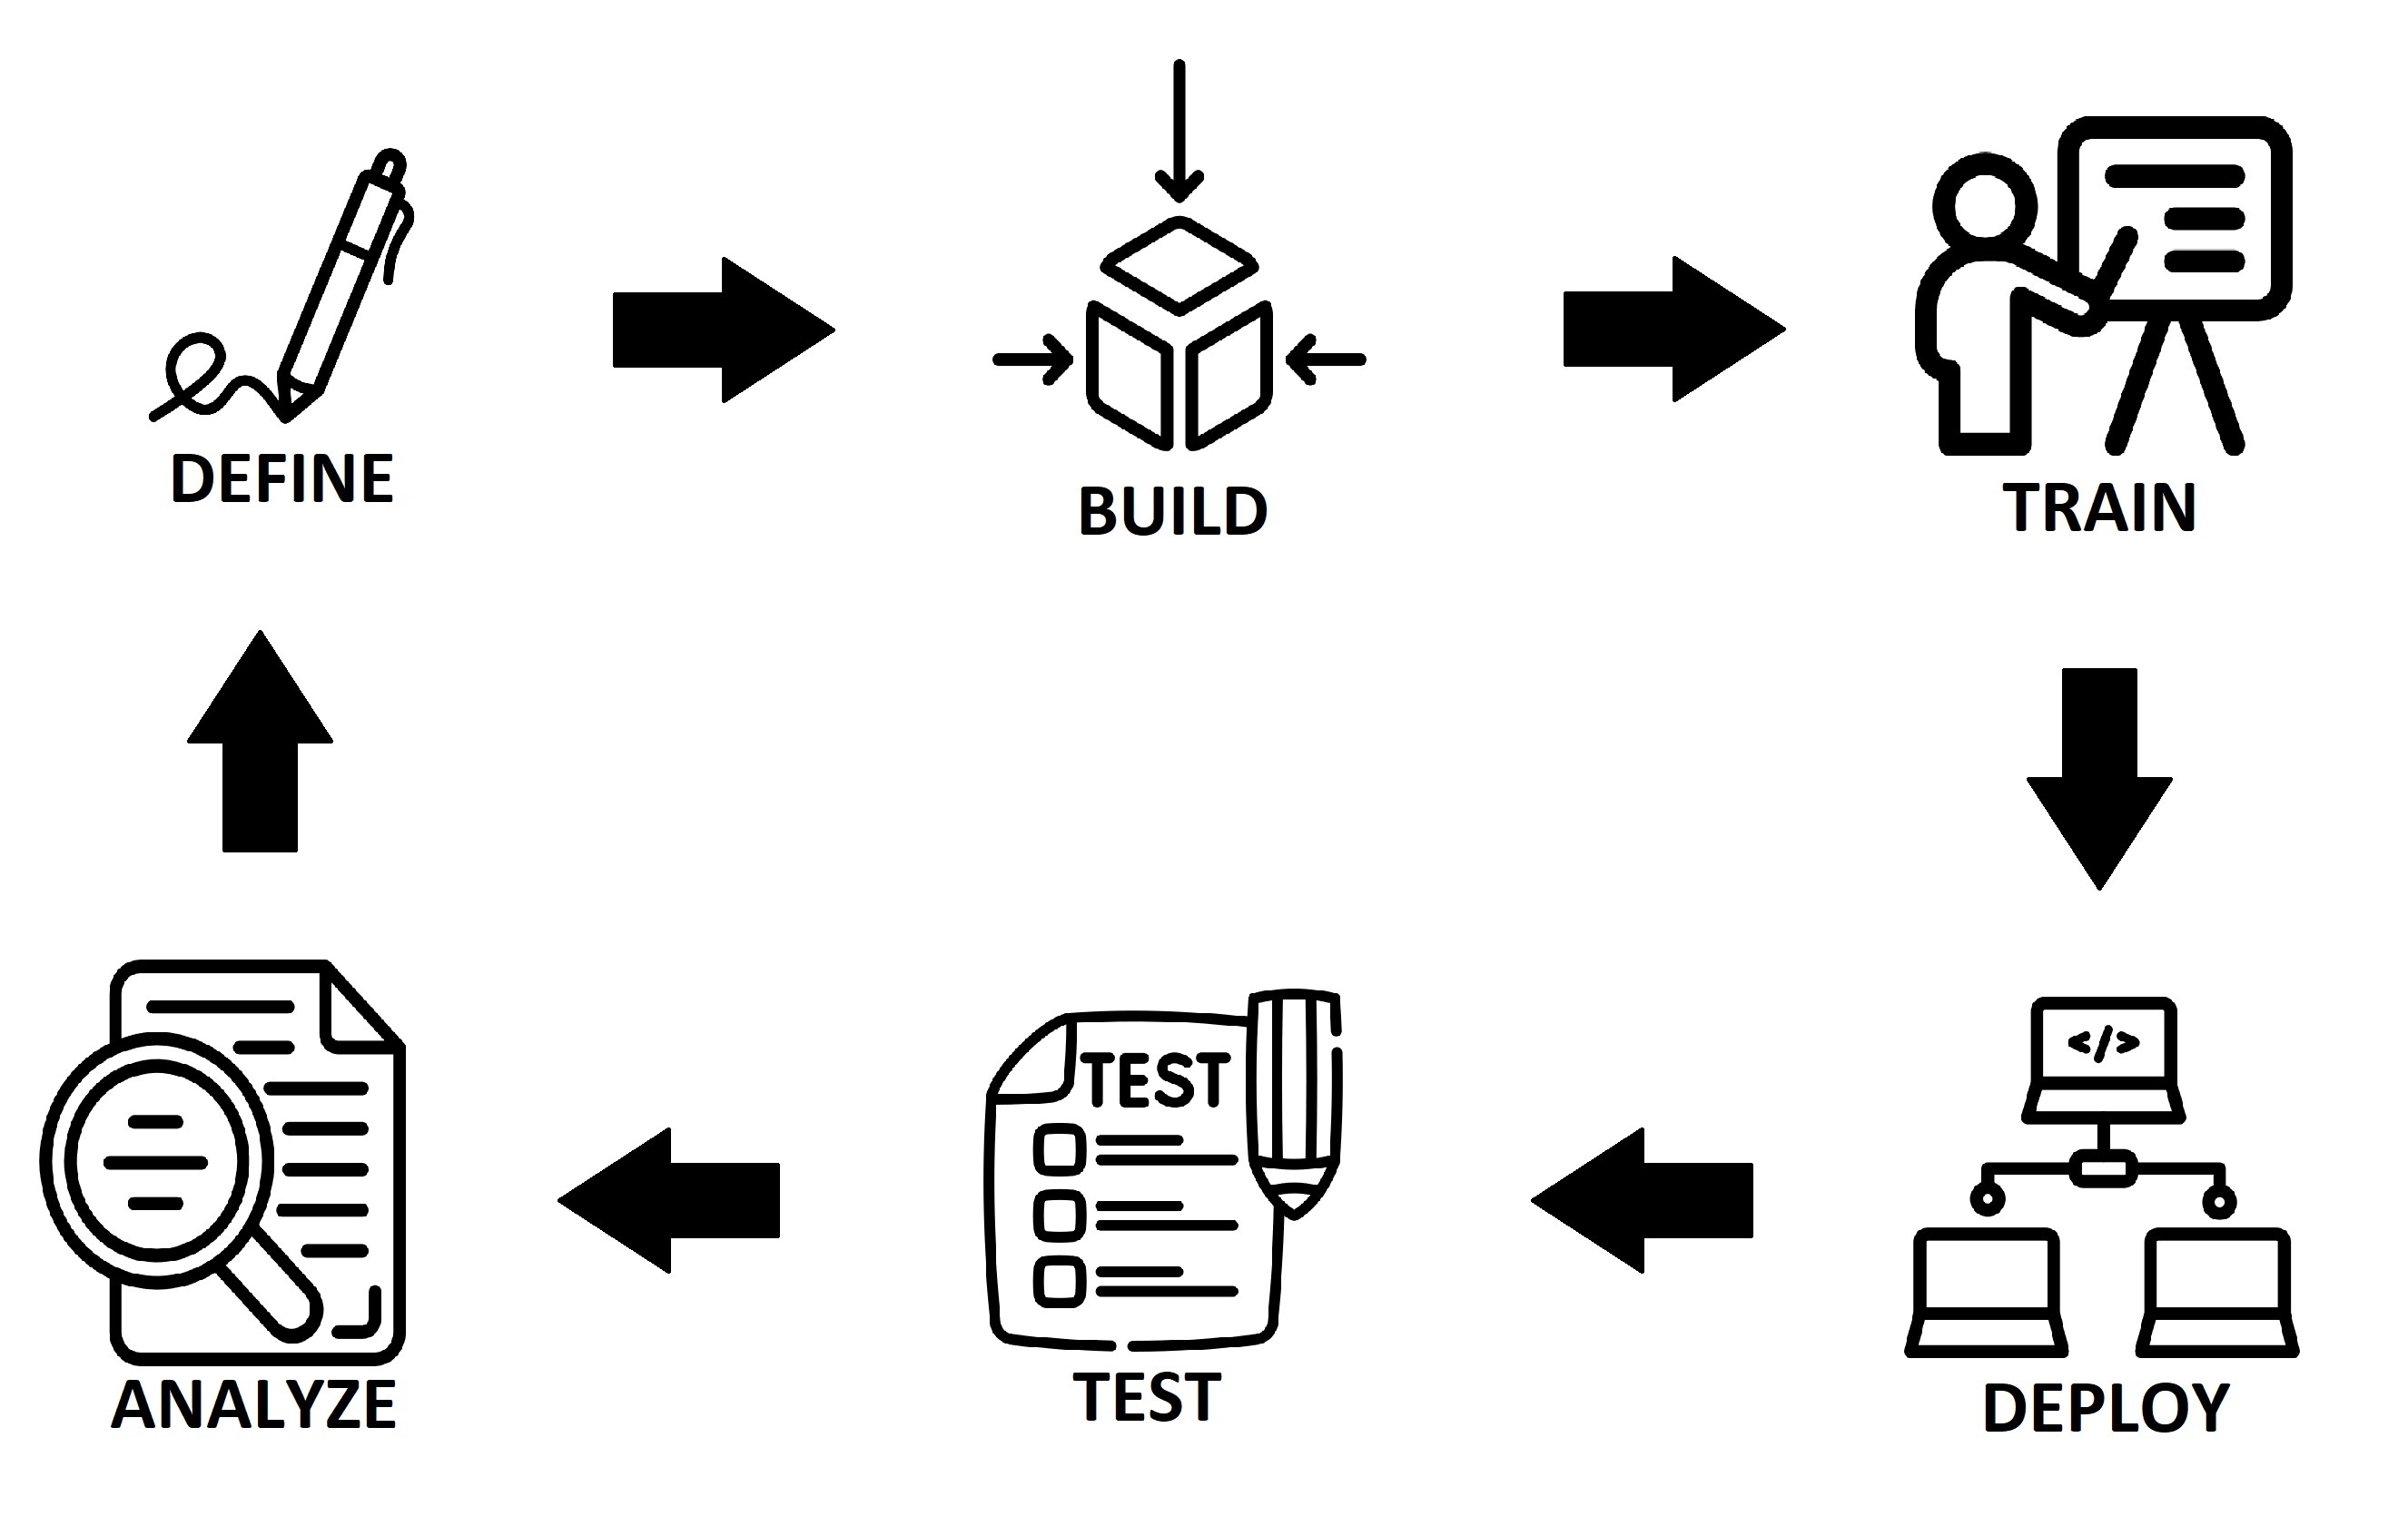
Voila, all steps in building and deploying your bot are done. It's time to revisit our first process diagram.

We are at the last leg now. I know that your bot would have scored 10/10 in your testing phase but did you make the best bot? NO! Your bot will learn by analyzing conversations and keeps getting smarter over time. To do this type of analysis, Haptik offers an Analytics tool called - Intelligent Analytics. You can proceed to read the next article to learn about it more.
