Business Operational Hours
Learn how to set up business hours on Smart Agent Chat

Written by Product Team
Updated on April 8th, 2024
- Getting Started
- Bot Building
- Smart Agent Chat
- Conversation Design
-
Developer Guides
Code Step Integration Static Step Integration Shopify Integration SETU Integration Exotel Integration CIBIL integration Freshdesk KMS Integration PayU Integration Zendesk Guide Integration Twilio Integration Razorpay Integration LeadSquared Integration USU(Unymira) Integration Helo(VivaConnect) Integration Salesforce KMS Integration Stripe Integration PayPal Integration CleverTap Integration Fynd Integration HubSpot Integration Magento Integration WooCommerce Integration Microsoft Dynamics 365 Integration
- Deployment
- External Agent Tool Setup
- Analytics & Reporting
- Notifications
- Commerce Plus
- Troubleshooting Guides
- Release Notes
Table of Contents
Businesses often have specific operational hours when their customer support agents are available to assist customers. This document will guide you through the process of setting up business hours for your account, ensuring a seamless experience for both your customers, and your agents.
Why Set Up Business Hours?
Setting up business hours is crucial for the following reasons:
- Improve User Experience: It allows you to manage incoming customer queries efficiently by ensuring they are addressed during your business hours.
- Prevent Miscommunication: It eliminates the confusion that can arise when customers try to contact your business outside of your operational hours.
- Maintain Service Level Agreements (SLAs): It helps in accurately tracking SLAs by ensuring that chats are assigned to agents only during their business hours.
- Enable Automation: You can set up automated "away" messages to inform customers when your team is unavailable.
- Optimize Workforce: You can analyse traffic trends during non-business hours to allocate resources effectively.
How the ‘Business Hours’ feature works
-
Every Business Hours setting comprises the following fields:
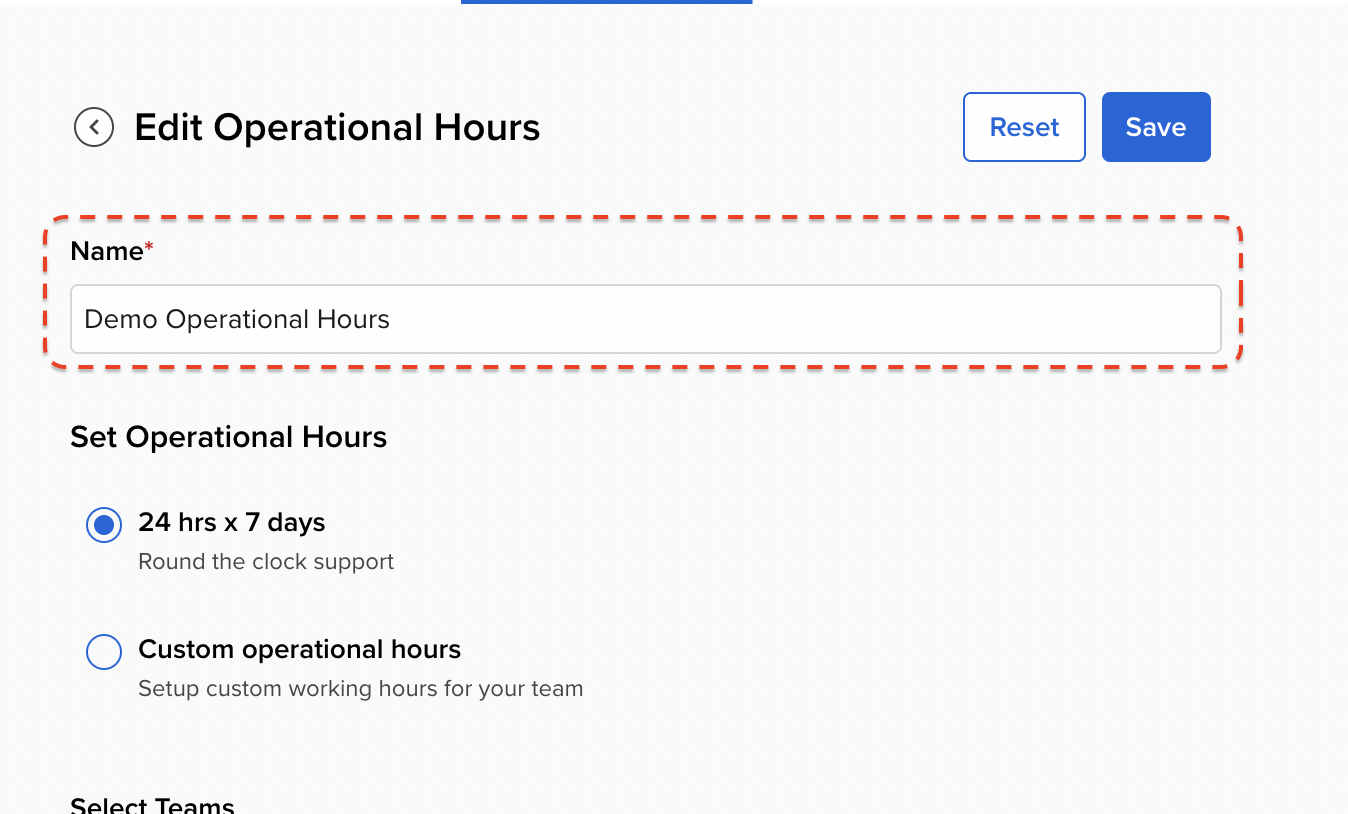
- Name: this allows you to assign a unique name for this setting (e.g., "Night Shift Hours").
- Working Days: this allows you to select the days of the week when agents are available
- Working Hours: this allows you to set the specific hours of a day when agents are available.
- Away Message: this allows you to configure a standard automated message that is sent out to any customer attempting to connect with the team during non-business hours.
- Teams: this allows you to select 1 or more Teams that these Business Hour settings must apply to.
-
By default, every account has a “Default Business Hours” setting. This is applied to all the Teams in your account that haven’t been assigned any specific custom Business Hours.
- By default, your account’s Business Hours will be set to 24/7 (i.e. round the clock support).
- You can customise your Default Business Hours setting suitably as per your requirements.
- However, the Default Business Hours cannot be assigned to any Team.
-
In addition to the default, you can also create custom Business Hours settings.
- There is no upper limit on the number of Business Hours settings you can maintain.
- Custom Business Hours settings can be assigned to either 1 or multiple Teams.
- A given Team can only be assigned a single Business Hours setting.
- In the event a custom Business Hours setting is deleted, all Teams assigned to that setting are automatically reassigned to the Default Business Hours.
How to set up Business Hours on SAC
Follow these steps to configure the business hours for your account:
Navigate to Admin Settings on your left side Navigation Pane, and click on “Operational Hours” under Team Settings.
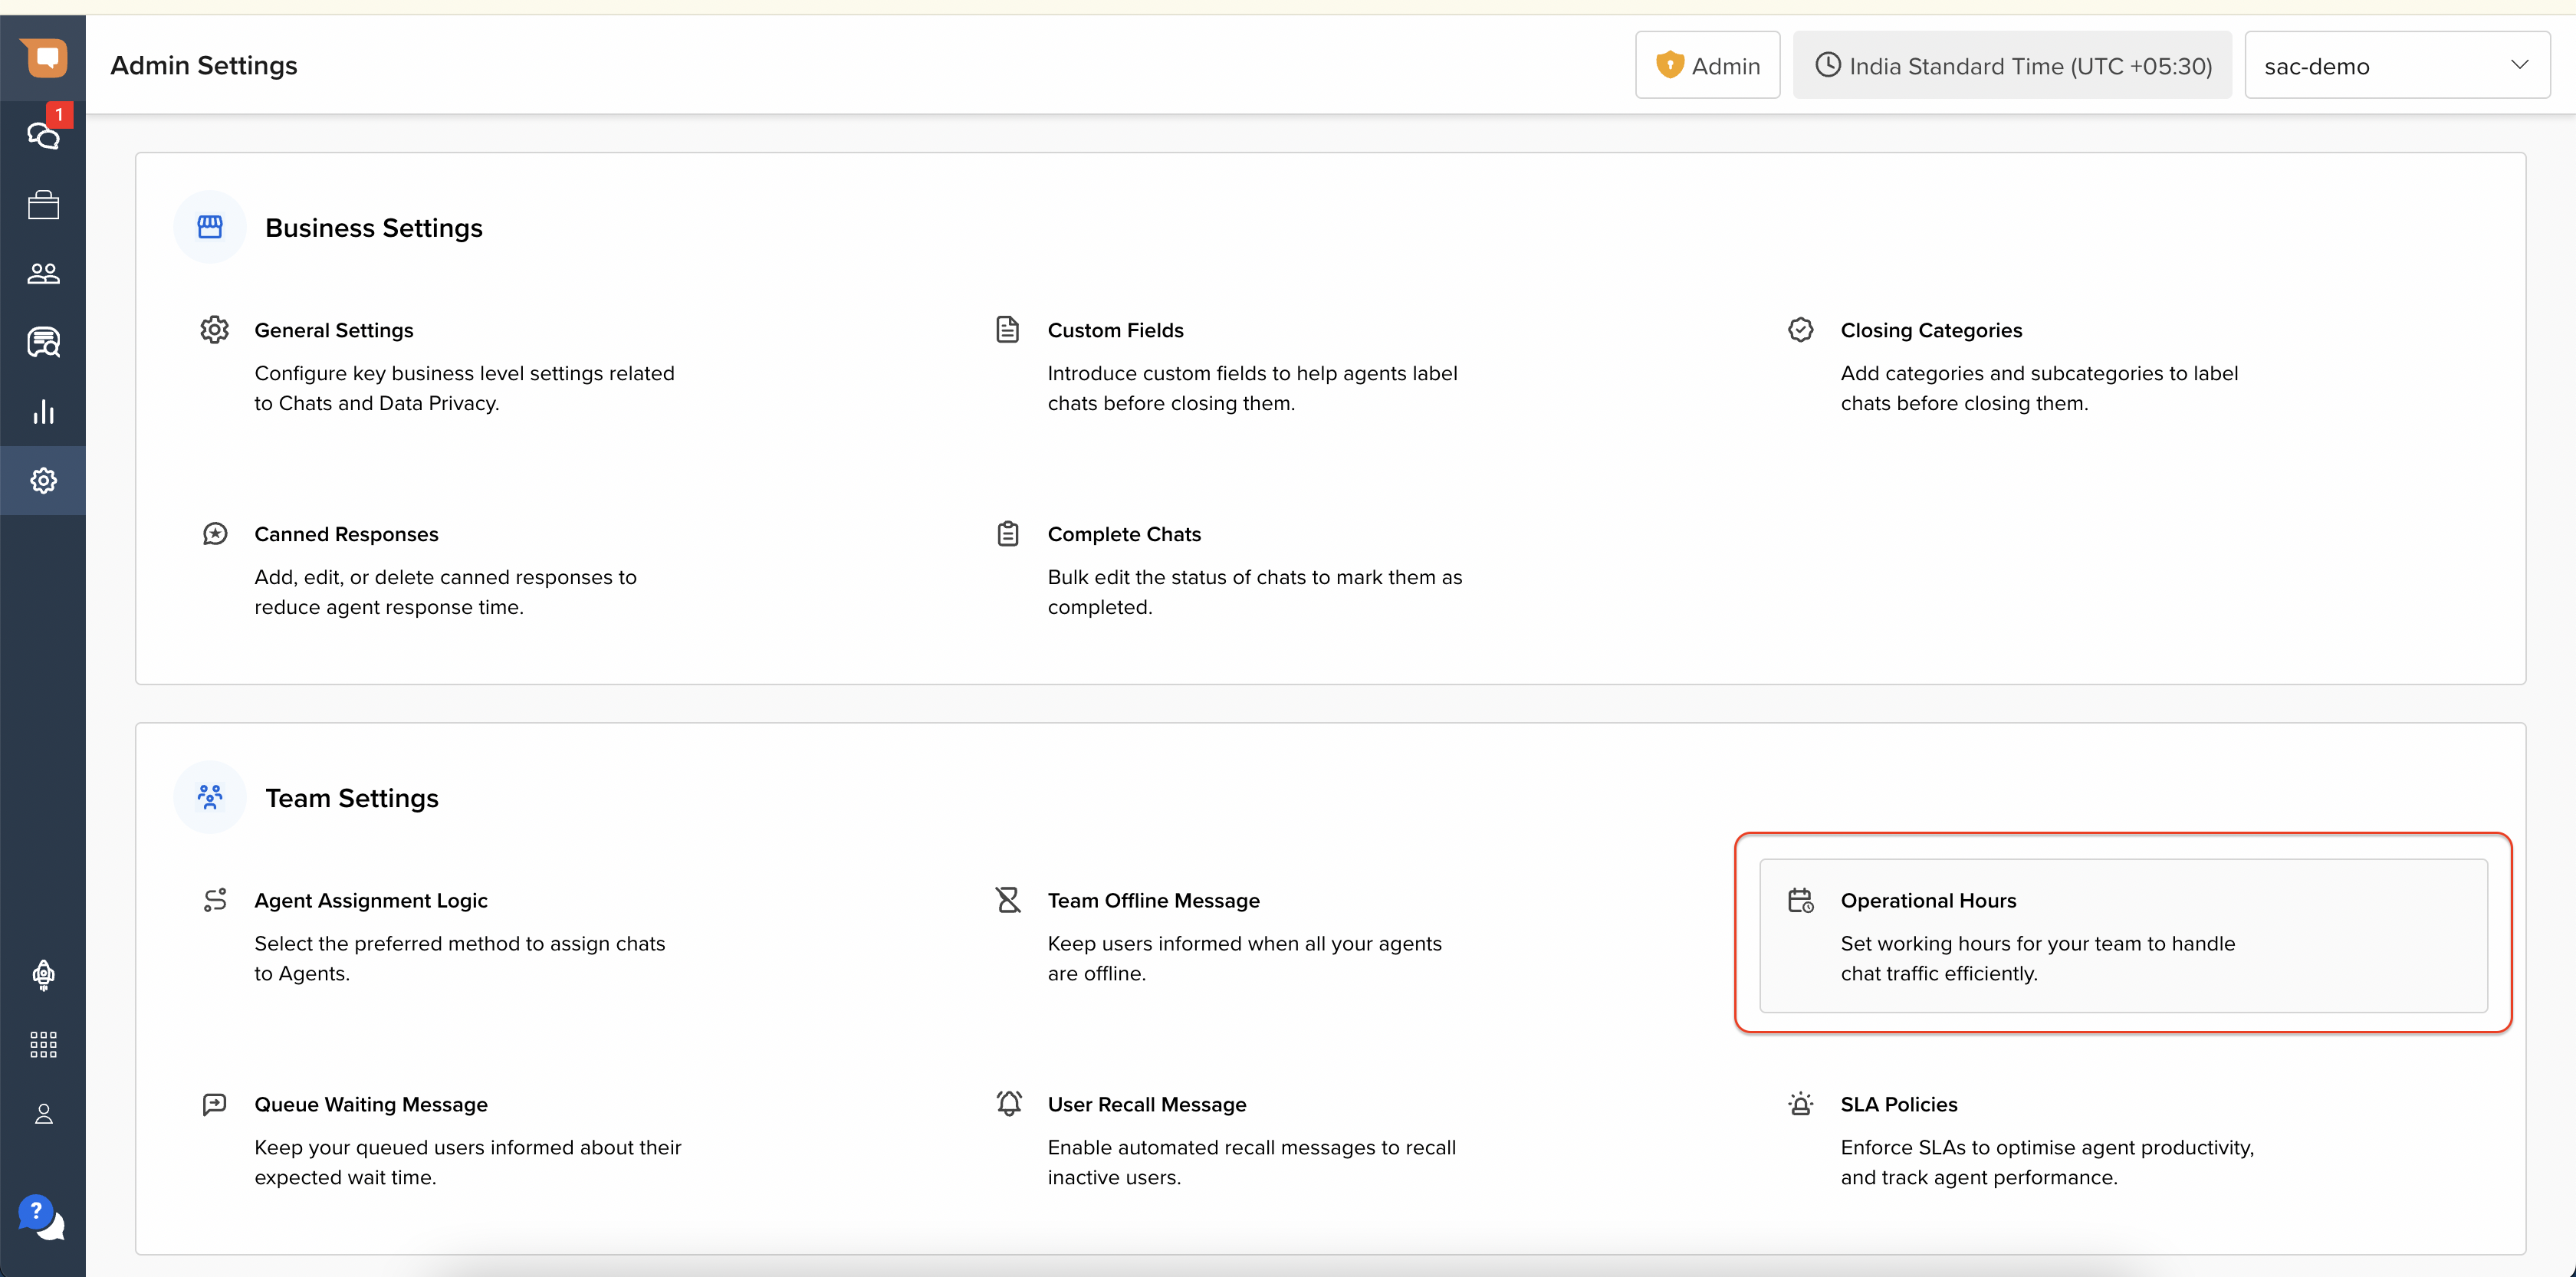
Upon clicking on this button, you will be redirected to a new screen for configure Operational Hours.
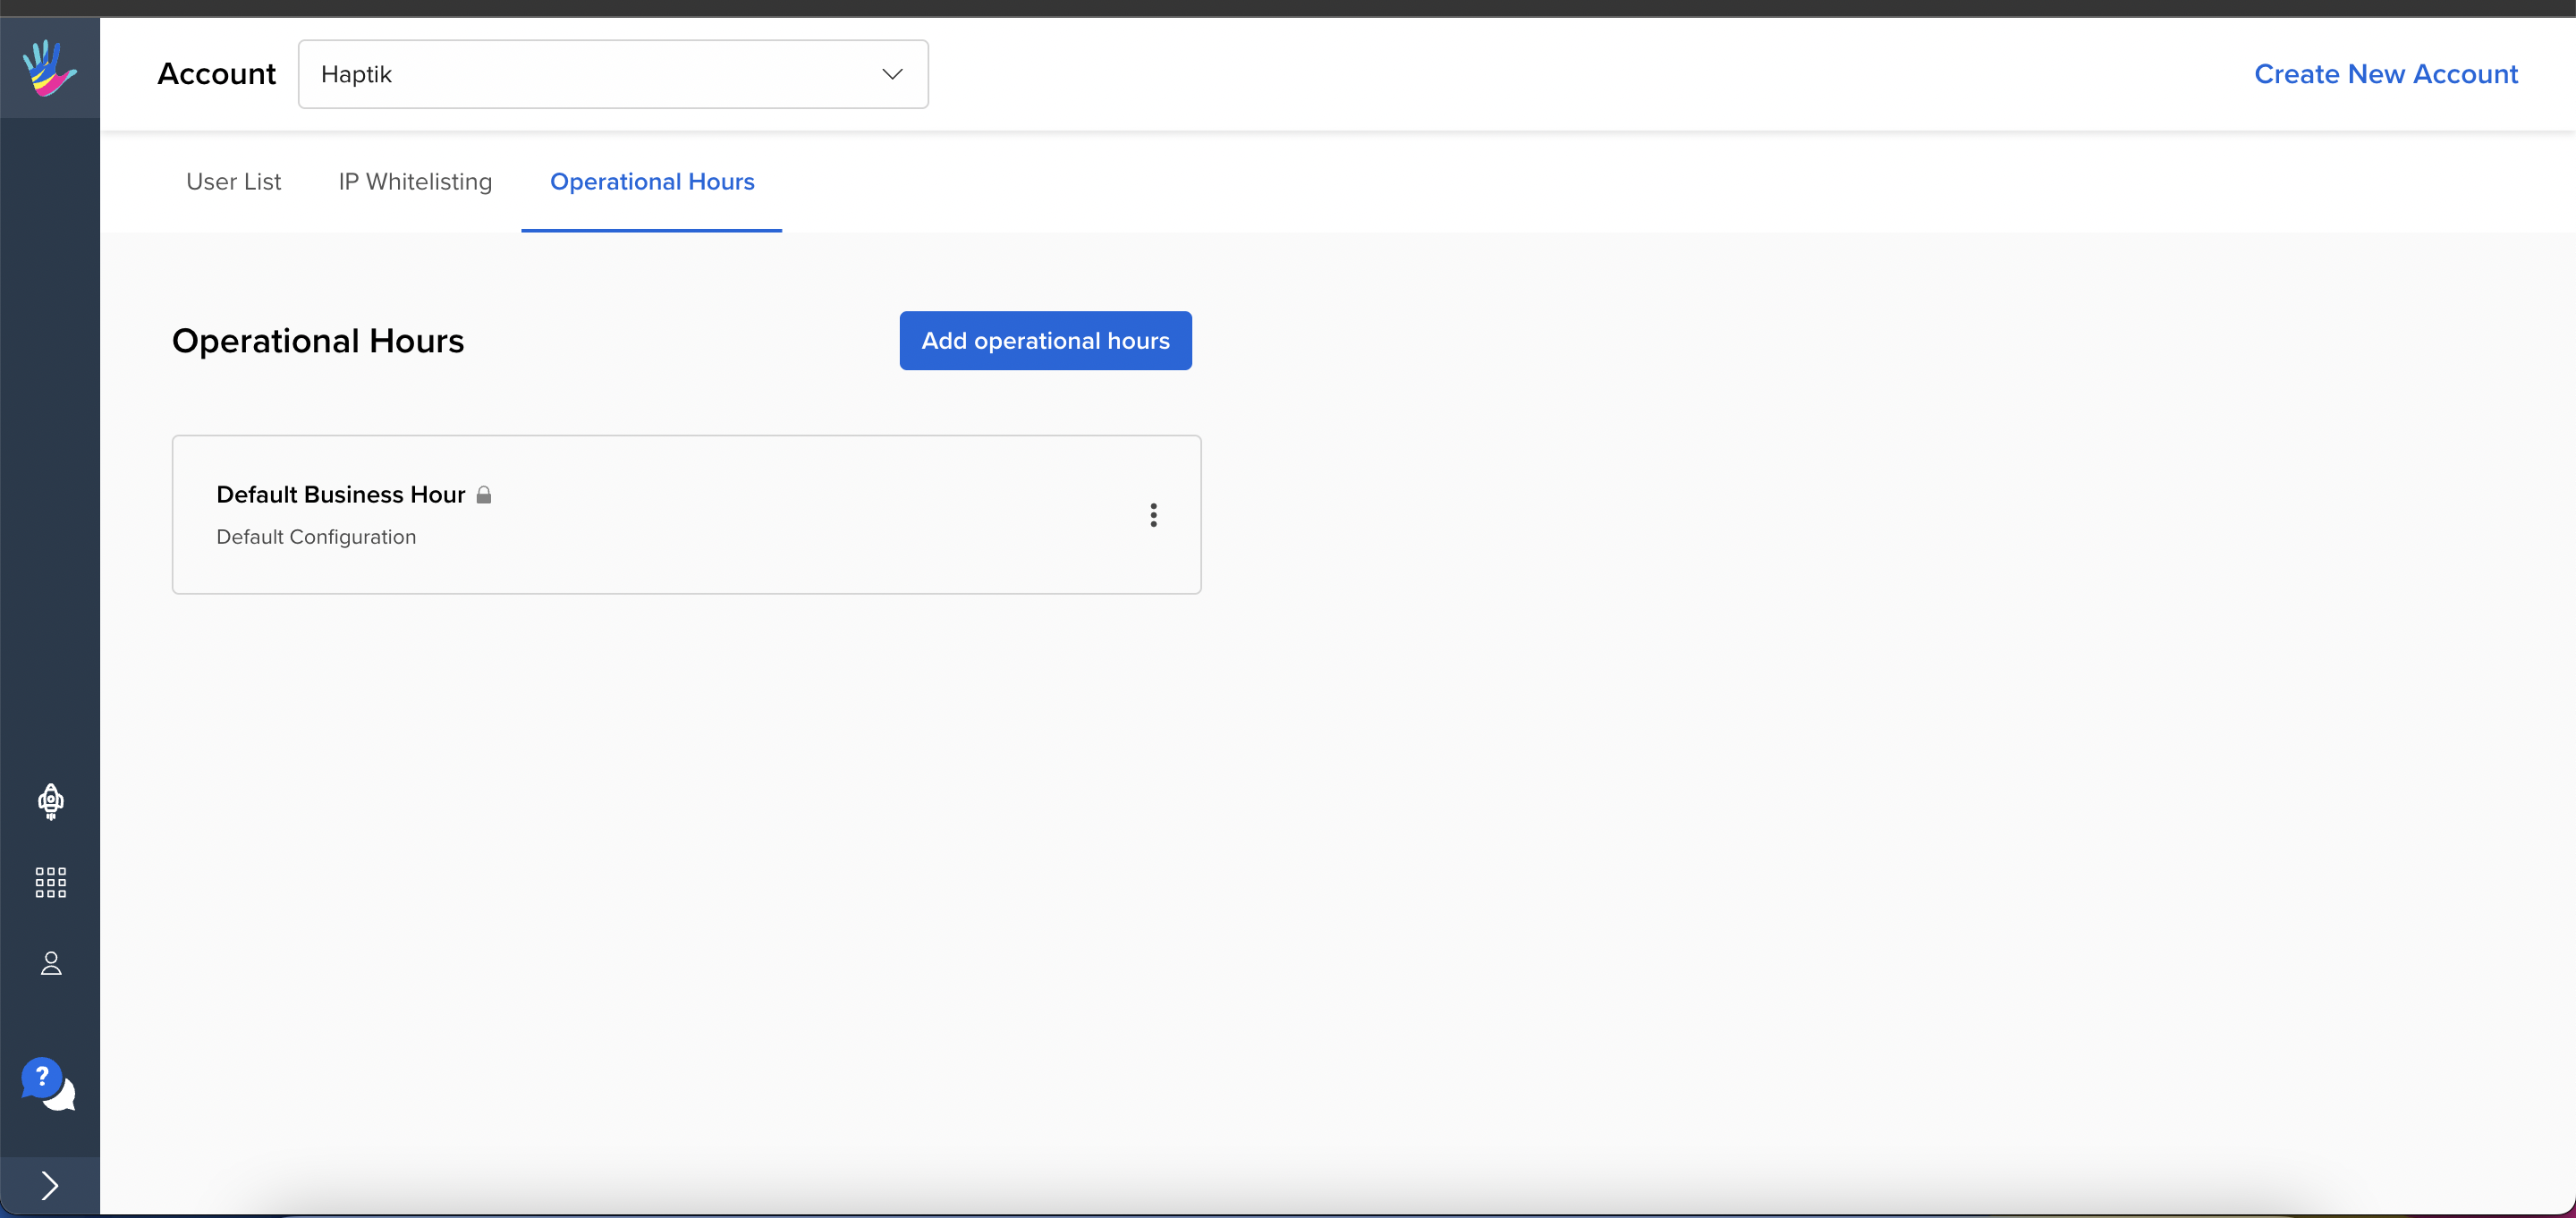
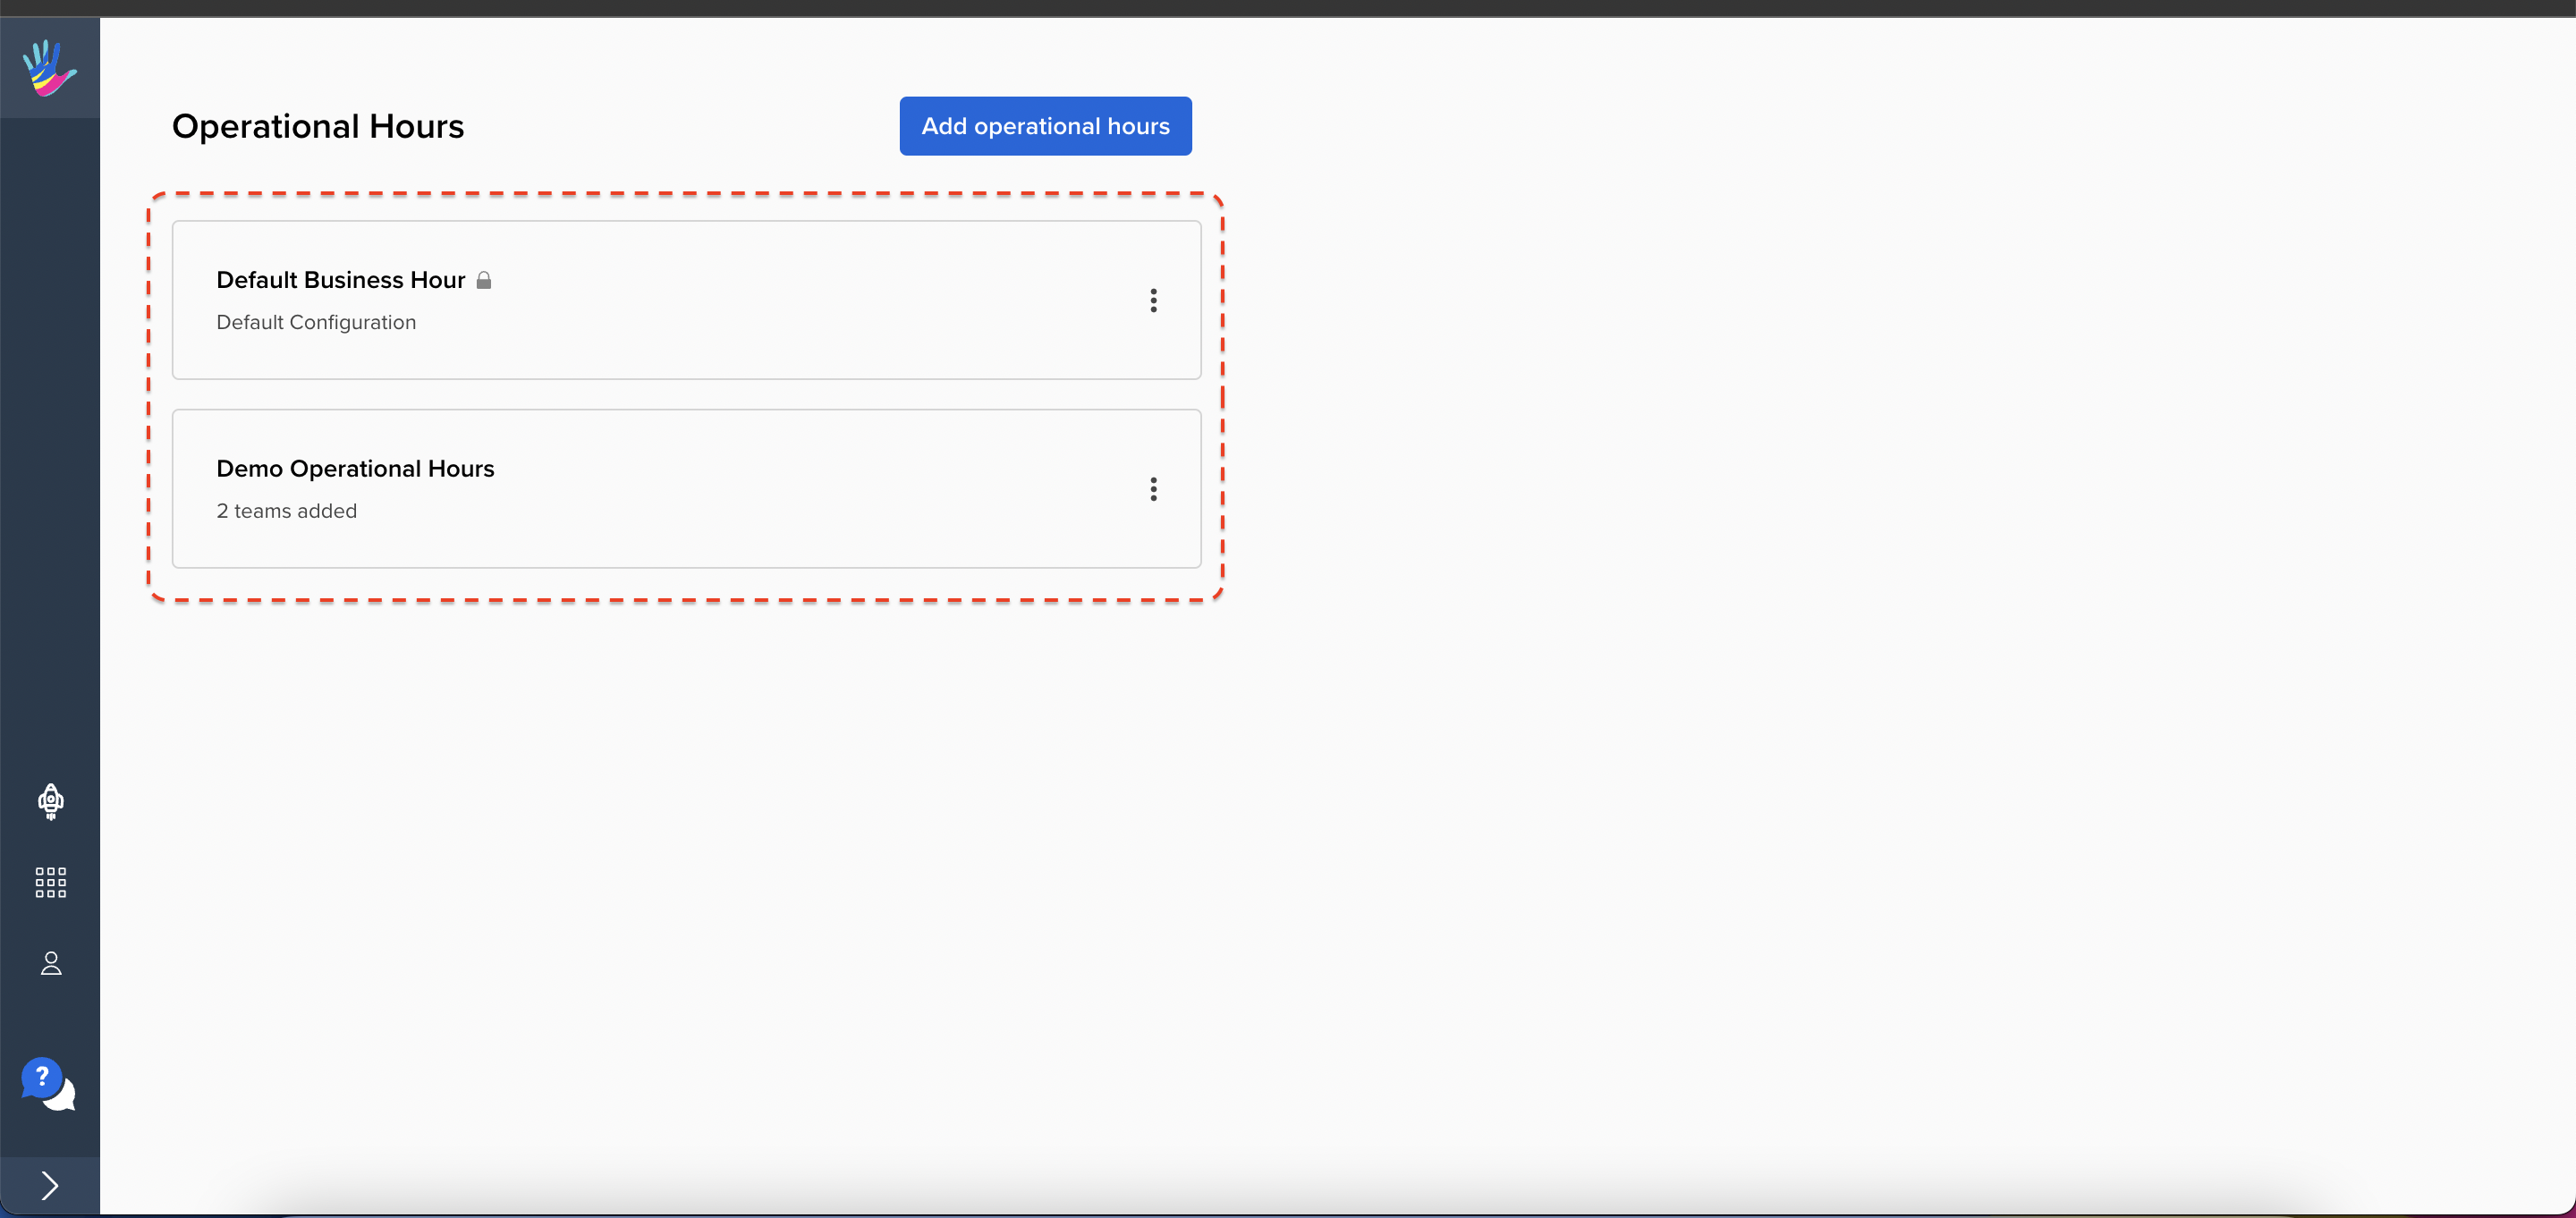
On this screen, you will find a “Default Business Hour” configuration. This is the default setting that applies to all the Teams created on your account.
- To edit this configuration, simply click on the default settings card.
- To add a custom business hours setting, click on the “Add Operational Hours” button on the top right of the screen.
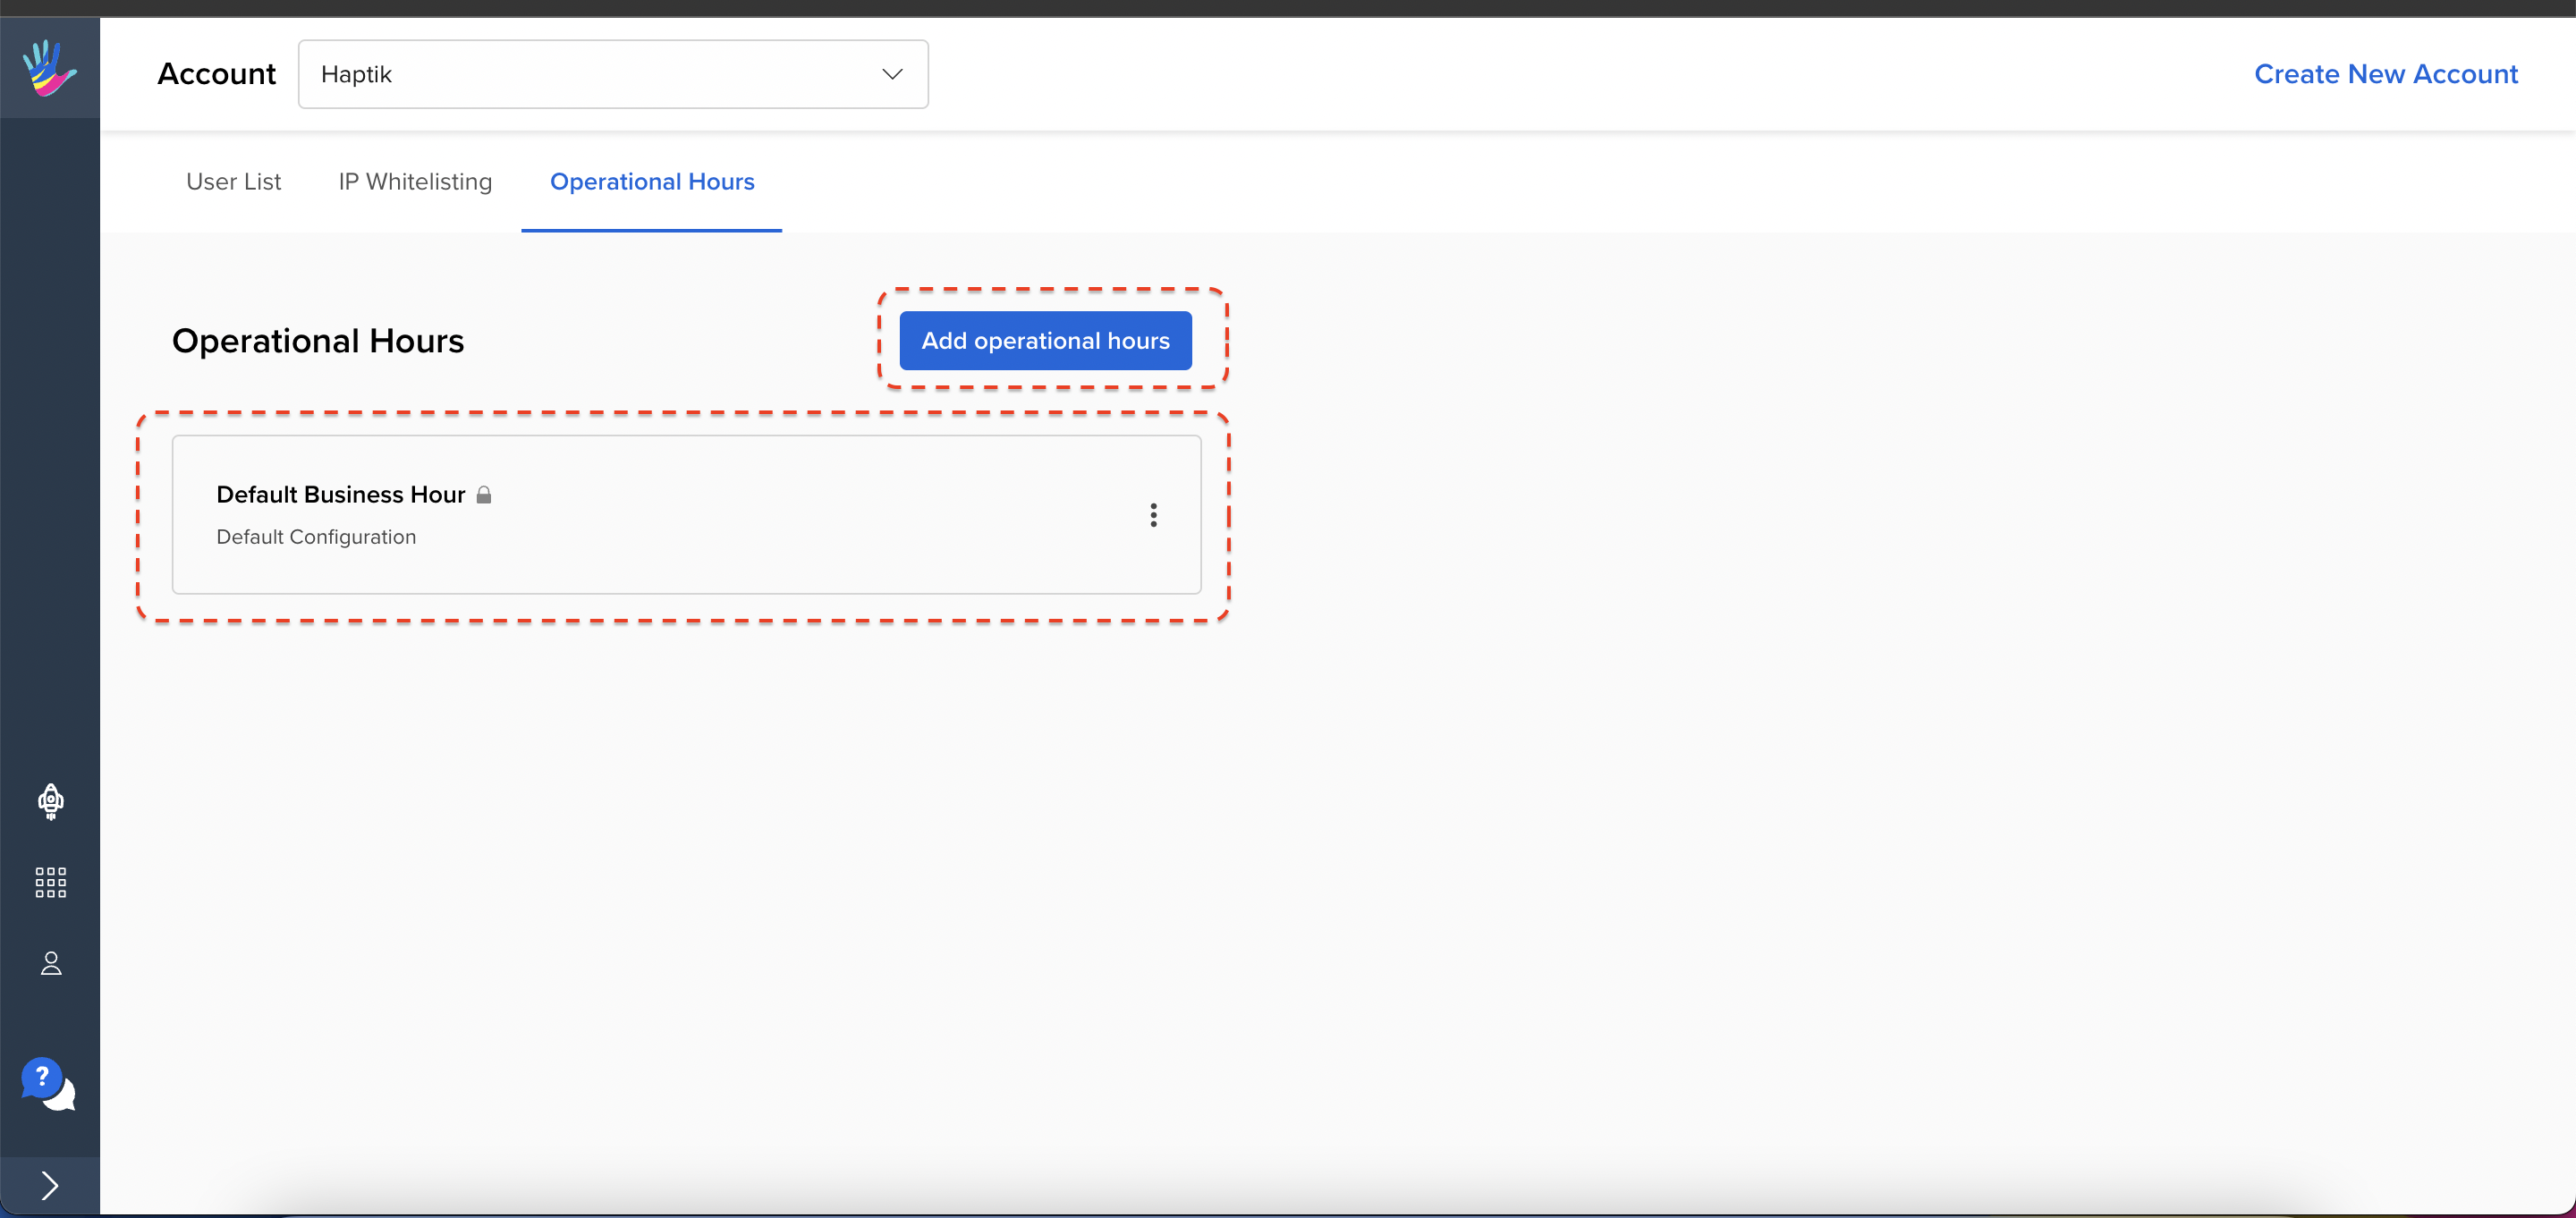
Once you choose to edit your default business hours, or add custom business hours, you will be redirected to the configuration screen.
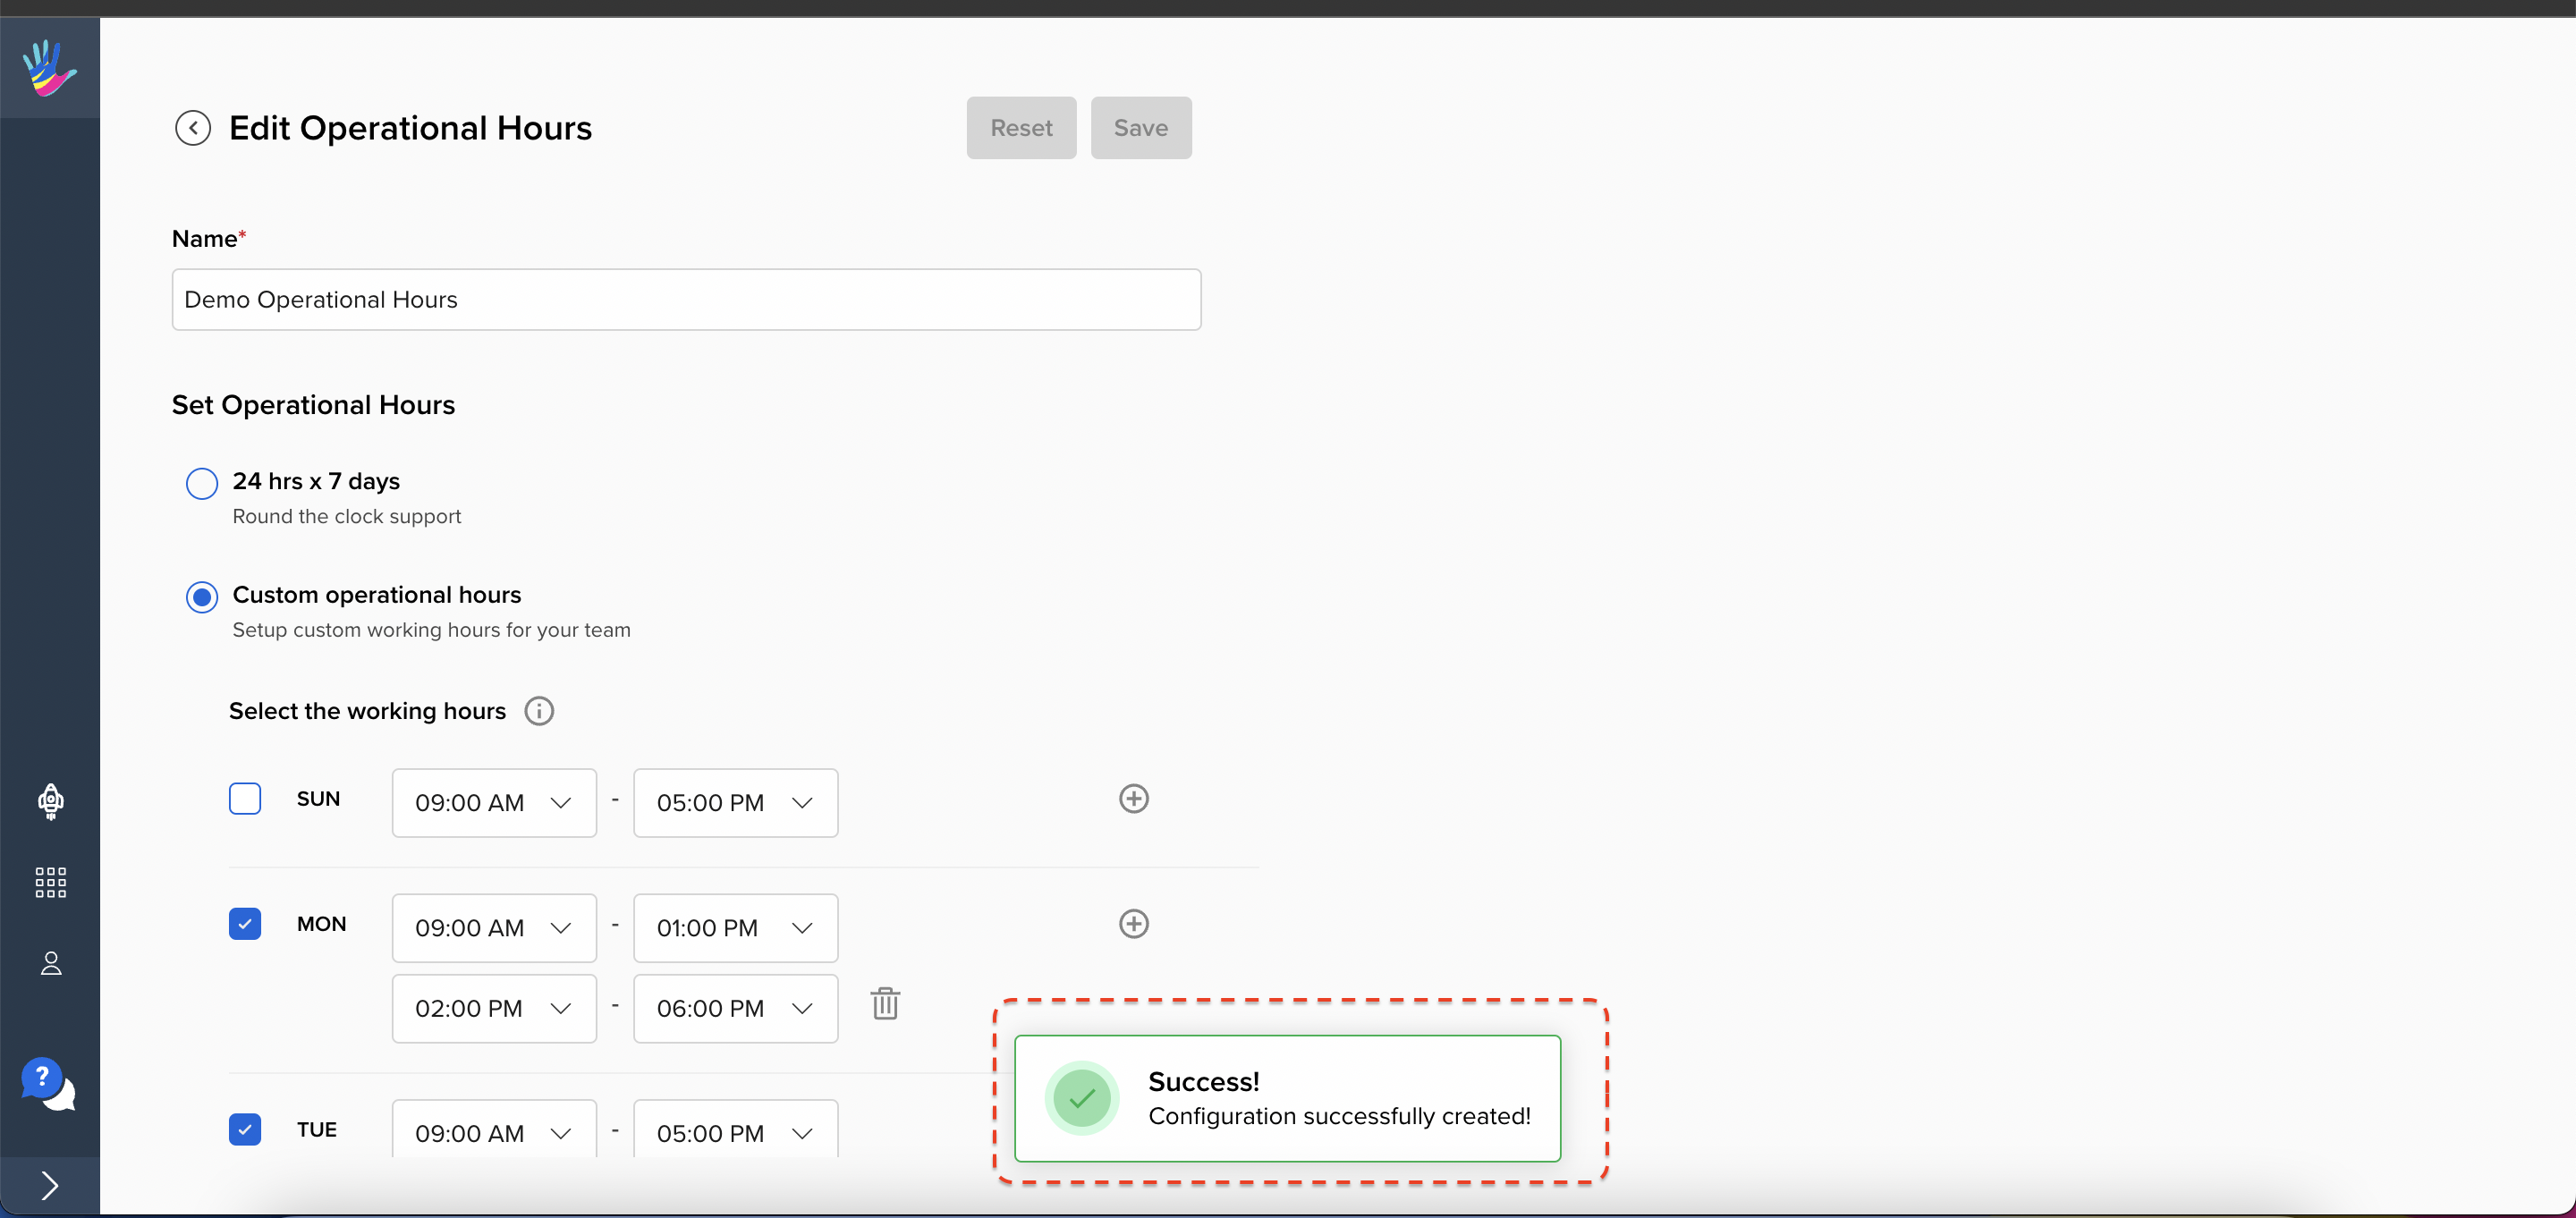
Add a name to your setting that can be used to refer to this setting by all the users in your account.
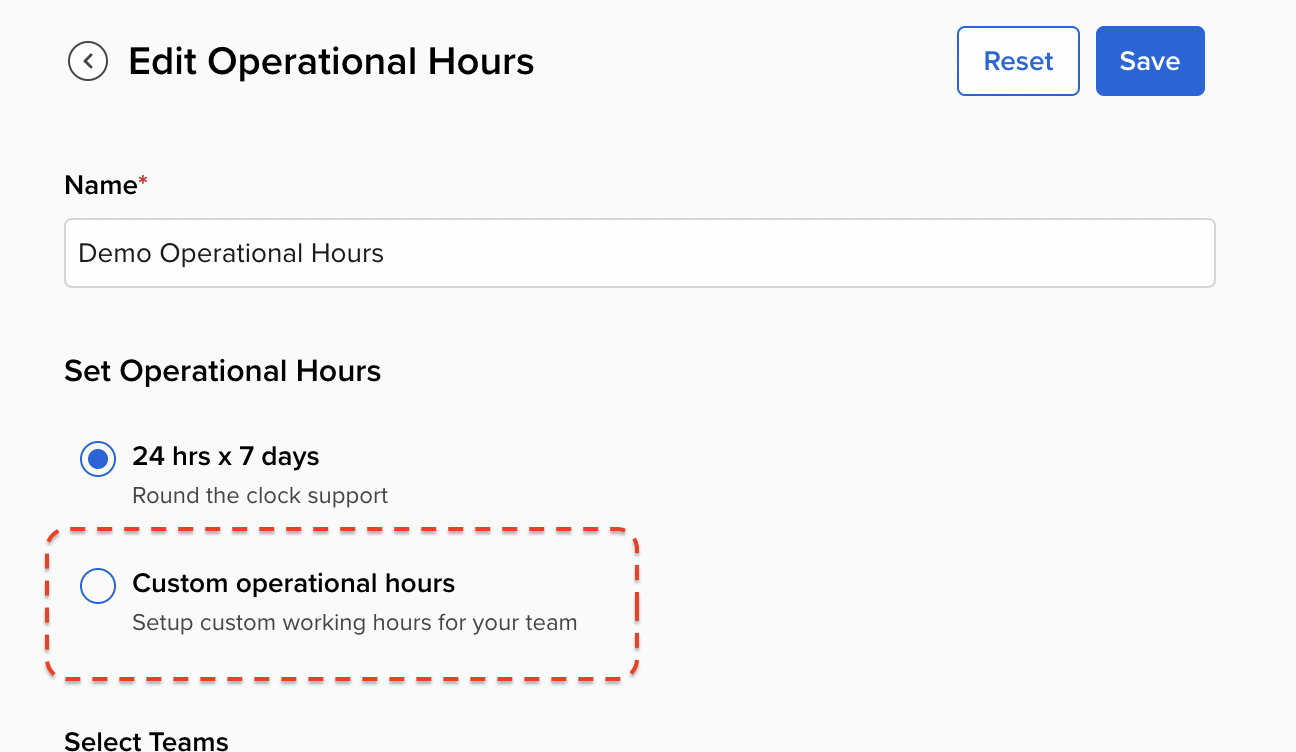
Next, in order to set the operational hours (and if you do not plan on providing 24/7 support), select the “Custom operational hours” radio button to customise your business hours.
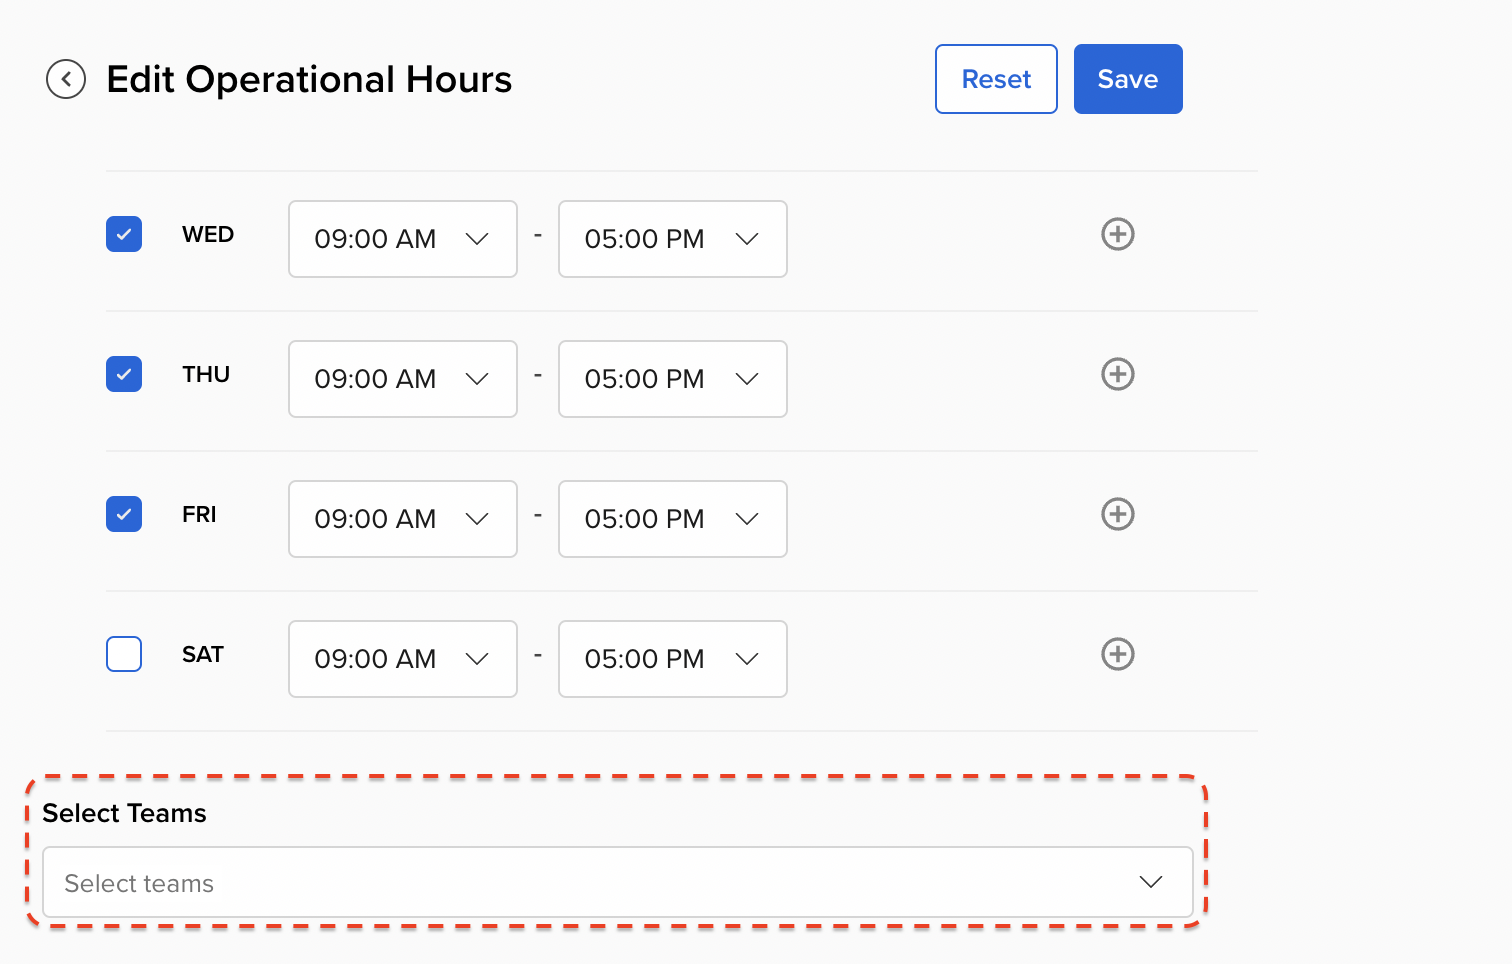
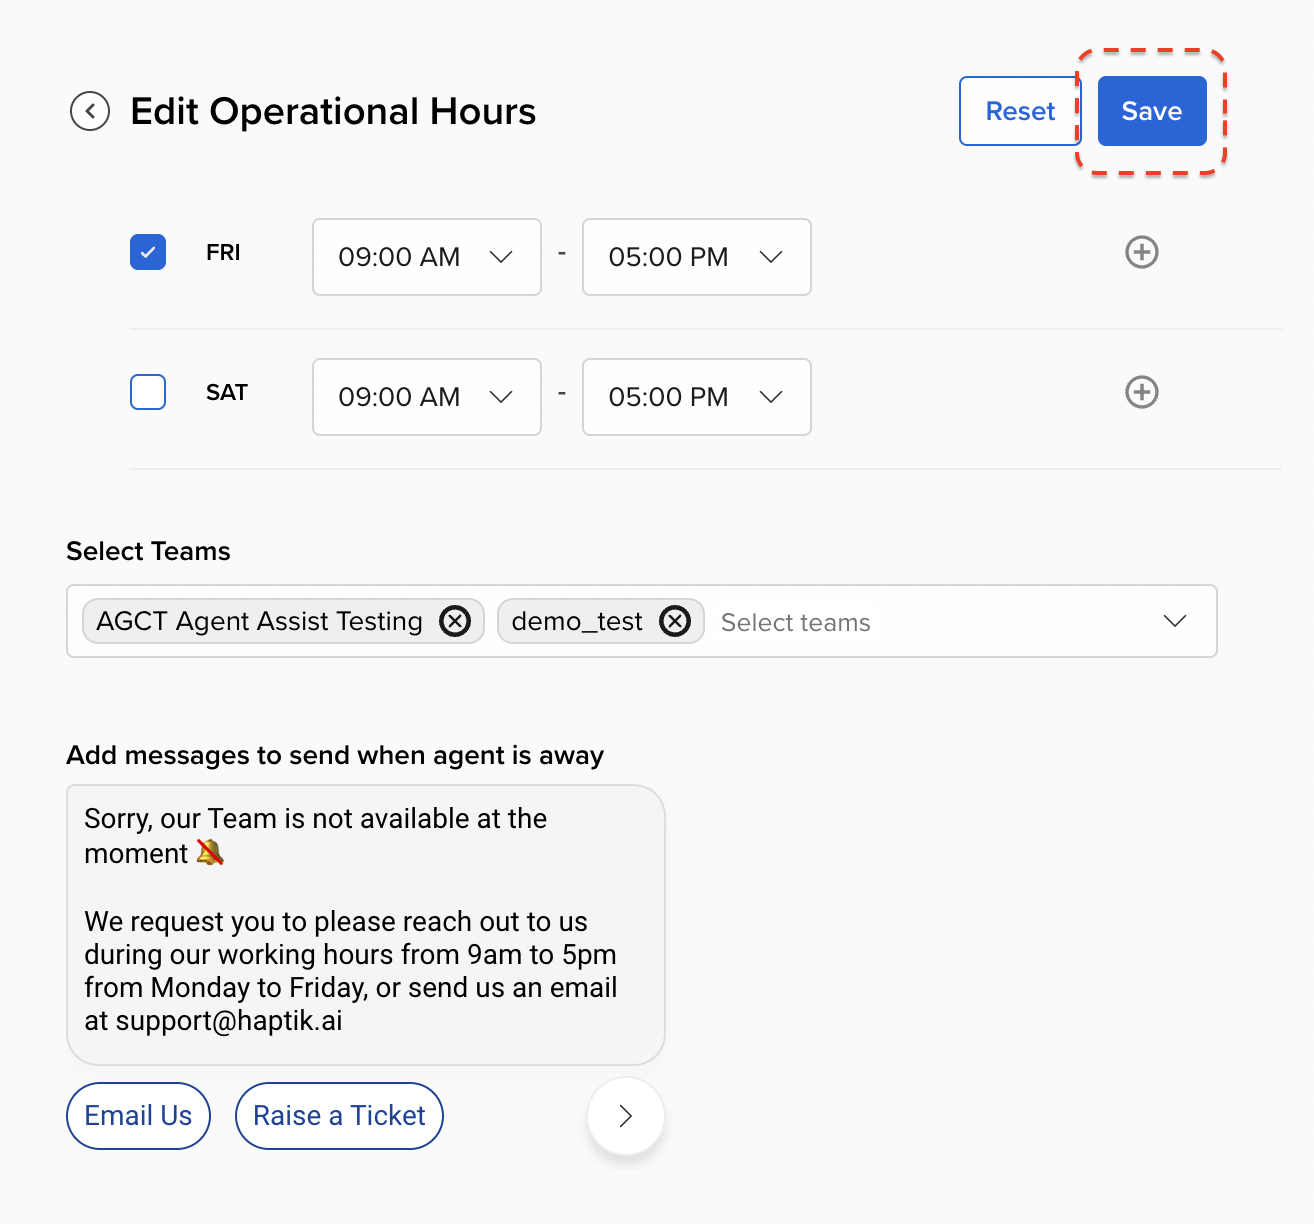
Select the days of the week when your agents are available by clicking on the relevant checkboxes. It is mandatory to select at last 1 of the days.
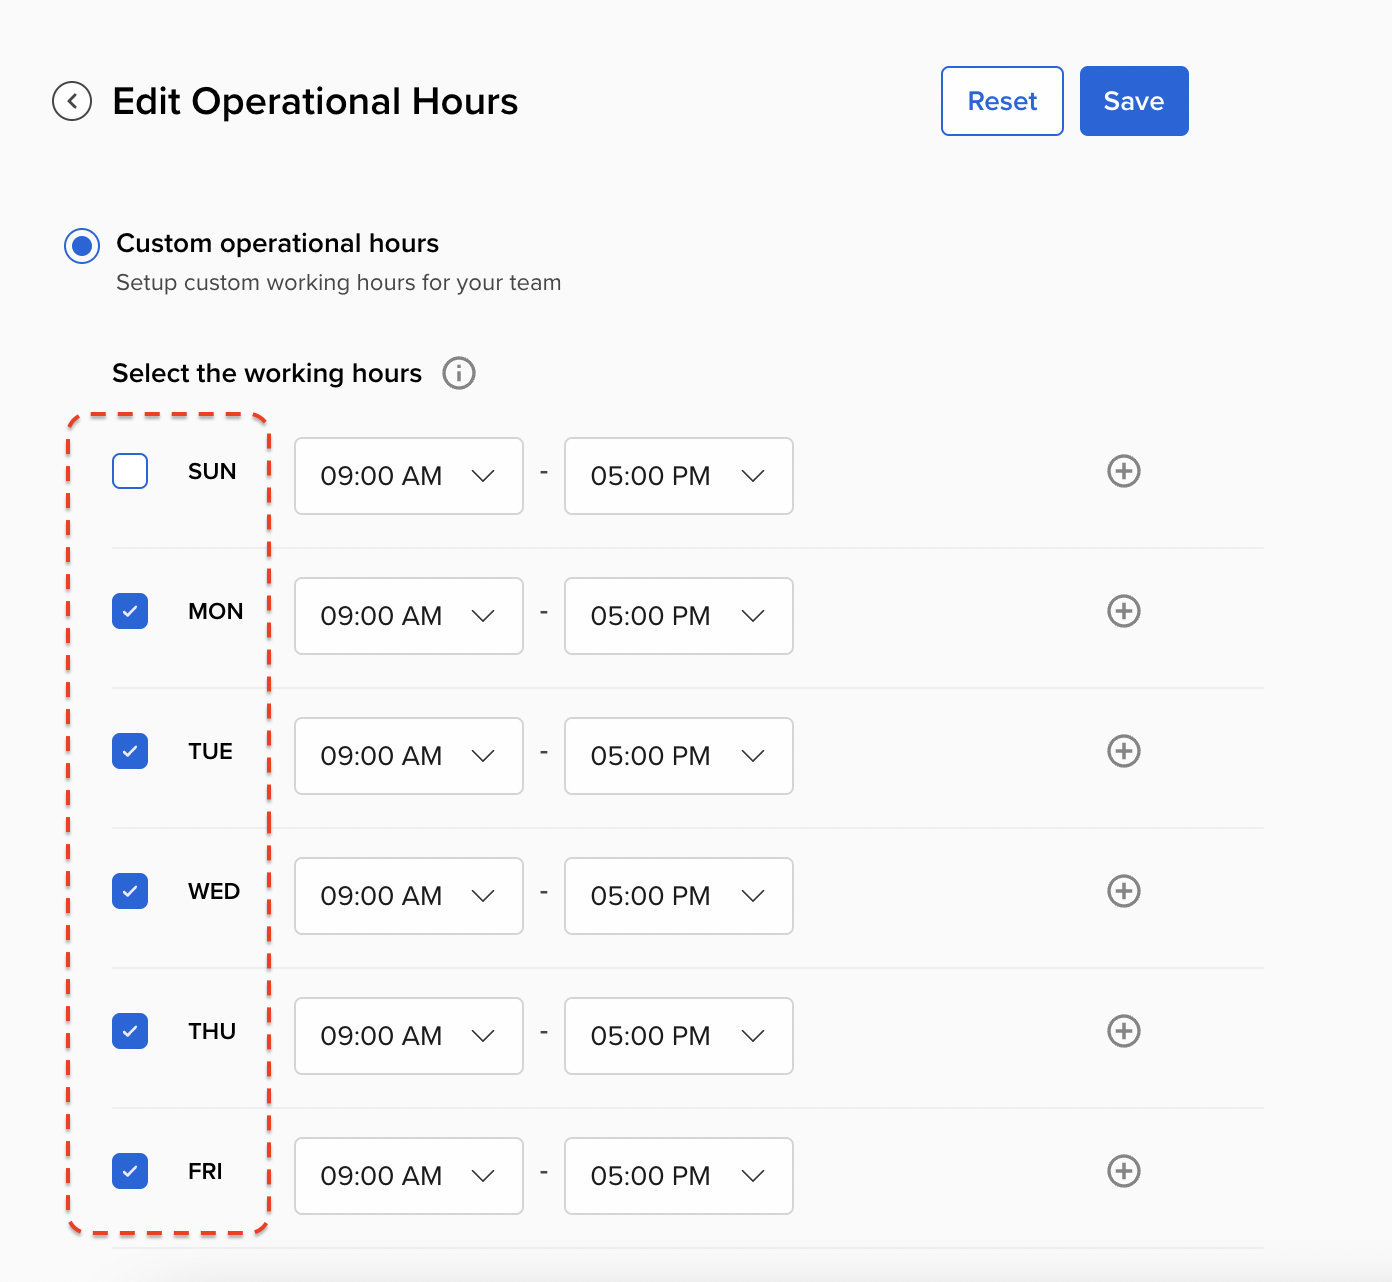
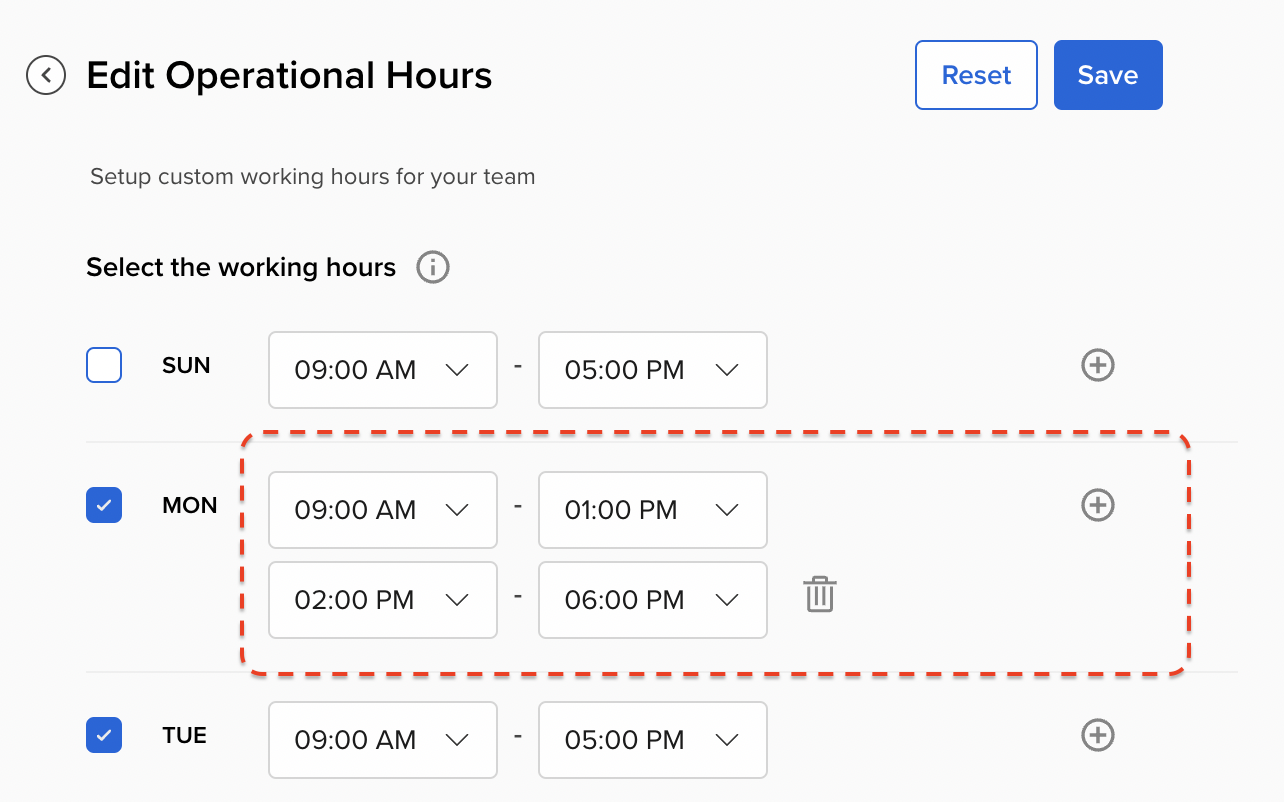
For a given day, add 1 or multiple shifts as applicable for your agents. For any available days, it is mandatory to configure at least 1 time range. The minimum shift time, and all shift increments, are set to 15 minutes.
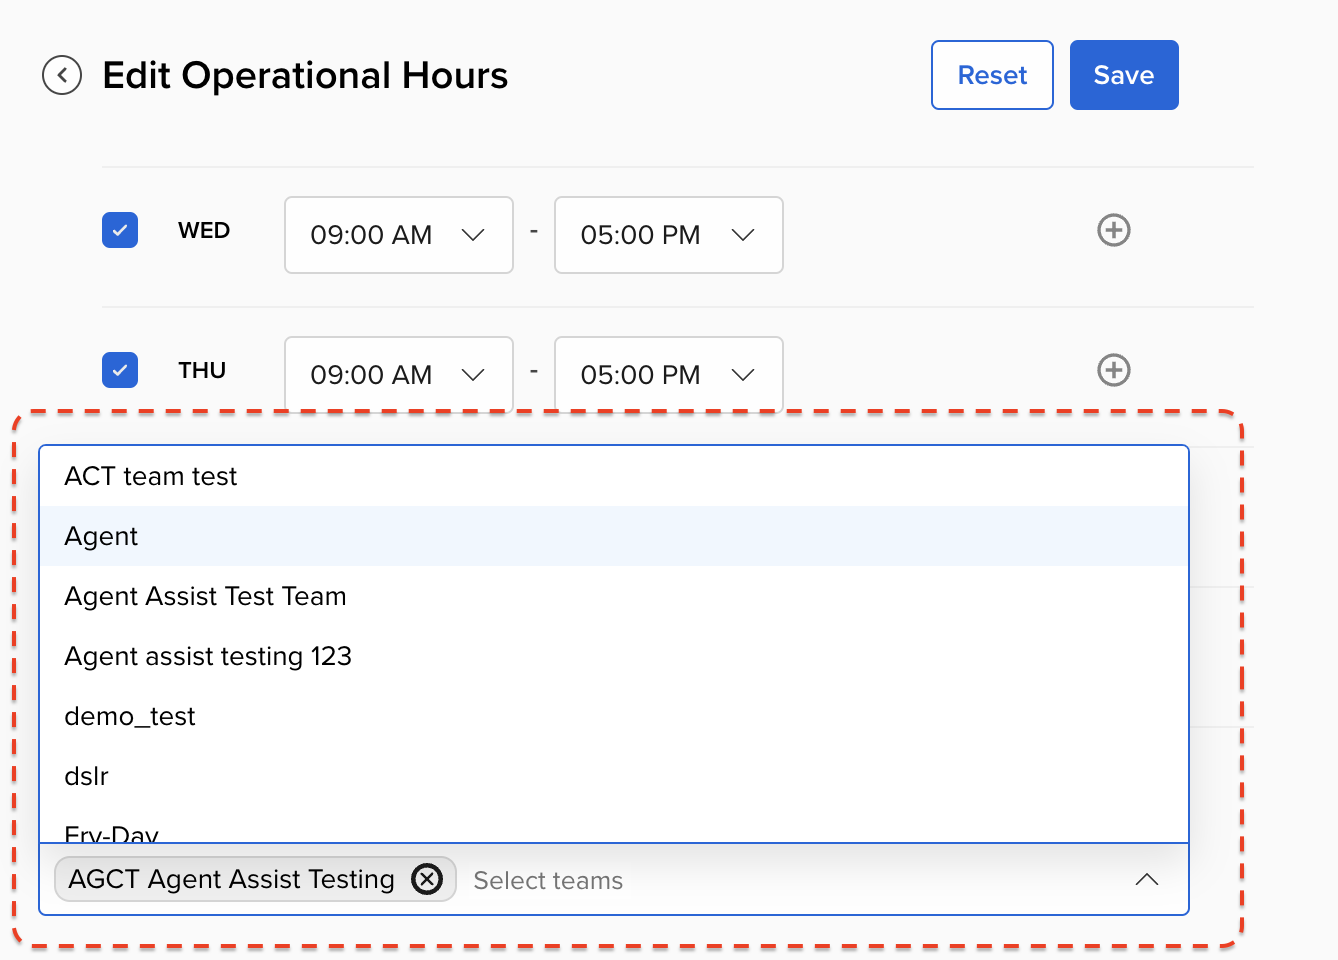
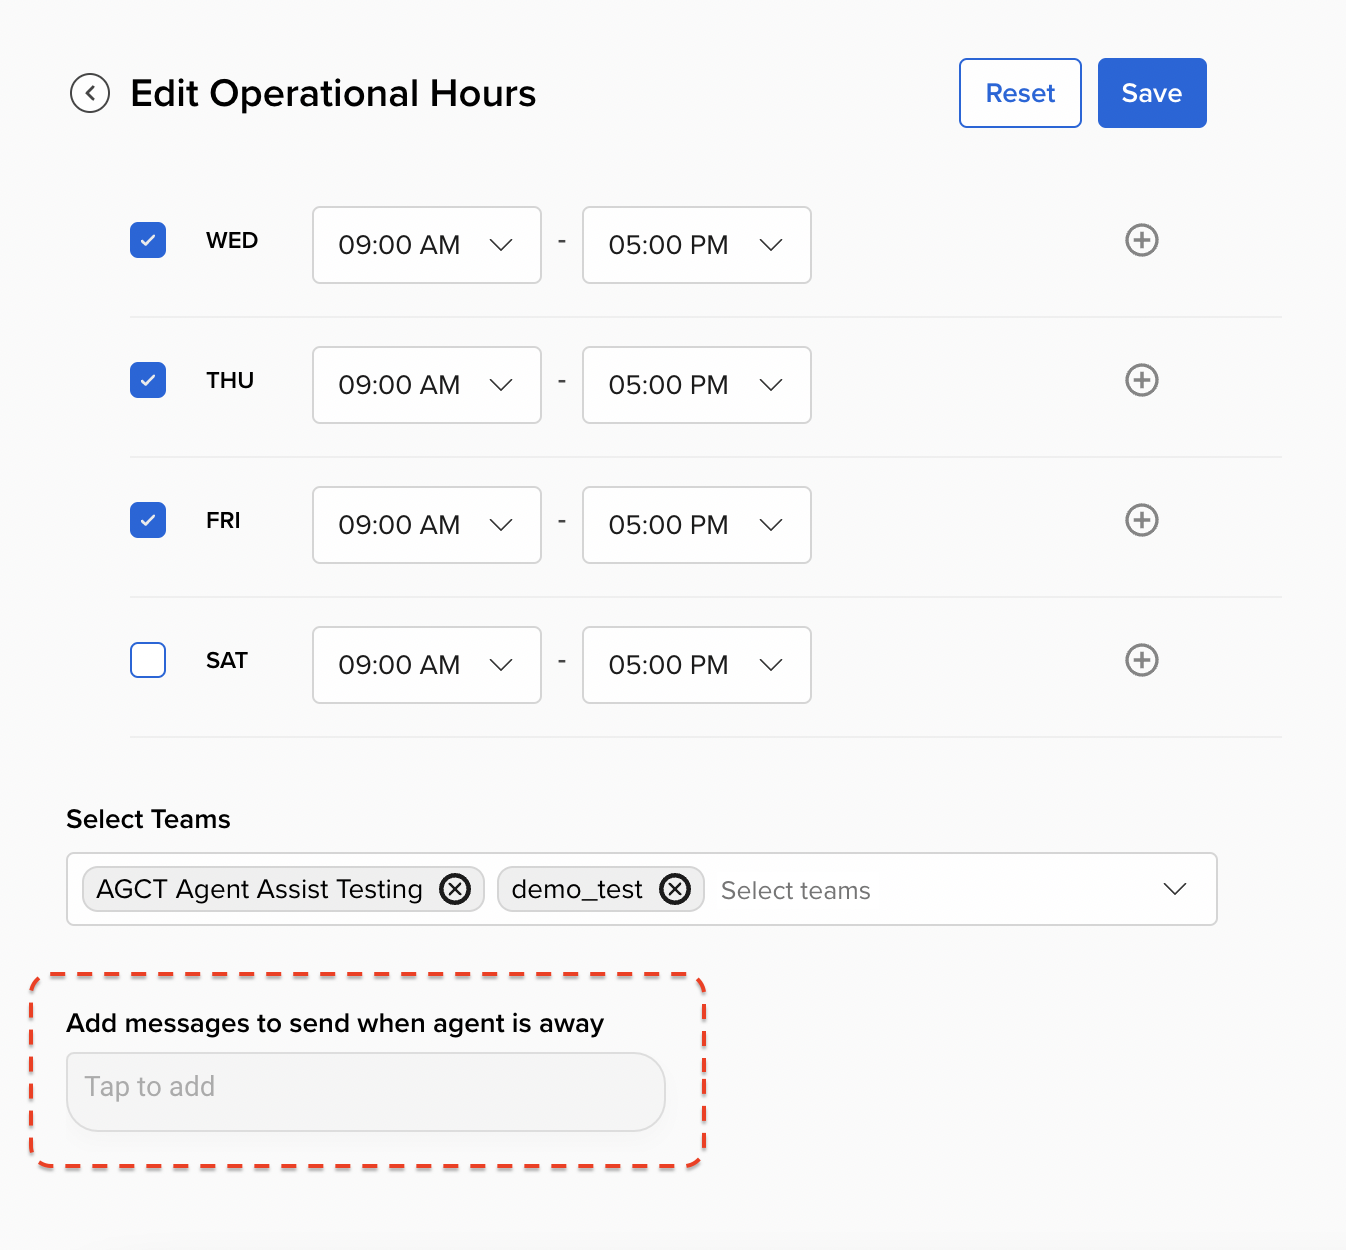
Once the days and hours are assigned, select the Team(s) that you wish to assign these business hours settings using the “Select Teams” drop down.
You can select either one, or multiple Teams, for a given business hours setting. However, if a Team has already been assigned a different setting, that team’s name will not appear in your drop down.
Lastly, to configure the message that is sent to customers attempting to reach your agents outside of operational hours, click on the “Tap to Add” button at the bottom of the screen.
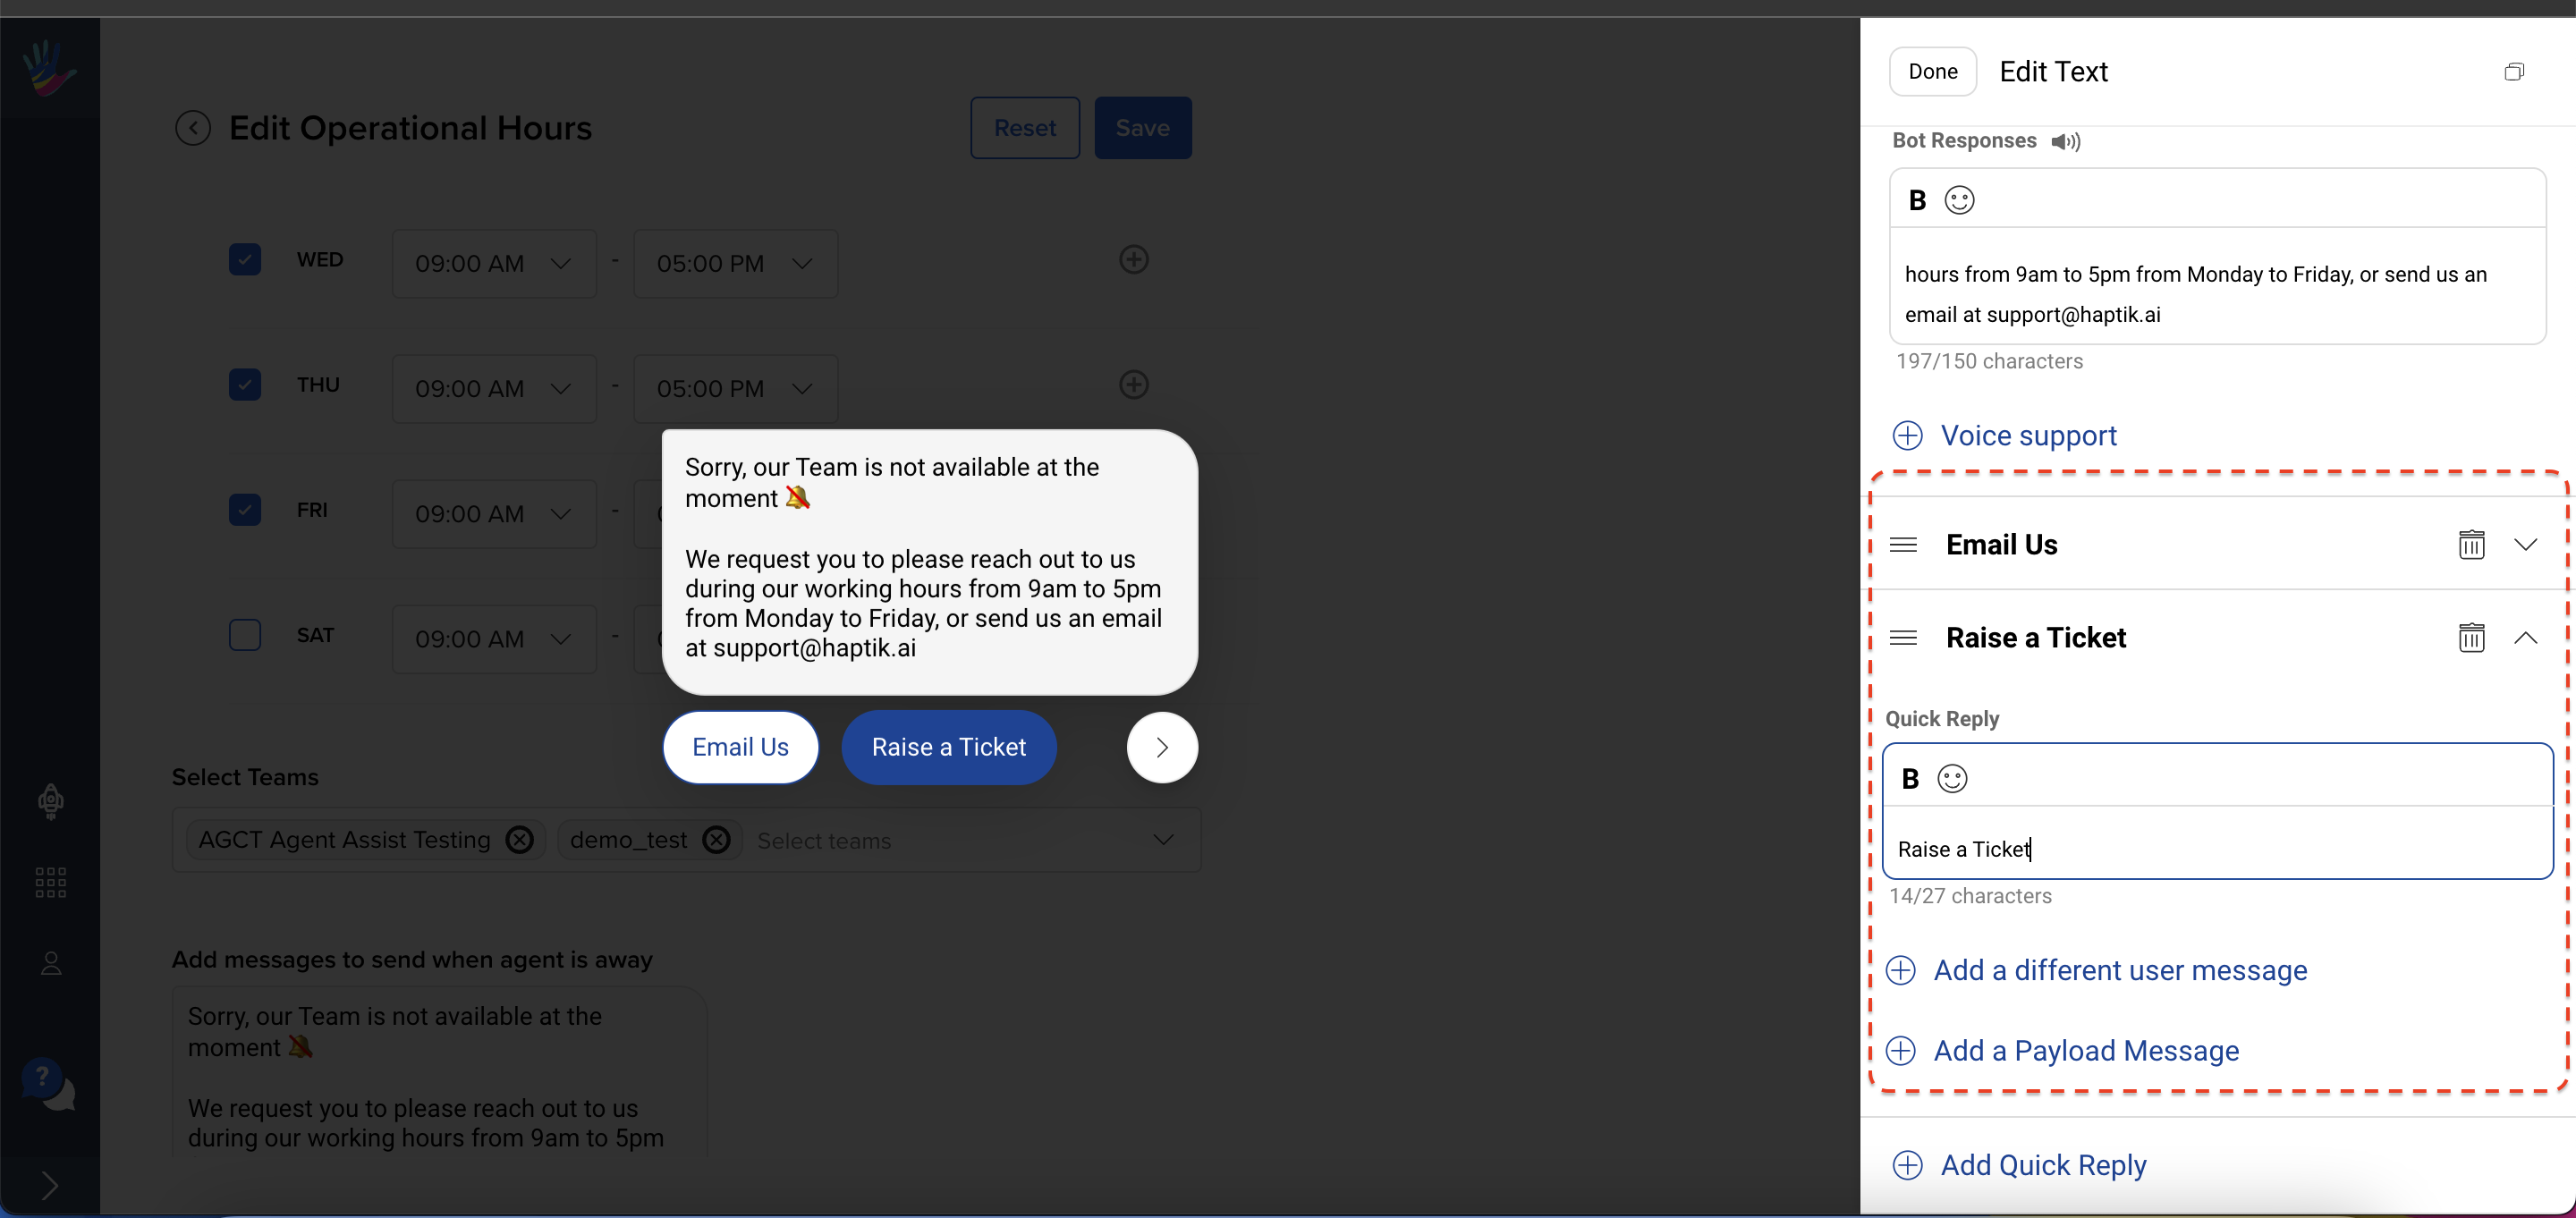
In the modal that pops up on the right, add the text message you wish to send your customers if they try to connect with your Agents outside their working hours.
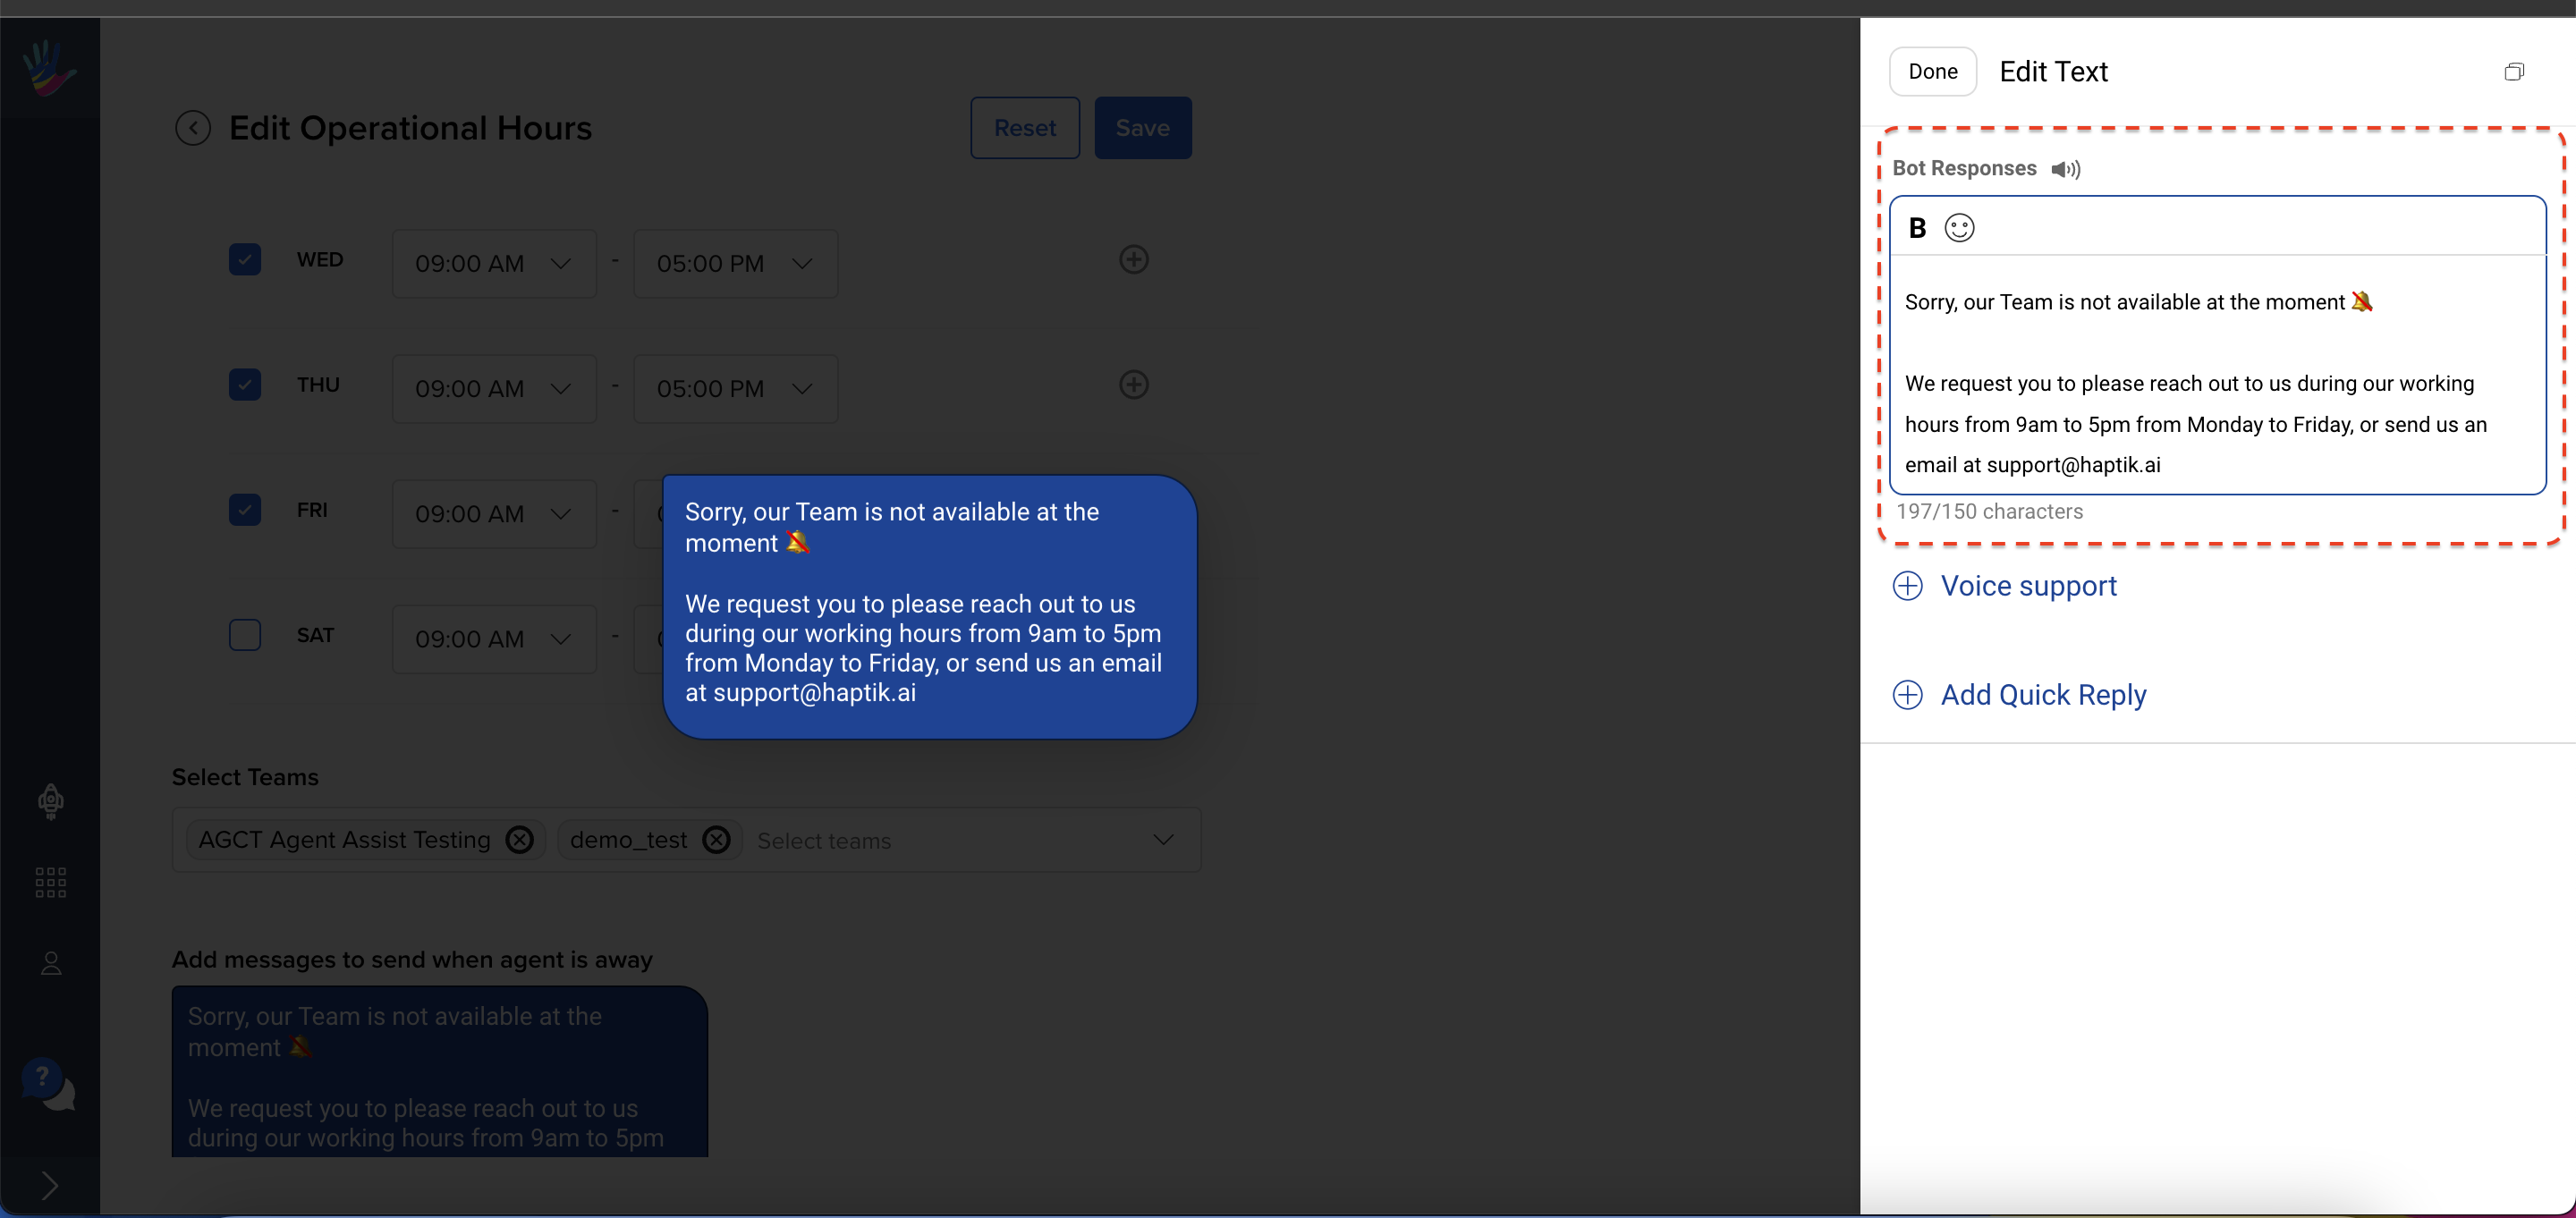
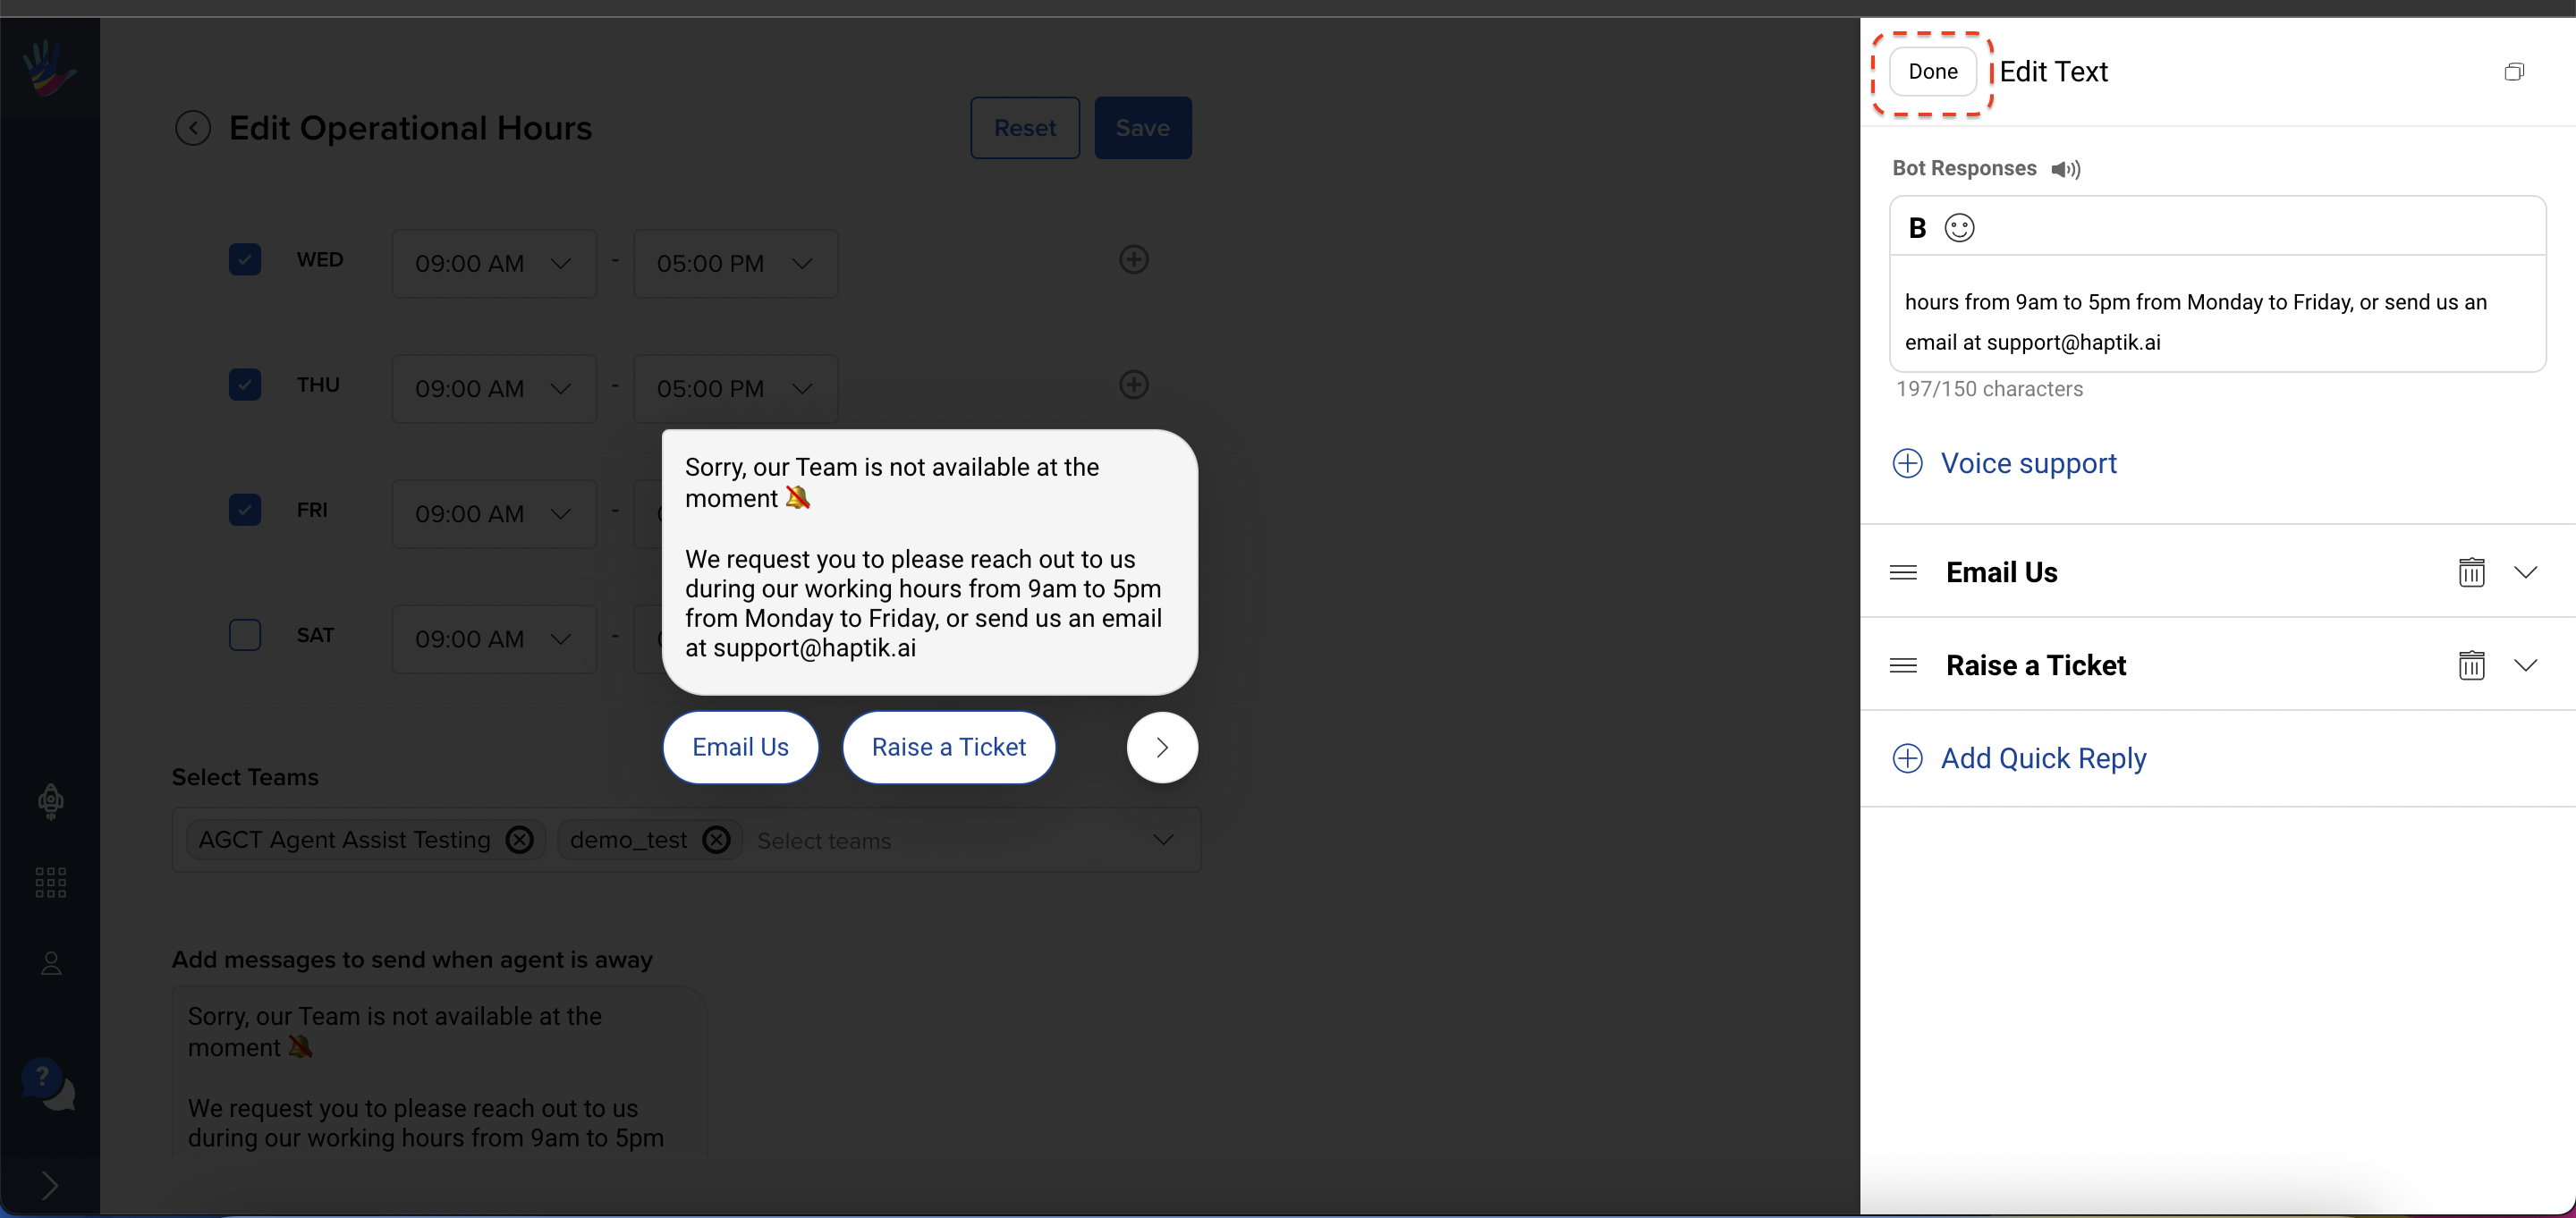
You can also add Quick Replies to your “Away Message” if you wish to enable users to trigger chatbot workflows as a follow-up action.
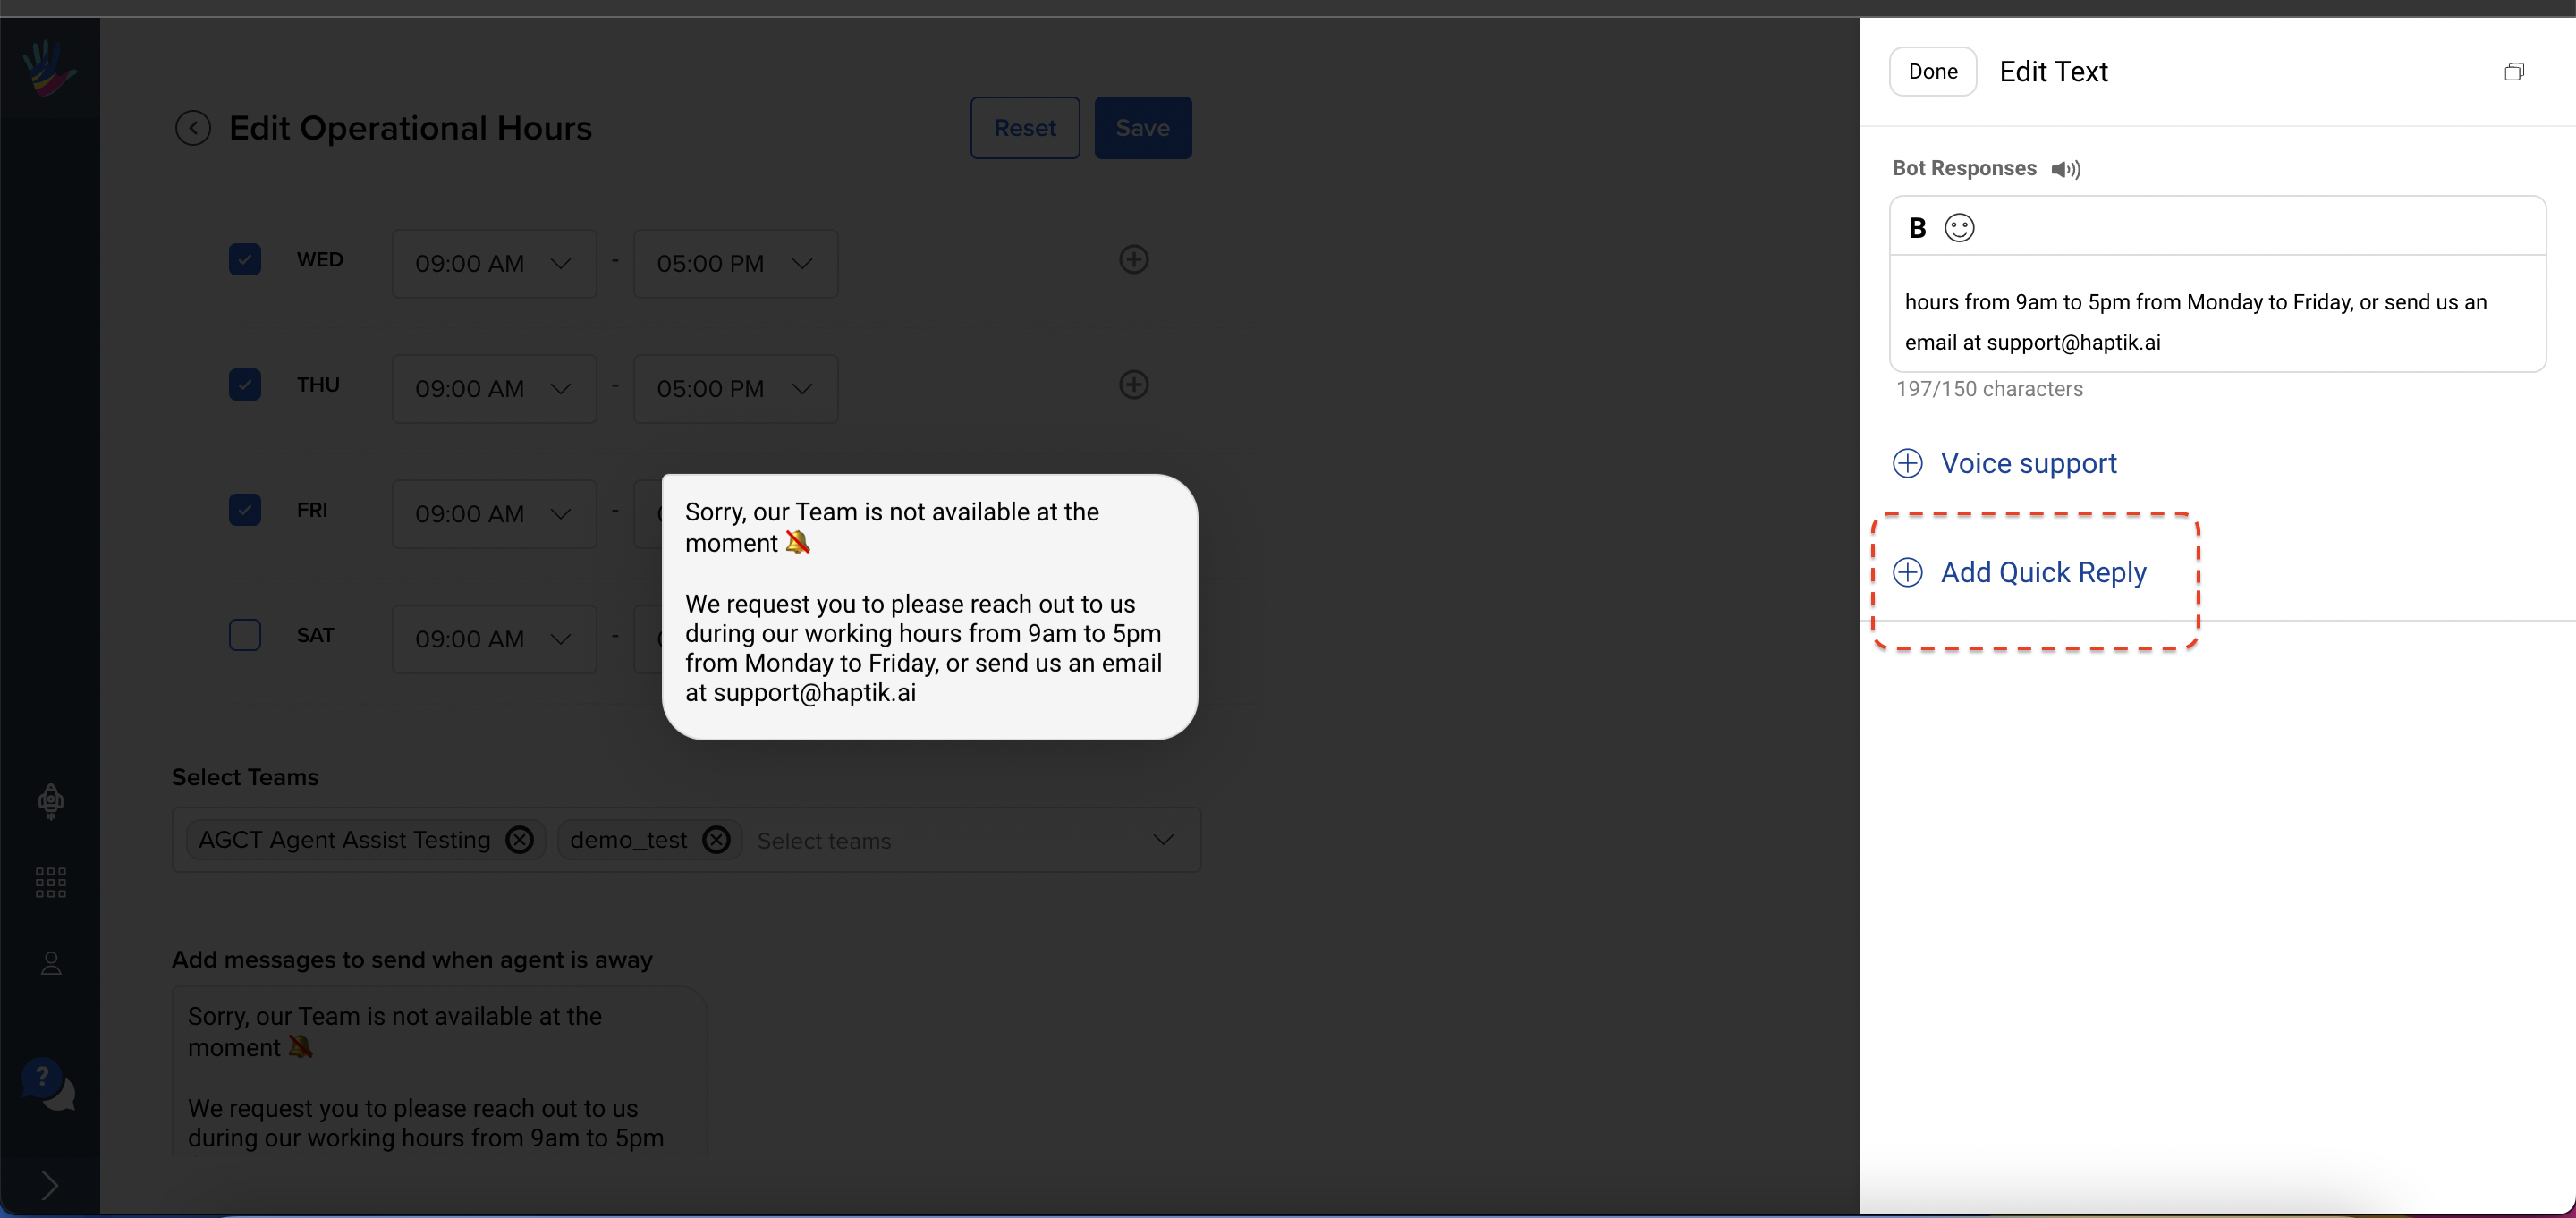
To finalise your away message, click on the “Done” button on the top of the modal.
Once all the settings have been configured, click on “Save” on the top right of the configuration screen to save the settings.
Once saved, you will receive a system message confirming that the settings have been successfully saved.
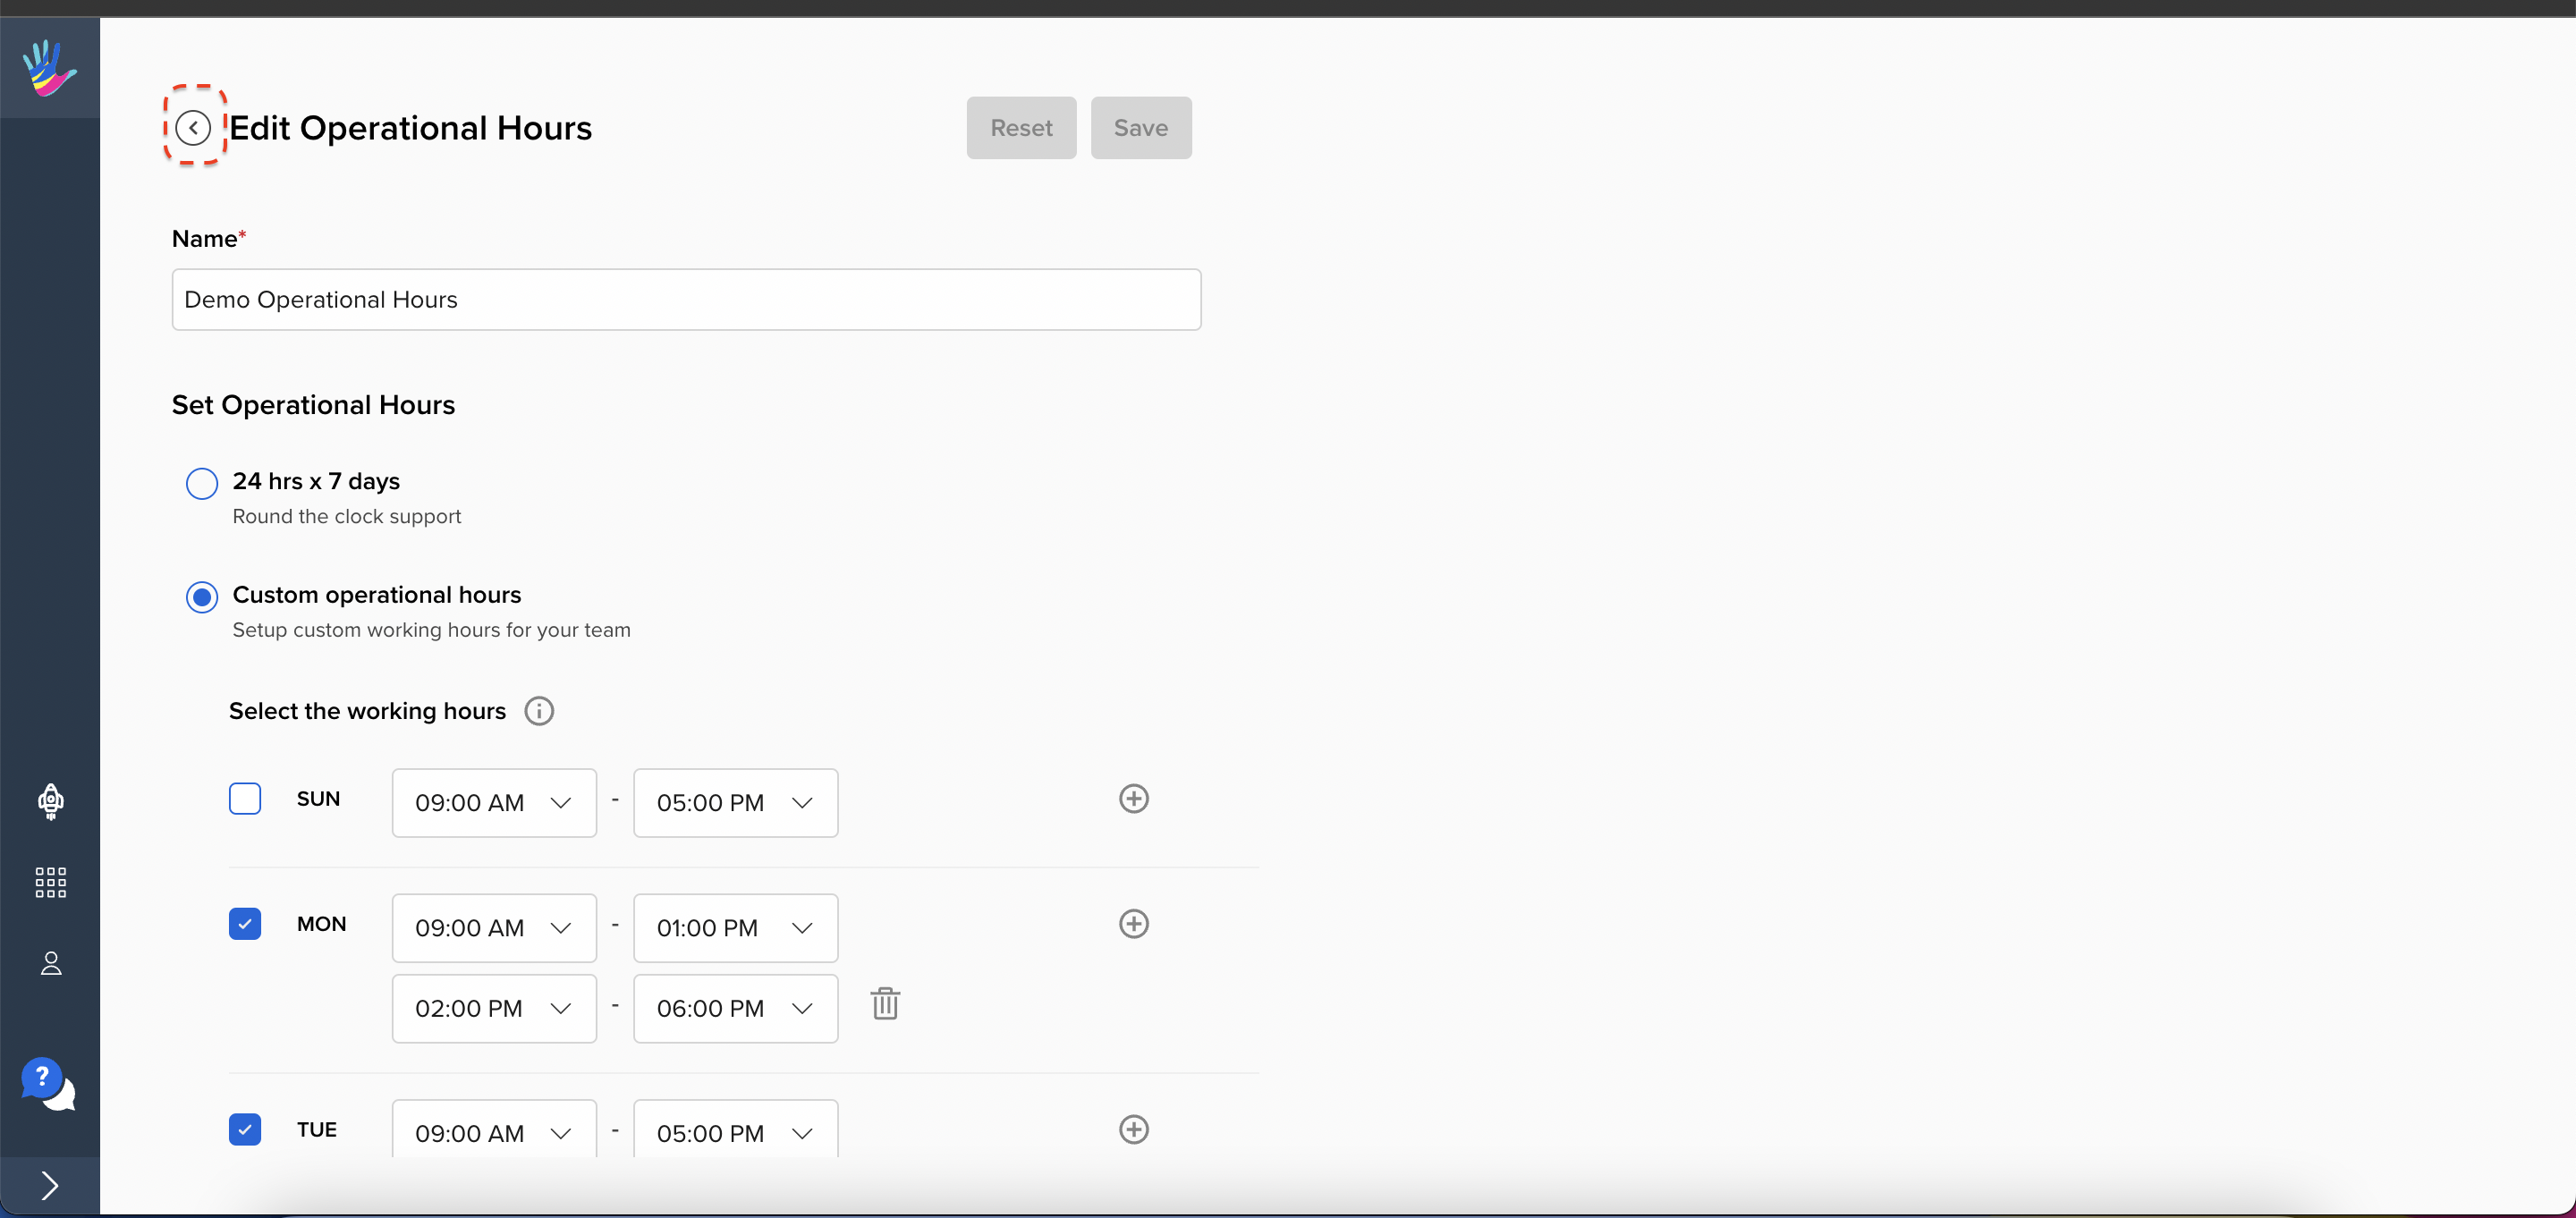
In order to navigate back to the main screen, click on the back button on the top left corner.
Once you are back on the main screen, you will be able to see all the available settings configured for your account.
Non-Business Hour Communications
During non-business hours, end-users will receive away messages configured for the team they are trying to contact. If no specific configuration exists, the system default away message will be sent.
How to download the ‘Missed Chats’ Reports
While your customers receive an away message when they attempt to reach your agents outside their business hours, it is important for your business to track the volume of chats initiated during non-operational hours to make informed decisions about agent shifts, and improve your customers’ experience.
To help with this, our platform provides you with a “Missed Chats” report, which contains a list of chats that were attempted during your non-business hours. This report contains the following data about missed chats:
- Date/time
- Account Name
- Bot ID (business ID)
- Conversation ID
- User Name
- Channel
- Team Name
To download this report, follow these steps:
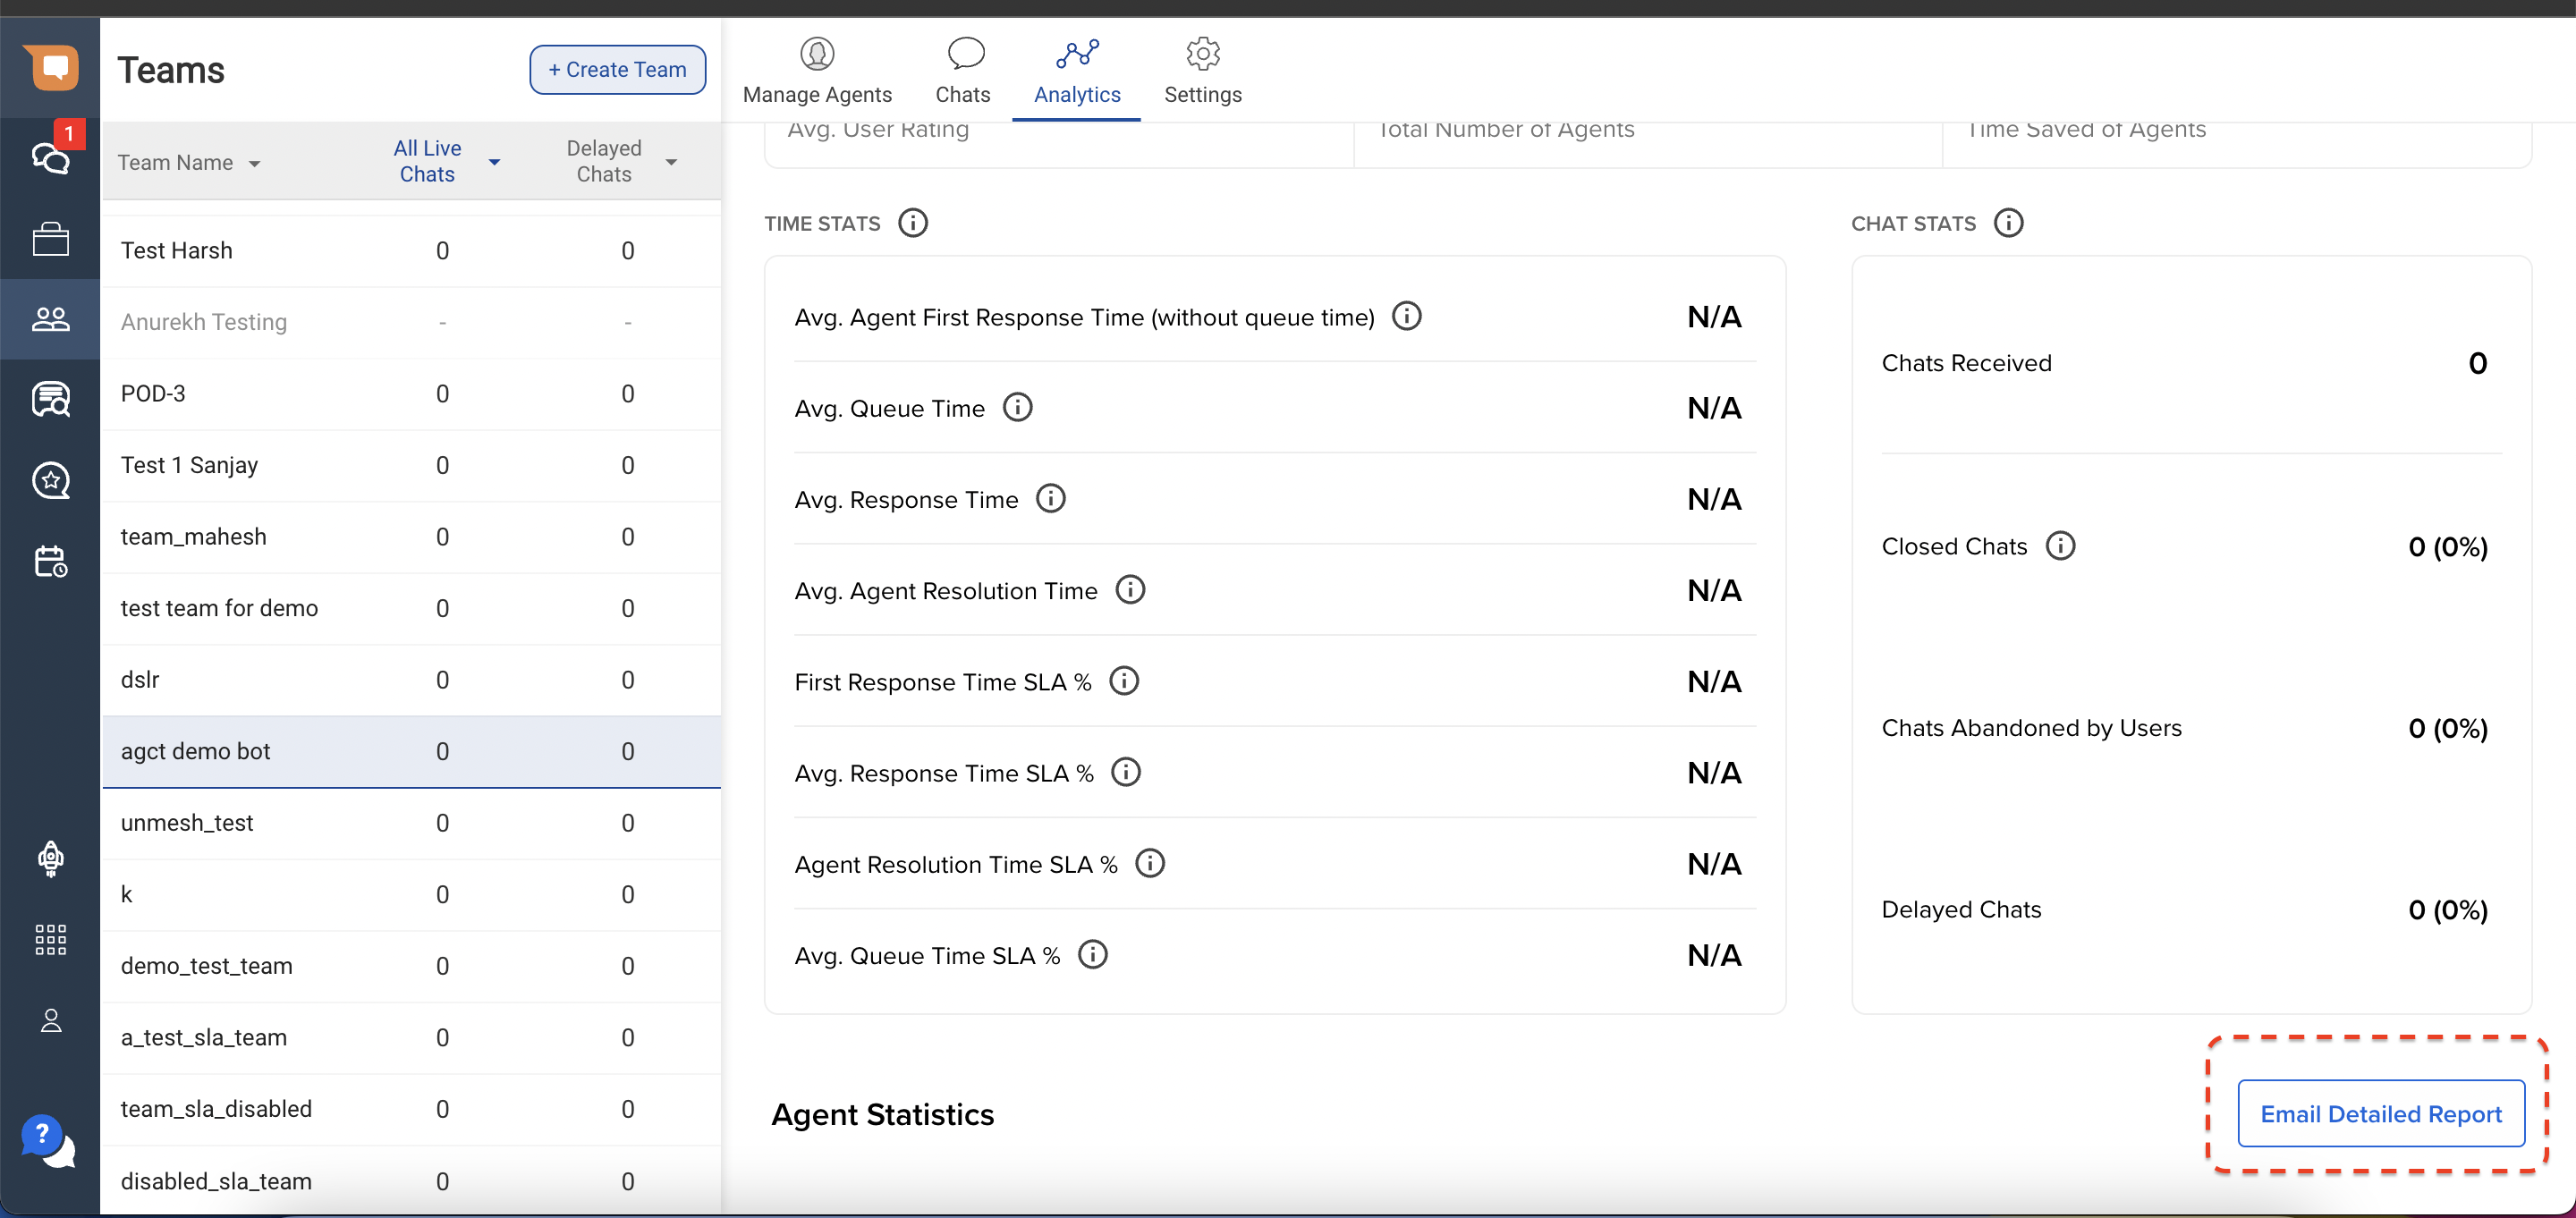
- Navigate to the “Team” tab on the left navigation bar, and select the team you wish to analyse.
- Open the “Analytics” tab present on your screen using the top navigation pane.
-
Click on the “Email Detailed Report” button on the screen.
-
Select the relevant time range, and click on “Email Report”.
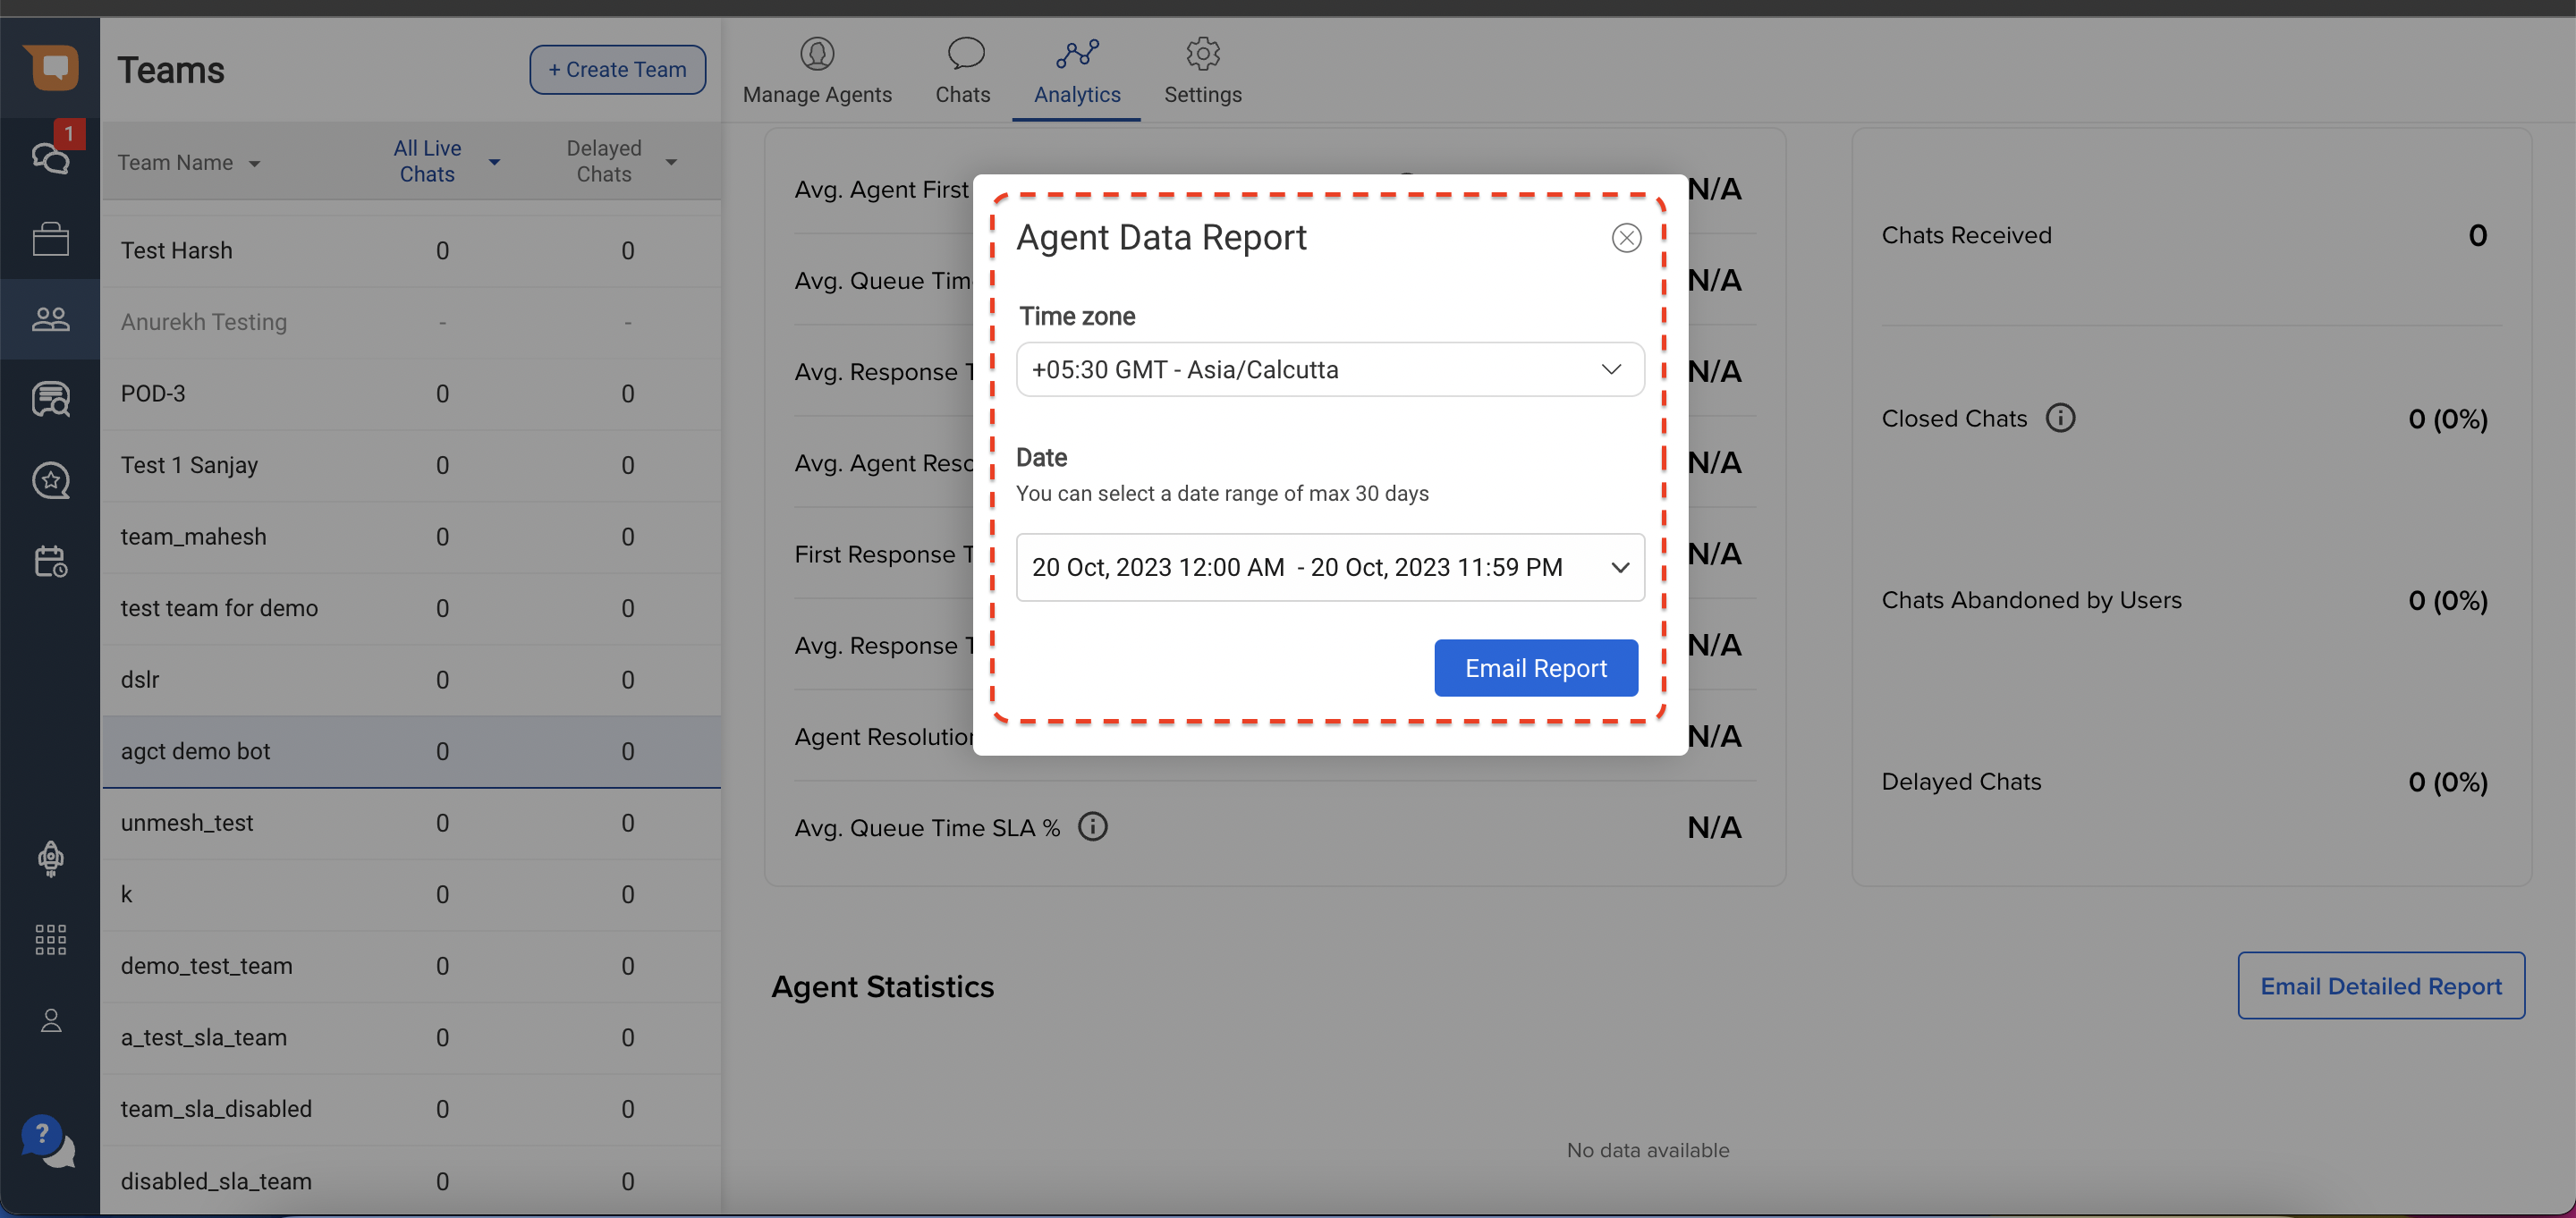
- The report will be sent to your registered email address associated with your user profile.
- Once you receive the report, open the CSV file titled “missed_chats_report”.
