Steps to Use Proactive Messaging’s SMS Notifications
- Getting Started
- Bot Building
- Smart Agent Chat
- Conversation Design
-
Developer Guides
Code Step Integration Static Step Integration Shopify Integration SETU Integration Exotel Integration CIBIL integration Freshdesk KMS Integration PayU Integration Zendesk Guide Integration Twilio Integration Razorpay Integration LeadSquared Integration USU(Unymira) Integration Helo(VivaConnect) Integration Salesforce KMS Integration Stripe Integration PayPal Integration CleverTap Integration Fynd Integration HubSpot Integration Magento Integration WooCommerce Integration Microsoft Dynamics 365 Integration
- Deployment
- External Agent Tool Setup
- Analytics & Reporting
- Notifications
- Commerce Plus
- Troubleshooting Guides
- Release Notes
Table of Contents
Overview
Proactivity and customer experience usually go hand in hand. When brands anticipate customers' needs and take action in advance, they make a strong impression for a long-term relationship.
With Haptik’s Proactive Messaging, you can notify your customers through text messages. Right from creating personalized templates to setting up event-based triggers, everything is there to empower you to deliver the best experience.
Steps to Trigger SMS Notifications Through Haptik
- Log in to your Haptik account to choose SMS from the drop-down menu of Proactive Messaging.
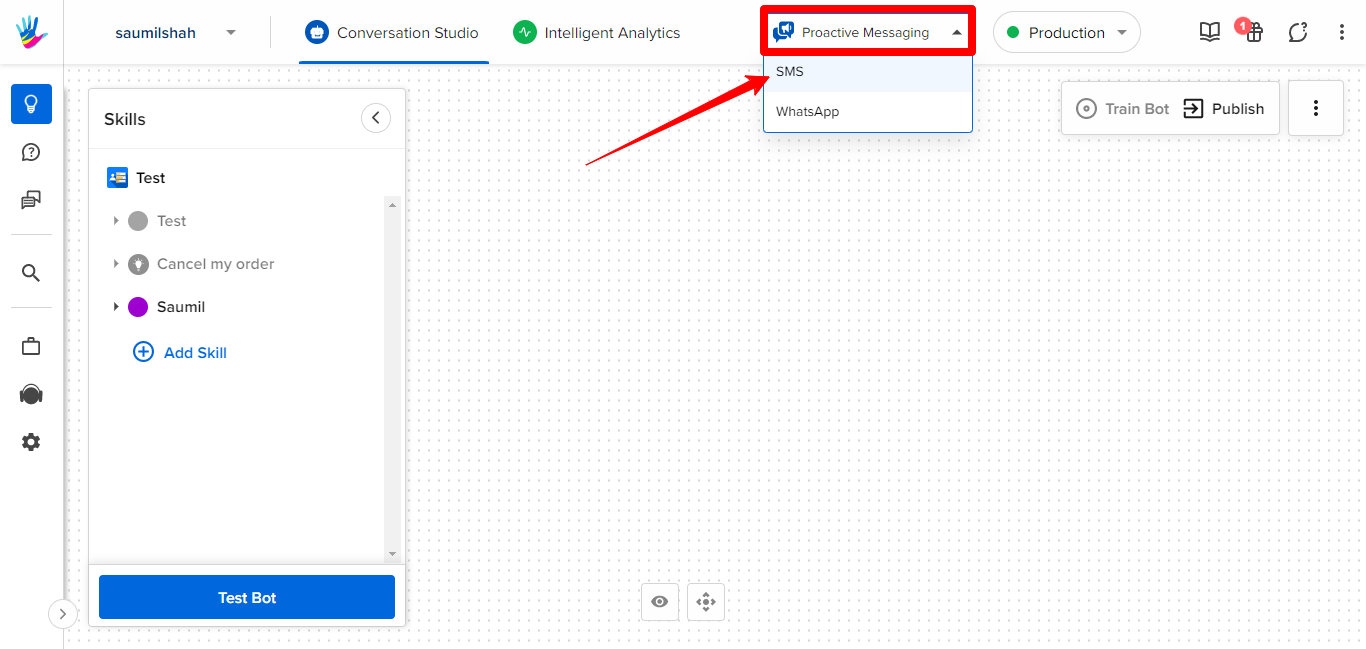
- Go to the left-hand side of the panel and select SMS to see Campaigns and Template options.
Scenario 1: You Decide to Set up an SMS Campaign
- Click + New Campaign and complete the steps shown as below.
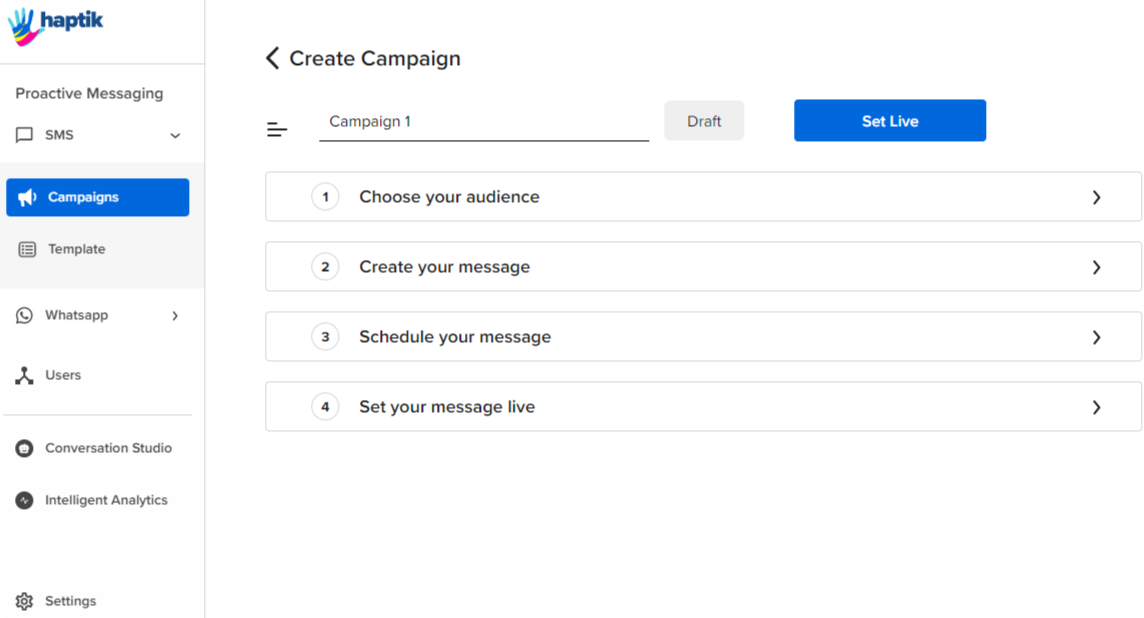
- Enter the name of your campaign.
- Go to Choose your audience and then decide which users should get your SMS notification.
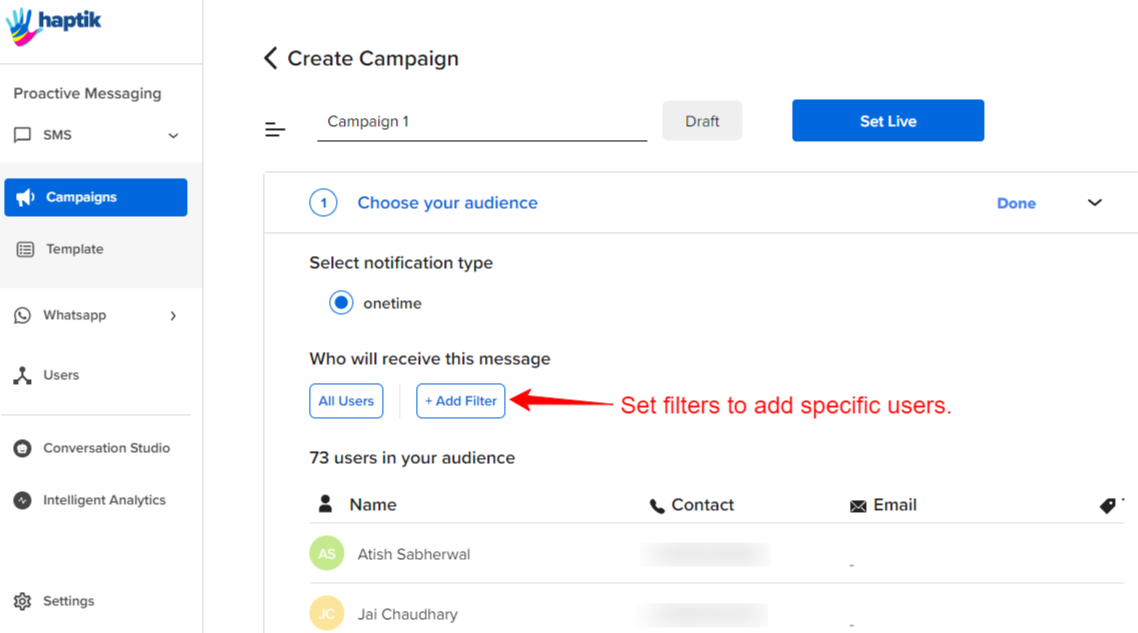
- Now, go to Create your message and click Choose template.
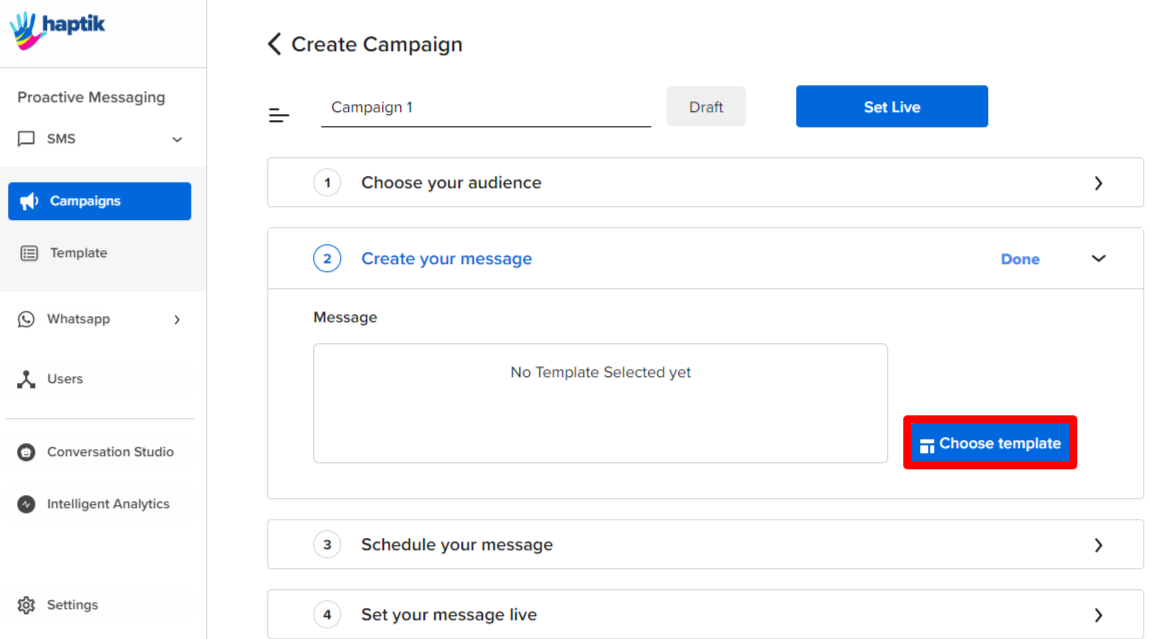
- Now, go to Schedule your message. Available scheduling options are Immediately and Custom date. Keep the local time zone in mind while setting up a custom date.
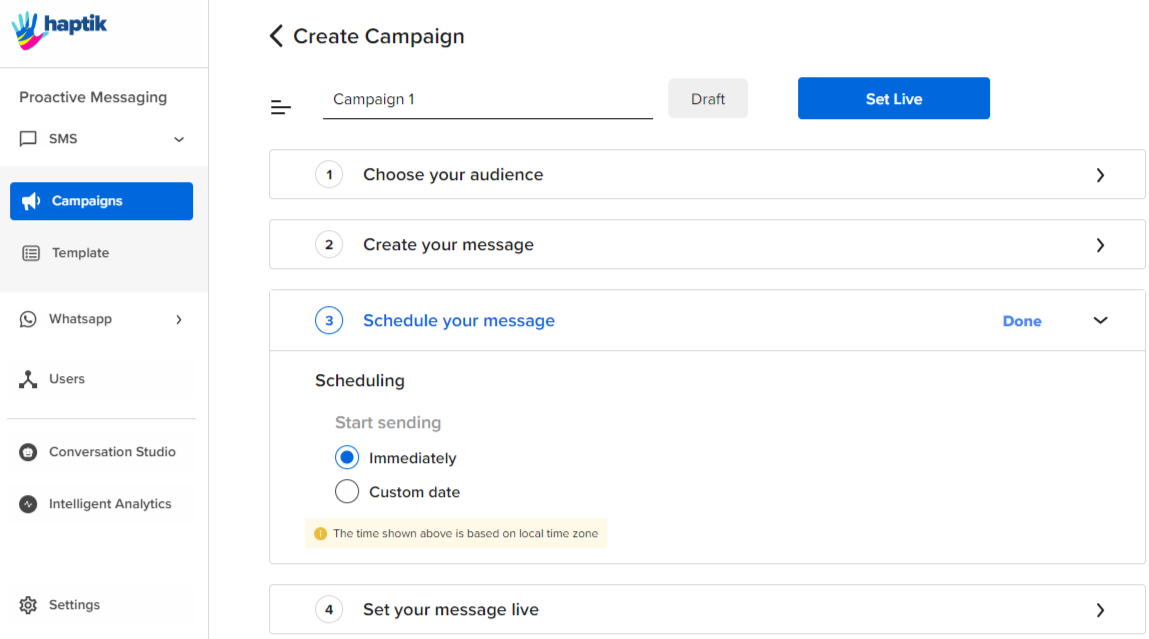
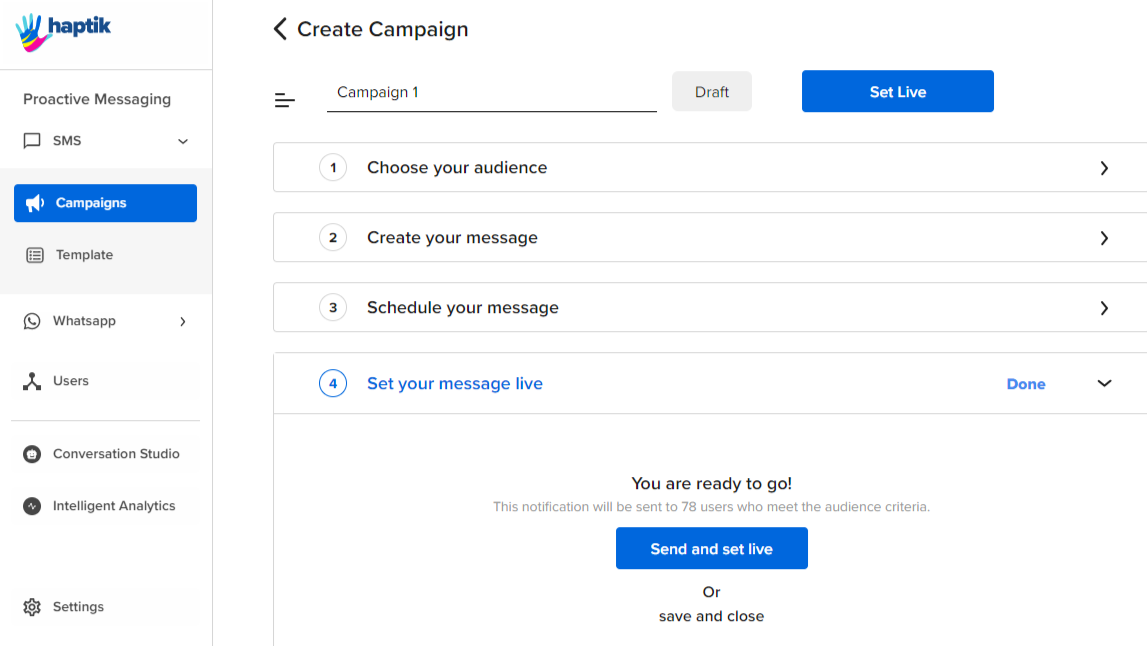
- At last, switch to Set your message live and choose either between “Save and set live” or “save and close”. Choosing “save and close” will let you save your campaign as a draft.
 Scenario 2: You Decide to Create an SMS Template
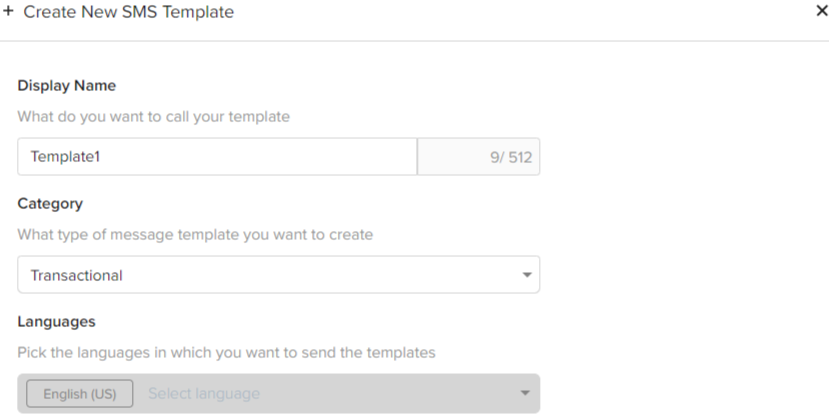
- Click + Create New to give your template a name and set its category. Available category options are Transactional, Promotional, and Service.
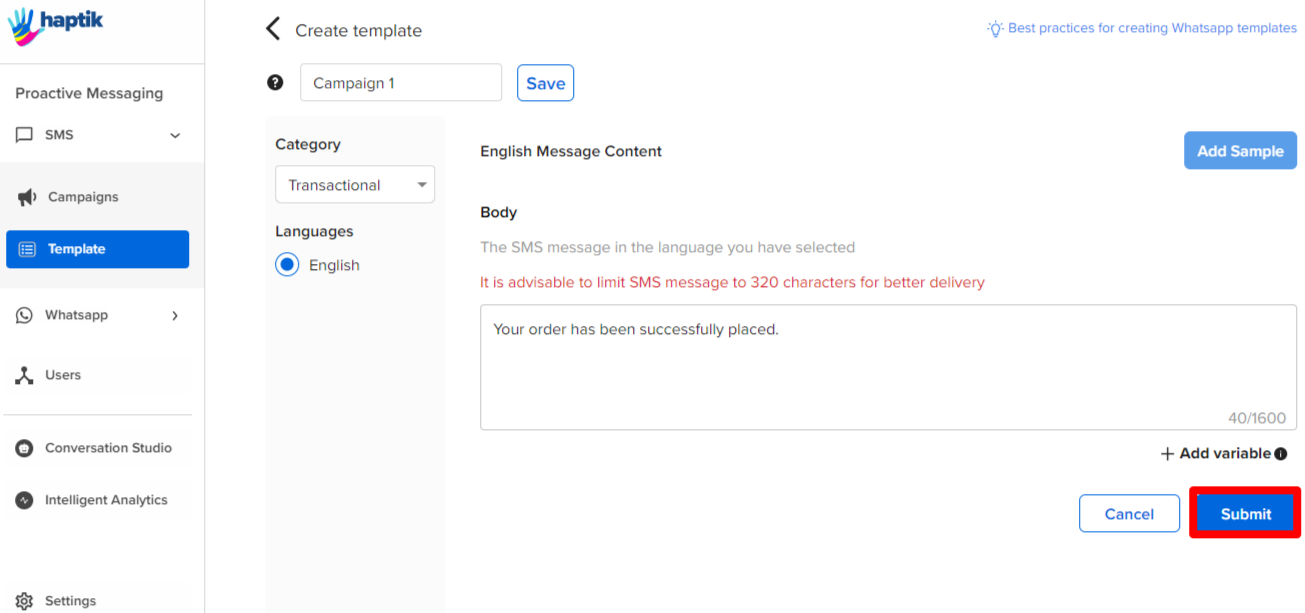
- Now, enter your SMS content according to the character limit in the Body field and then click Submit. Create your template carefully because it won’t be editable once saved.
Reach out to your Haptik SPOC for further clarity into the process.
