How to Ensure NICE CXone Integration is Working Properly

Written by Soham Amburle
Updated on June 27th, 2022
- Getting Started
- Bot Building
- Smart Agent Chat
- Conversation Design
-
Developer Guides
Code Step Integration Static Step Integration Shopify Integration SETU Integration Exotel Integration CIBIL integration Freshdesk KMS Integration PayU Integration Zendesk Guide Integration Twilio Integration Razorpay Integration LeadSquared Integration USU(Unymira) Integration Helo(VivaConnect) Integration Salesforce KMS Integration Stripe Integration PayPal Integration CleverTap Integration Fynd Integration HubSpot Integration Magento Integration WooCommerce Integration Microsoft Dynamics 365 Integration
- Deployment
- External Agent Tool Setup
- Analytics & Reporting
- Notifications
- Commerce Plus
- Troubleshooting Guides
- Release Notes
Once you have done the integration, it is time to check if it is working properly. We need to check if the agents are receiving chats from the user. Let us understand what all to check and how.
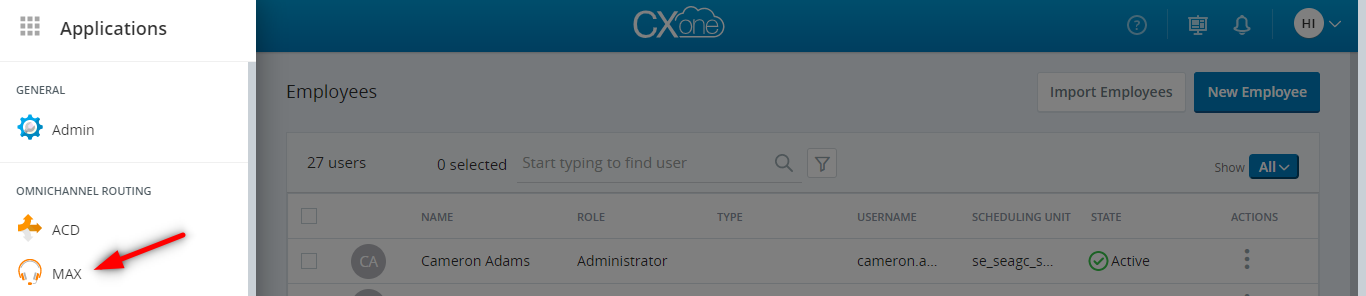
The Agent needs to navigate to the NICE CXone dashboard and click on MAX, in order to access the Agent console as shown.
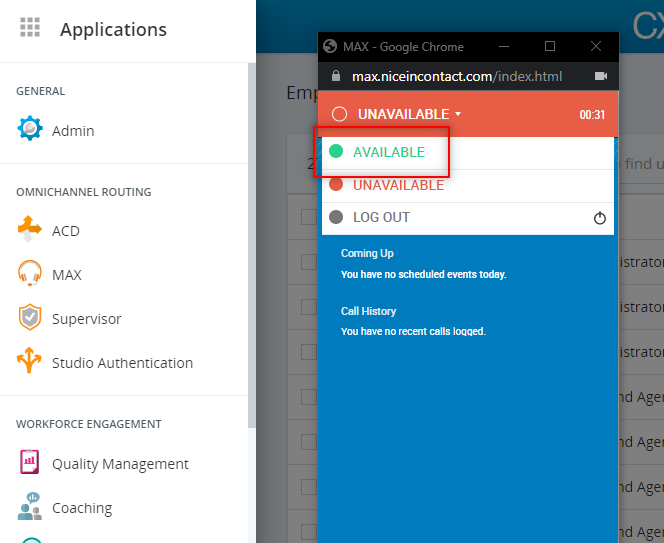
After which, the MAX agent console will open in another tab as shown. Here, the Agent needs to tap on Unavailable and select AVAILABLE in order to go online and start receiving chats.
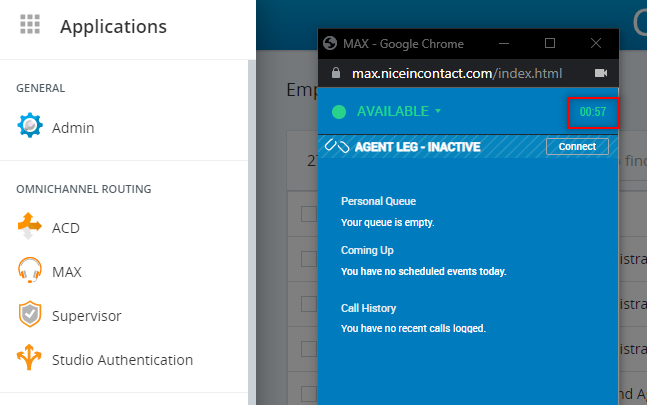
Once the Agent makes the status as AVAILABLE, he will be able to see a timer being ticked, which basically keeps a track of the time, for which the agent has been online, as shown.
How is the chat transferred to an agent?
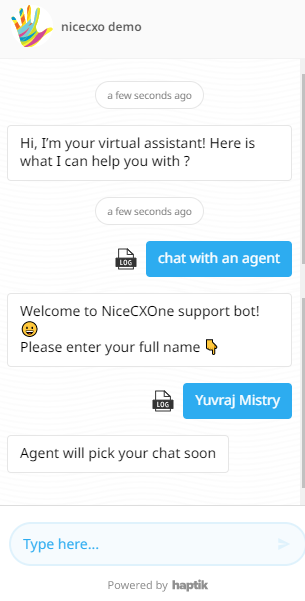
Once the user initiates the conversation with the bot and requests to chat with an agent, the bot will request the user's information.
In the image shown below, the bot asks for the user's name as we have added the person_name entity to our bot.
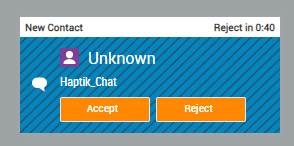
On the agent's MAX console, the agent will receive a pop-up as shown. They can accept the chat or reject it. If the agent is inactive, meaning away from the keyboard, the chat will be rejected automatically within 40 seconds from the time it arrived. You can see the timer that says Reject in 0:40.
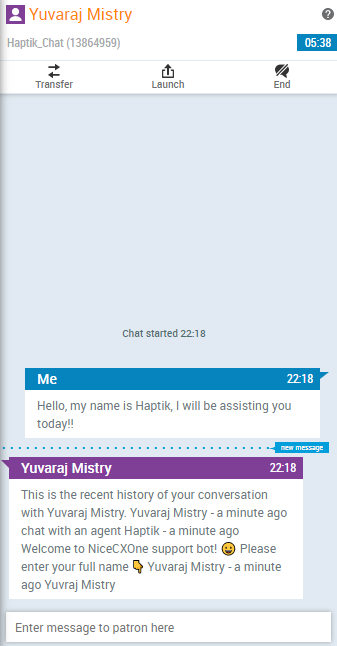
Once the Agent has accepted the chat, they will also receive a transcript of the user's conversation with the bot, as shown in the image below. This transcript is basically the set of messages exchanged between the user and the bot before the chat was handed over to the agent.
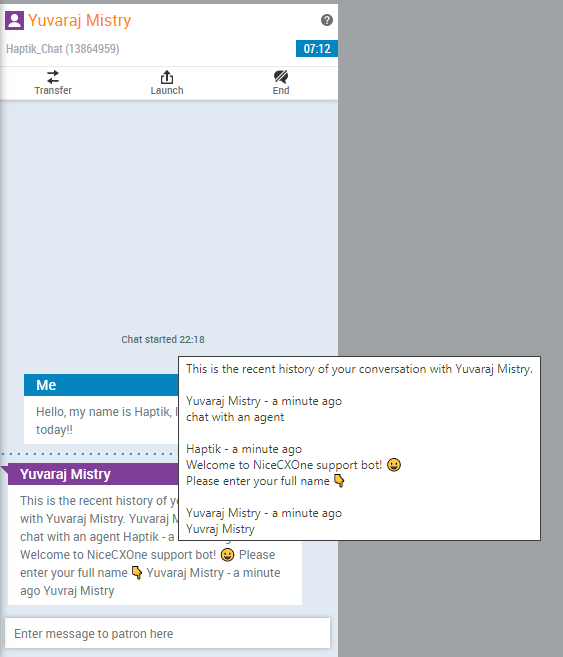
In order to see a better-structured view of the transcript, the agent can simply hover over the transcript, as shown.
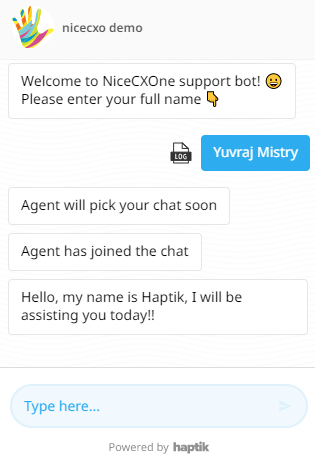
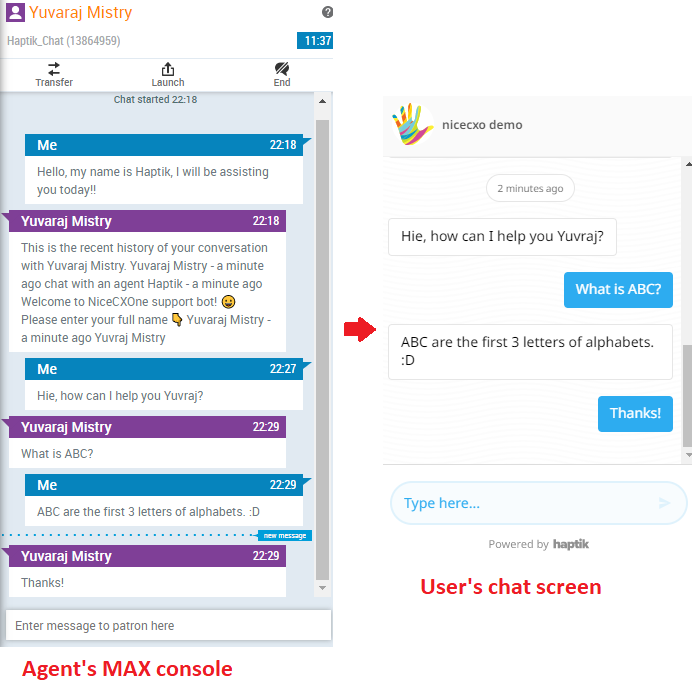
On the user's chat screen, they will be able to see these messages that will confirm the user of the events that are happening, as shown.
Next, the Agent responds to the user, and the same is reflected on the user's chat screen. This way a conversation is established between the agent and the user, as shown.
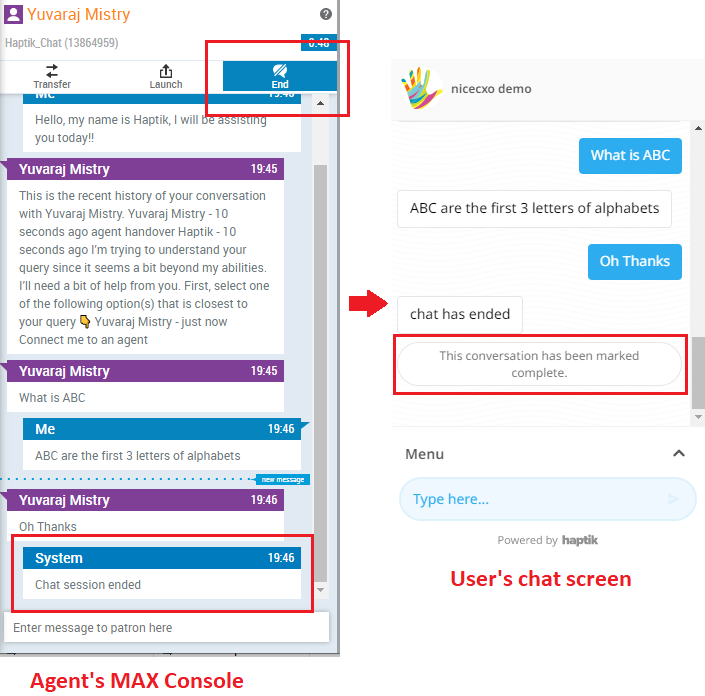
Now, when the user's query has been resolved, the agent can end the conversation with the user, by selecting the End option on the MAX console, as shown. The user is notified about the chat being ended.
So, if you are able to perform the above process seamlessly, you can rest assured. Your integration is successful. Congratulations!
