How to Set Up Microsoft Dynamics 365 Integration
- Getting Started
- Bot Building
- Smart Agent Chat
- Conversation Design
-
Developer Guides
Code Step Integration Static Step Integration Shopify Integration SETU Integration Exotel Integration CIBIL integration Freshdesk KMS Integration PayU Integration Zendesk Guide Integration Twilio Integration Razorpay Integration LeadSquared Integration USU(Unymira) Integration Helo(VivaConnect) Integration Salesforce KMS Integration Stripe Integration PayPal Integration CleverTap Integration Fynd Integration HubSpot Integration Magento Integration WooCommerce Integration Microsoft Dynamics 365 Integration
- Deployment
- External Agent Tool Setup
- Analytics & Reporting
- Notifications
- Commerce Plus
- Troubleshooting Guides
- Release Notes
Table of Contents
Overview
Microsoft Dynamics 365 is a powerful cloud-based CRM (Customer Relationship Management) tool enabling brands to communicate effectively with customers.
By integrating it with Haptik, different types of entities can easily be created and updated easily. For example, user information, cases, etc. Simply put, it helps to keep the CRM up-to-date and make conversations contextual and personalized.
With Haptik integration, you’ll enjoy:
- Lead Management (Create, Get, Update Leads)
- Contact Management (Create, Get, Update Contacts)
Prerequisites for Microsoft Dynamics 365 Integration with Haptik
- A registered Microsoft Dynamics 365 account.
- A Haptik bot. Click here if you haven’t created one yet.
Steps to Make Microsoft Dynamics 365 Integration Active
- Log in to your Haptik account and choose the bot you want to connect with your Microsoft Dynamics 365 account.
- Navigate to Conversation Studio > Business Manager > Channels > Platform Deployments and select Microsoft Dynamics 365 from the Platform drop-down.
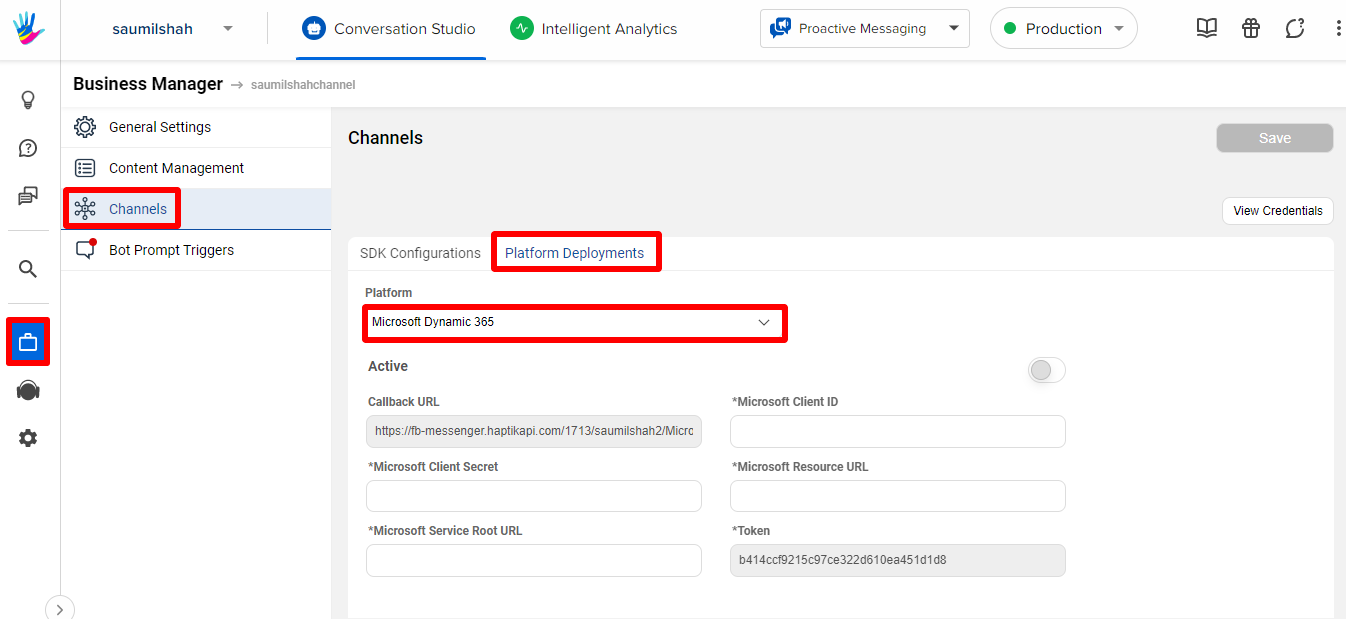
- Now, provide the following details:
- Microsoft Client ID
- Microsoft Client Secret
- Microsoft Resource URL
- Microsoft Service Root URL
- Turn on the toggle for successful integration.
How to Get Microsoft Client ID
- Access your Microsoft Dynamics 365 account and go to App Launcher.
- Select Admin.
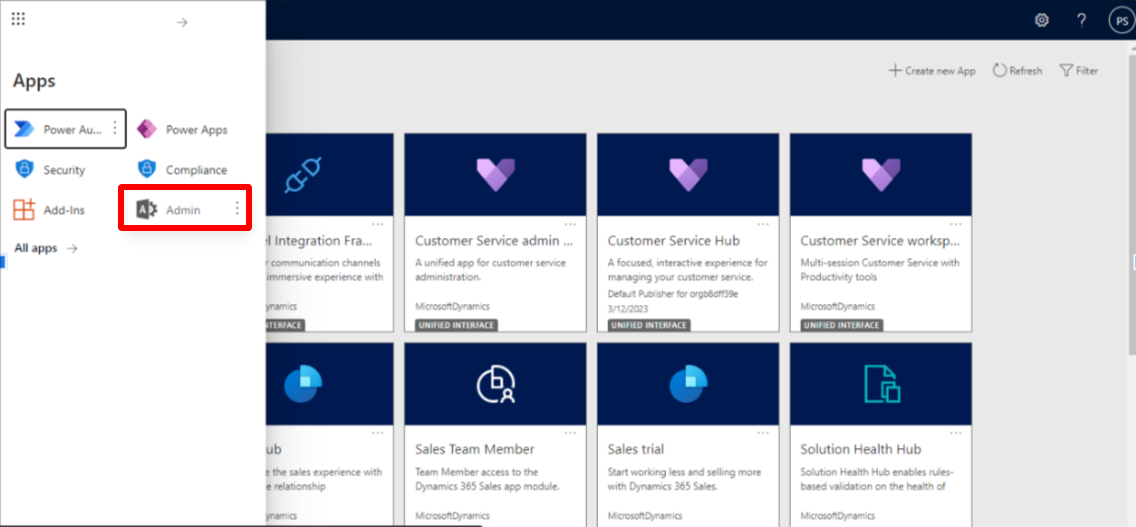
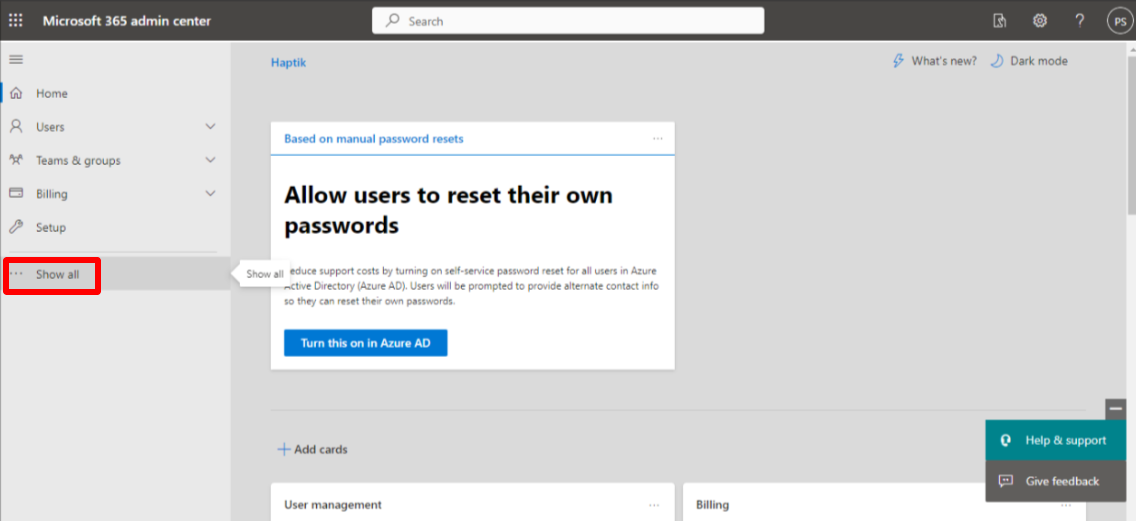
- In the Admin center, click Show all and navigate to Admin centers to select Azure Active Directory.
- Once you access Azure Active Directory, select App Registrations and then click New Registration.
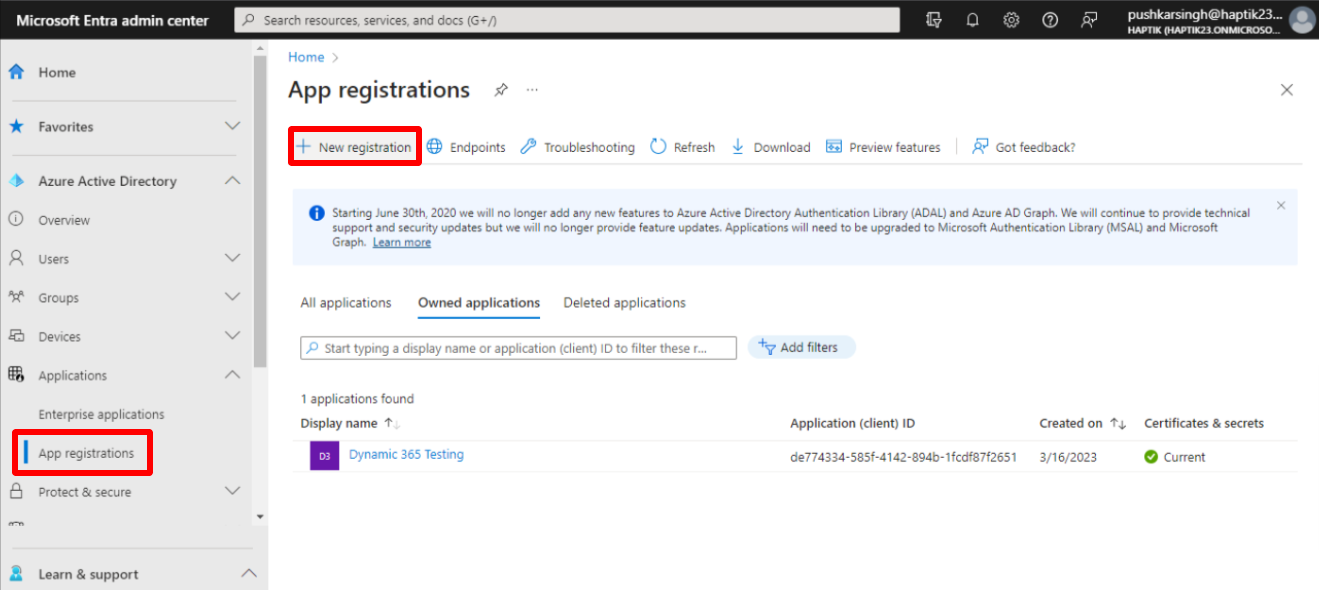
- Now, enter a Name and select Directory Only.
- In the Redirect URI section, Select Web platform and mention URL like this <MD_CAS_URL>/microsoft_dynamic_365/redirect_url
- Click Register and then copy the Application (Client) ID to paste for successful integration.
How to Get Microsoft Client Secret
- In Azure Active Directory, click App Registrations.
- Click Certificates & Secret and create a new client secret.
- Copy Value (Client Secret) to paste in your Haptik account.
How to Get Microsoft Resource URL
Copy your Microsoft Dynamics 365 account URL from https to .com, for e.g., https://orgb8dff39e.crm8.dynamics.com.
How to Get Microsoft Service Root URL
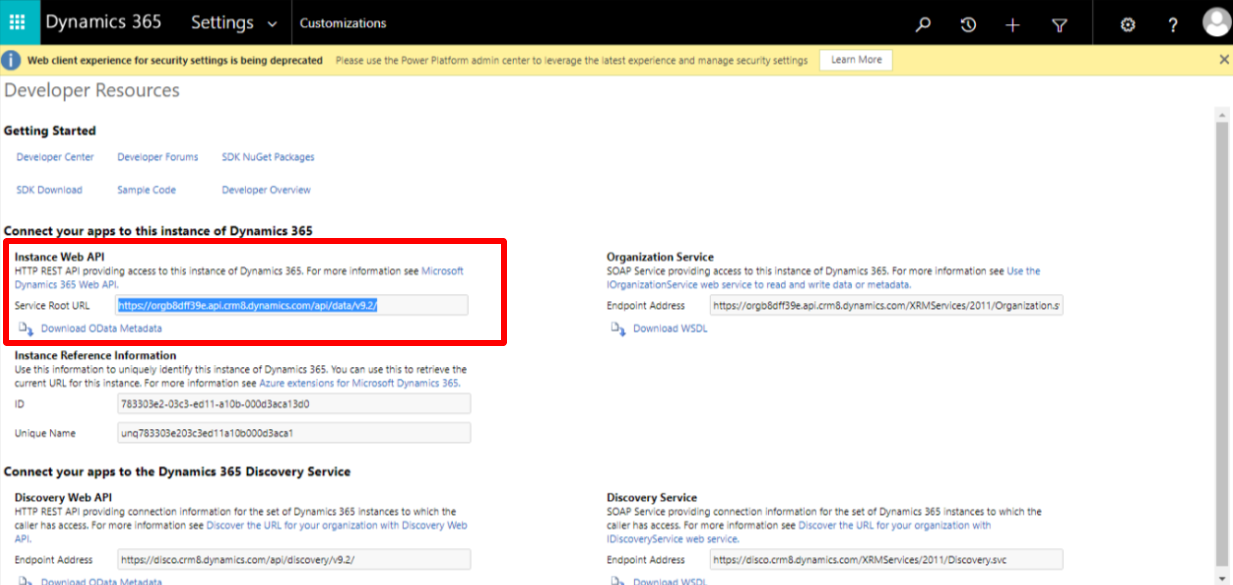
- Click Settings and then go to Advanced Settings.
- From the drop-down, select Customizations and then click the Developer Resources feature.
- Copy Service Root URL to paste in your Haptik account.
Feel free to reach your Haptik SPOC if you have any queries regarding this integration.
