How to Configure Ticketing on Salesforce?
- Getting Started
- Bot Building
- Smart Agent Chat
- Conversation Design
-
Developer Guides
Code Step Integration Static Step Integration Shopify Integration SETU Integration Exotel Integration CIBIL integration Freshdesk KMS Integration PayU Integration Zendesk Guide Integration Twilio Integration Razorpay Integration LeadSquared Integration USU(Unymira) Integration Helo(VivaConnect) Integration Salesforce KMS Integration Stripe Integration PayPal Integration CleverTap Integration Fynd Integration HubSpot Integration Magento Integration WooCommerce Integration Microsoft Dynamics 365 Integration
- Deployment
- External Agent Tool Setup
- Analytics & Reporting
- Notifications
- Commerce Plus
- Troubleshooting Guides
- Release Notes
Table of Contents
In order to enable Ticketing on Salesforce, you will first have to set up a Connected App. You can read more about that in the following article.
Setting up a Connected App on Salesforce Setup
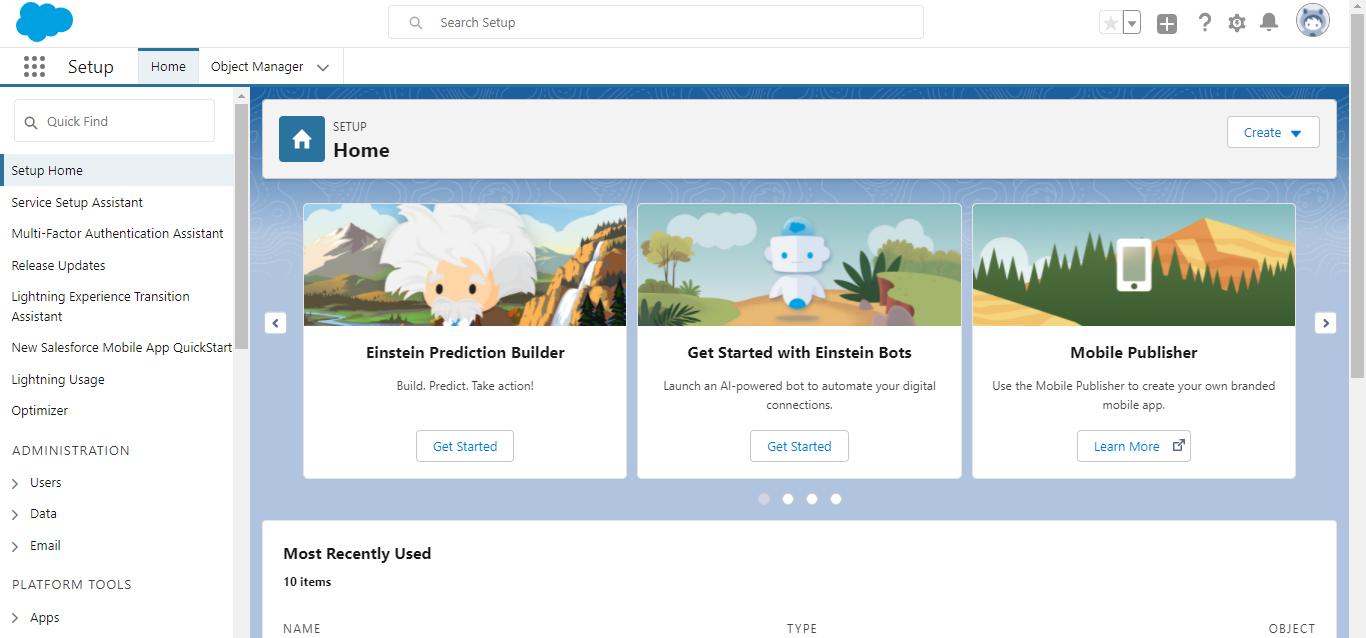
Step 1: Navigate to the Setup dashboard of Salesforce, as shown.
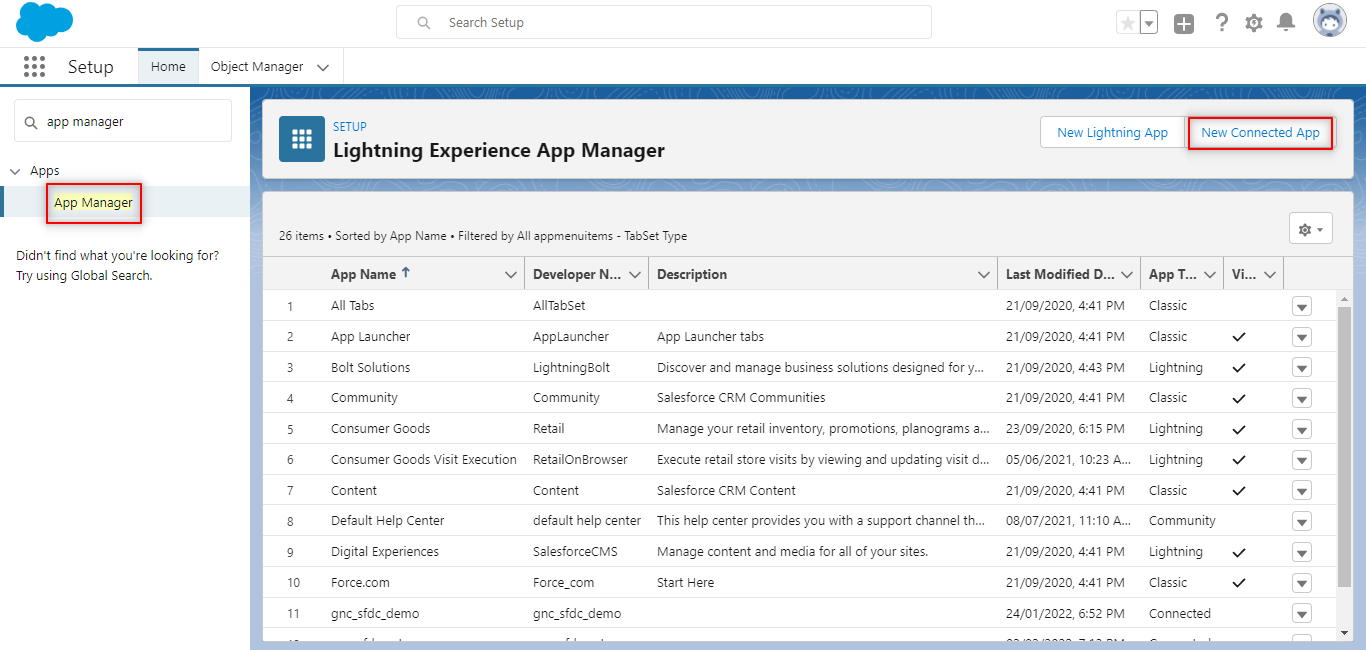
Step 2: Search for App Manager from the Quick find, and select New Connected App.
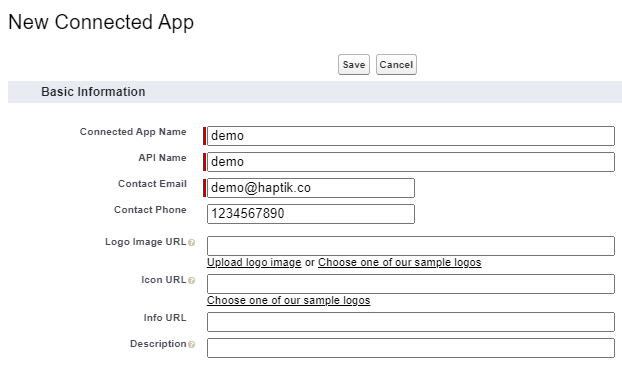
Step 3: Under Basic Information, fill the mandatory fields, as shown.
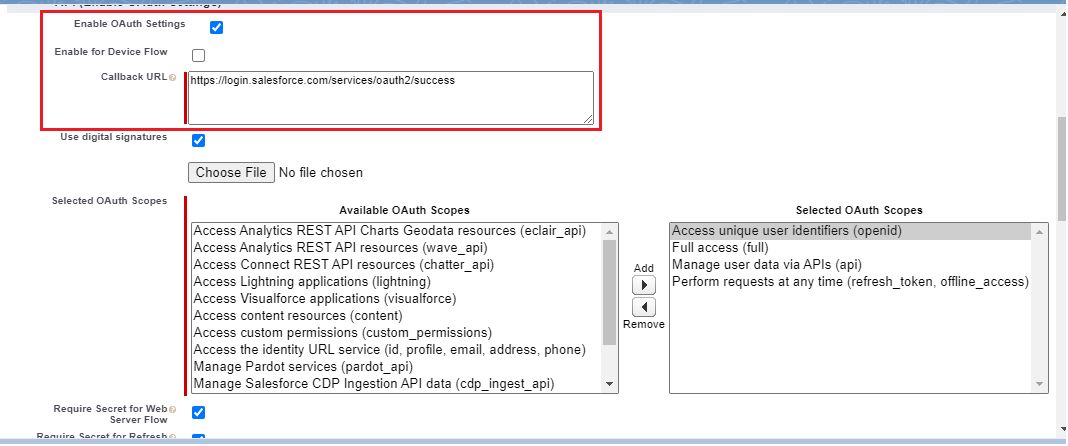
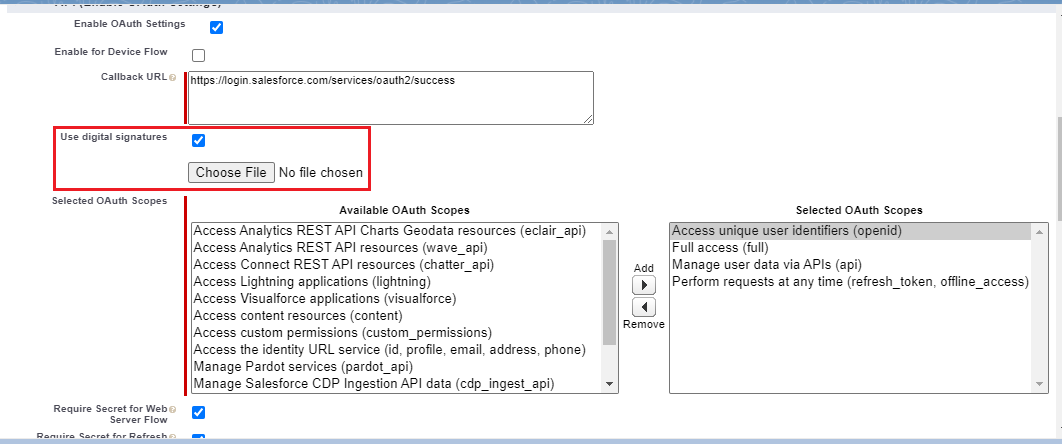
Step 4: Check the box for Enable OAuth Settings, and add this call back URL - https://login.salesforce.com/services/oauth2/success
Step 5: Next, check the box for digital signatures, upload the generated certificate file and also generate a private key.
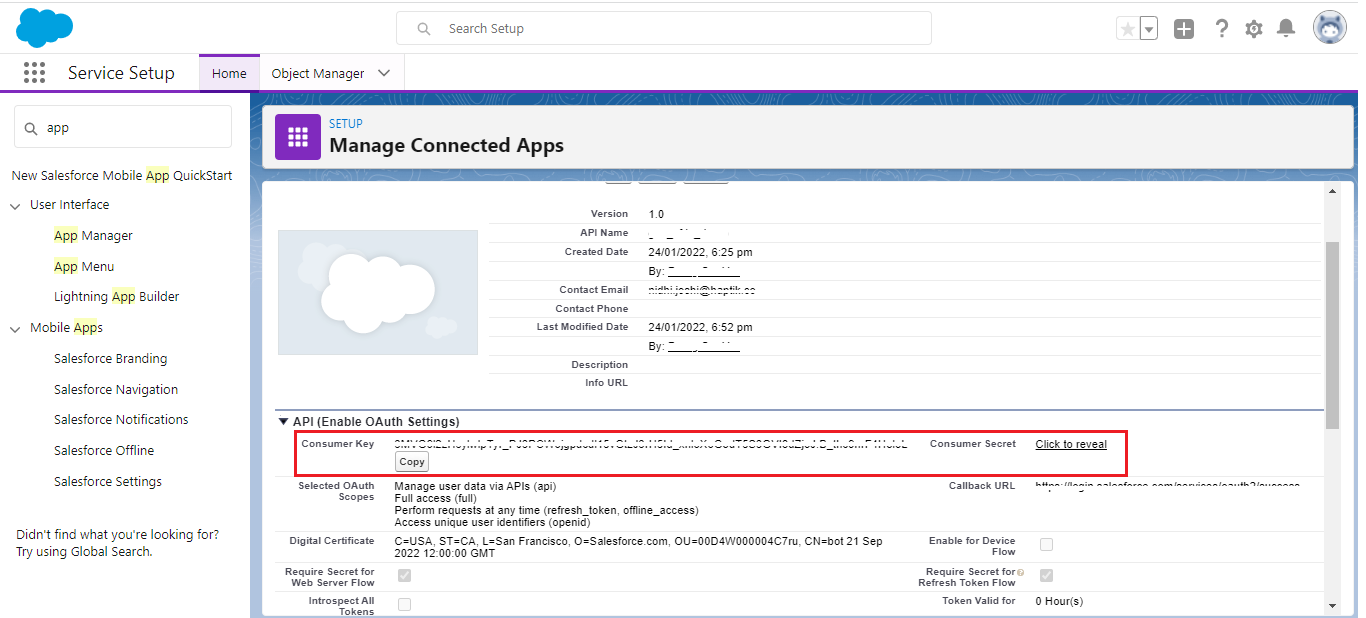
Step 6: After clicking on save and continue, Consumer Key and Secret will be generated, note these down for future reference.
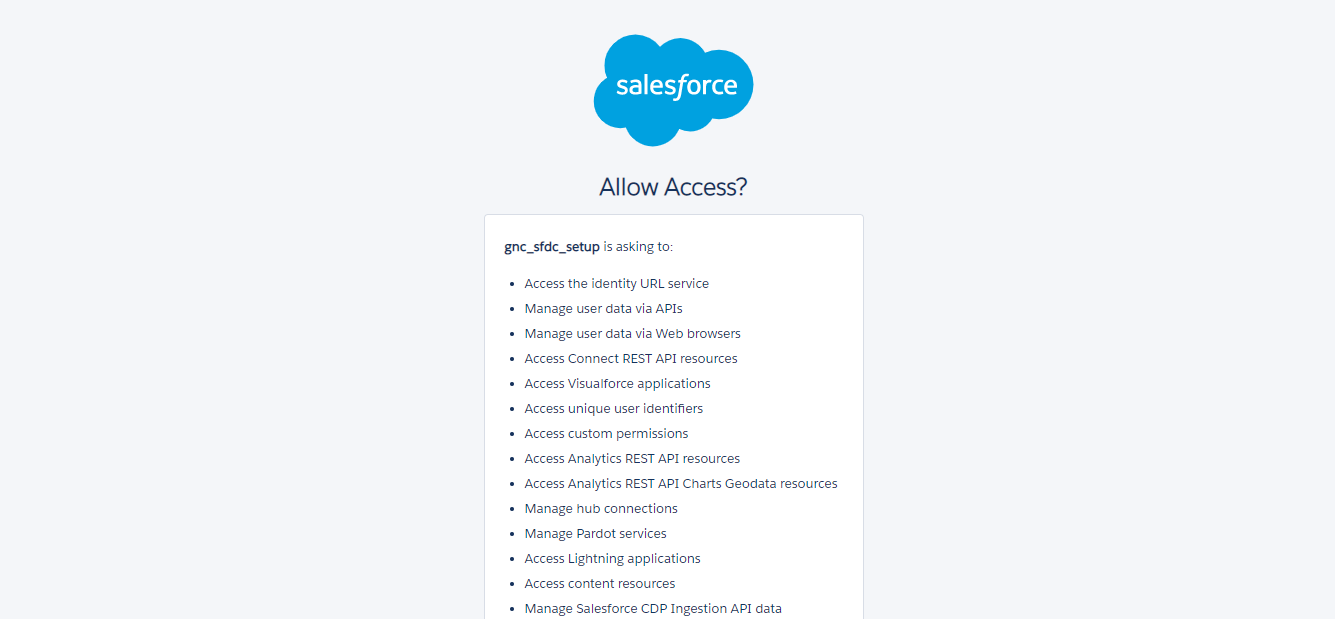
Step 7: To authorize the App, navigate to the below URL -
https://<salesforce_domain>/services/oauth2/authorize?response_type=token&client_id=<client_id>&redirect_uri=https://login.salesforce.com/services/oauth2/success
On clicking the above URL, the authorization page opens up as shown. Cick on Allow for all the stated permissions.
Step 8: The clientId (consumer key) and username will be used for creating the Connected Application with Haptik.

