How to Deactivate Your Haptik Bot
- Getting Started
- Bot Building
- Smart Agent Chat
- Conversation Design
-
Developer Guides
Code Step Integration Static Step Integration Shopify Integration SETU Integration Exotel Integration CIBIL integration Freshdesk KMS Integration PayU Integration Zendesk Guide Integration Twilio Integration Razorpay Integration LeadSquared Integration USU(Unymira) Integration Helo(VivaConnect) Integration Salesforce KMS Integration Stripe Integration PayPal Integration CleverTap Integration Fynd Integration HubSpot Integration Magento Integration WooCommerce Integration Microsoft Dynamics 365 Integration
- Deployment
- External Agent Tool Setup
- Analytics & Reporting
- Notifications
- Commerce Plus
- Troubleshooting Guides
- Release Notes
Table of Contents
Overview
Haptik gives a platform for brands to develop a chatbot according to their business requirements, enabling them to enhance customers' experience and handle monotonous tasks with the utmost ease.
In case you’ve created multiple bots with Haptik and want to take some out of action, below is the deactivation process you need to follow.
Steps to Deactivate Your Haptik Bot
- Log in to your Haptik account and choose the bot you wish to deactivate.
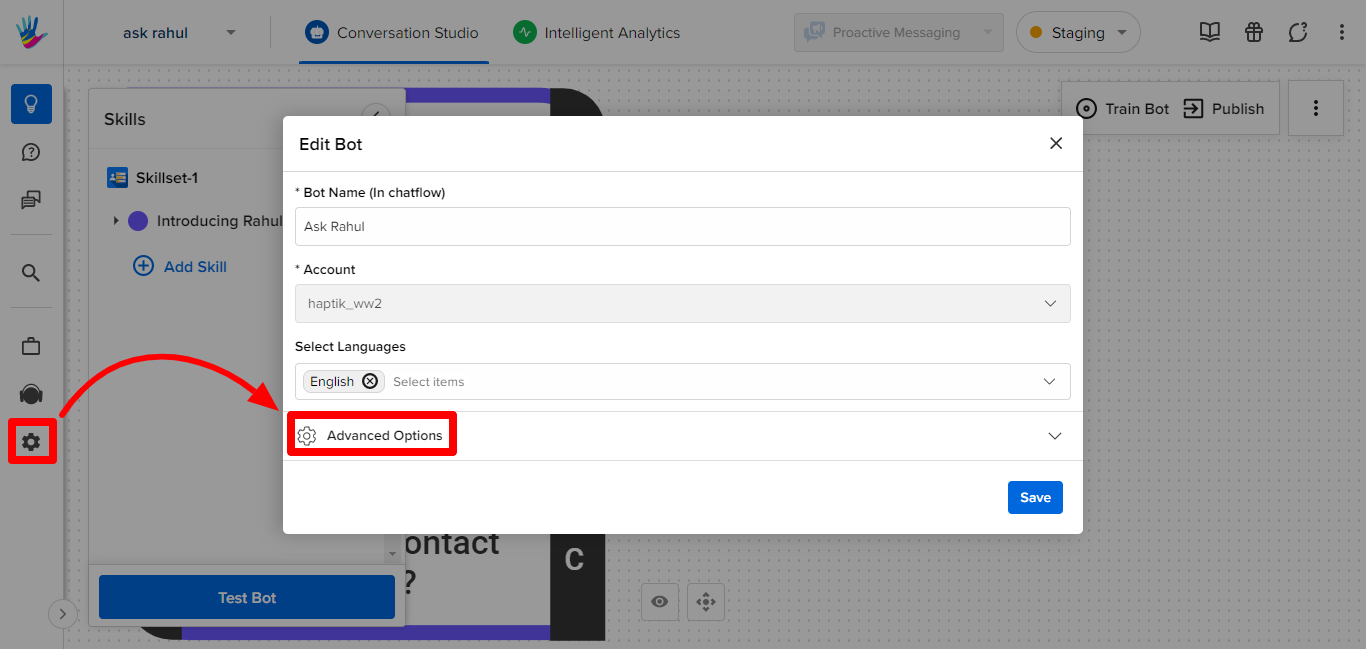
- Go to the gear icon (⚙️) to access the settings of your account.
- Click Advanced Options.

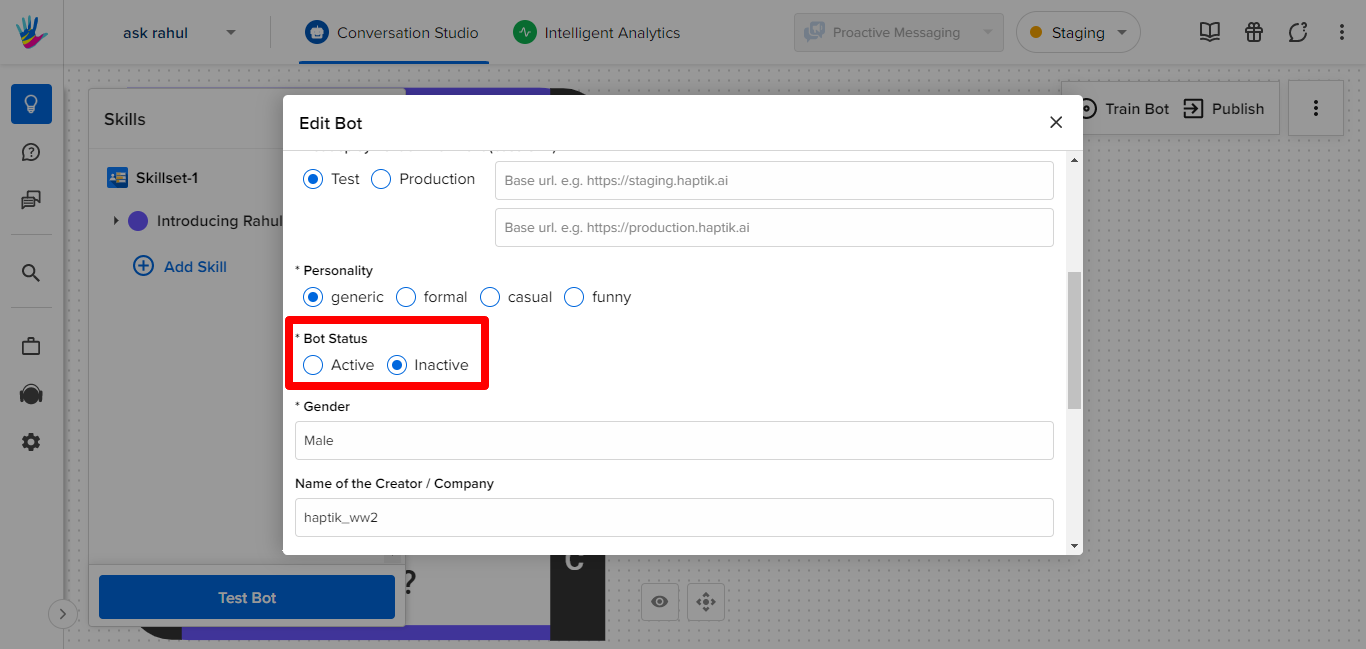
- Scroll down to the Bot Status section and select the Inactive radio button.

- Click Save to finally deactivate your Haptik bot.
Contact your Haptik SPOC for any help related to the above-explained process.
